Recently was introduced to the ESP 8266 processor which is a low cost IoT device with built in Wi-Fi, costing around £3 - £4 for a development board. The thing that interested me (apart from price) was the device is Arduino compatible and will also run MicroPython. The version I purchased from Amazon was the NodeMcu variant with built in power and serial port via a microUsb port, so it makes an ideal board to start with as there are no additional components required.
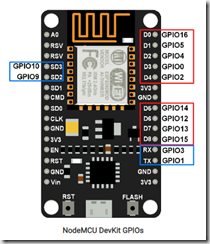
This board however did not have MicroPython installed and that required a firmware change. The instructions were fairly straight forward and I followed this tutorial.
After installing MicroPython you can connect to the device using a terminal emulator via the USB serial port. Check in Device Manager to find the COM port number and the default baud rate is 115200. I used the Arduino Serial Monitor tool. In the terminal emulator you can press enter and you should get back the python REPL prompt. If not then you have the COM port or Baud rate wrong.
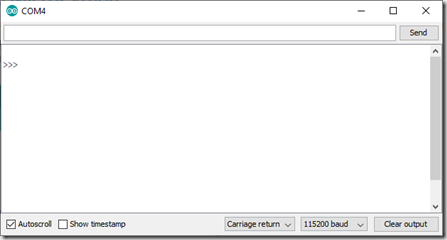
You can write you python directly into here but its easier to write the python in you PC then run it on the device. For this I use ampy
In Command Prompt install ampy using:
pip install adafruit-ampy
This allows you to connect to your device. Close the terminal emulator to free up the COM port then type the following to list the files on your device:
ampy --port COM4 --baud 115200 ls
The MicroPython Quick Ref will summarise how to access the GPIO ports etc but in order to connect to the IoT hub you will need to configure the Wi-Fi on the device. This can be done using the network module.
So create a new text file on your PC and write the code to connect to your Wi-Fi. To test this you can use ampy to run the python on the device:
ampy --port COM4 --baud 115200 run networking.py
Its a good idea to use print statements to help debug as once the run has complete the output will be reflected back in your Command Prompt.
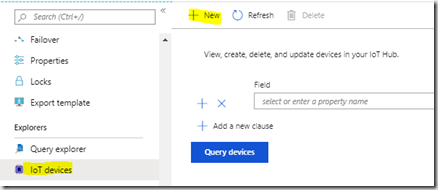
Now you are connected to Wi-Fi we can start to look at connecting to the IoT hub. I am assuming that you already have your IoT hub set up. We now need to configure you new device. Navigate to the IoT hub in your Azure Portal. In Explorers click IoT Devices, then New
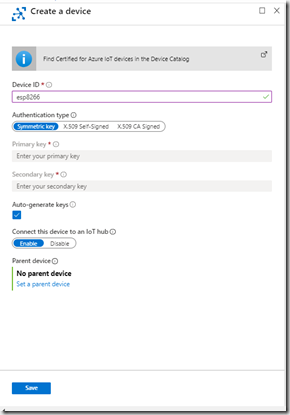
Enter your device id, the name your device will be known as. All your devices need a name that is unique to your IoT hub. Then click Save. This will auto generate the keys needed to generate the shared access signature needed to access the IoT hub later.
Once created you may need to click refresh in the devices list to see you new device. Click the device and copy the primary key, you will ned this for later to generate the Shared Access Signature used in the connection string. In order to generate a new Shared Access Token you can use Visual Studio Code with the Azure IoT Hub Toolkit extension installed. This puts a list of devices and endpoints in the explorer view and allows you to create a new Shared Access Token. find your device in the Devices list, Right click and select Generate SAS Token For Device
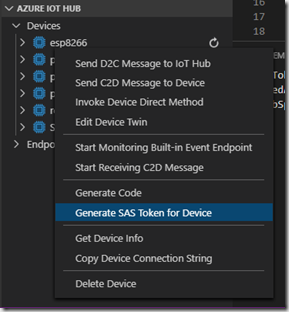
You will be prompted to enter the number of hours the token is valid for and the new SAS token will appear in the output window:

SharedAccessSignature sr=[your iothub name].azure-devices.net%2Fdevices%2Fesp8266&sig=bSpX6UMM5hdUKXHfTagZF7cNKDwKnp7I3Oi9LWTZpXI%3D&se=1574590568
The shared access signature is made up of the full address of your device, a time stamp indicating how long the signature is valid for and the whole thing is signed. You can take this an use it to test your access to IoT hub, so make sure you make the time long enough to allow you to test. The ESP8266 doesn't have a clock that can be used to generate the correct time so you will need to create the SAS off board. I’m going to use an Azure function with the code here to generate it.
Back to Python now. In order to connect to the IoT hub you will need to use the MQTT protocol. MicroPython uses umqtt.simple.
There are a few things required before you can connect.
Firstly the Shared Access Signature that you created above.
Next you will need to get the DigiCert Baltimore Root certificate that Iot Hub uses for SSL. This can be found here. Copy the text from -----BEGIN CERTIFICATE----- to -----END CERTIFICATE-----, including both the Begin and End lines. Remove the quotes and replace the \r\n with real new line in your text editor then save the file as something like baltimore.cer.
Next you will need a ClientId. For IoT hub the ClientId is the name of your device in IoT Hub. In this example it is esp8266
Next you will new a Username. For IoT hub, this is the full cname of your IoT Hub with your client id and a version. e.g. [your iothub name].azure-devices.net/esp8266//?api-version=2018-06-30
The following code should allow you to connect to the IoT Hub:
def connectMQTT():
from umqtt.simple import MQTTClient
CERT_PATH = "baltimore.cer"
print('getting cert')
with open(CERT_PATH, 'r') as f:
cert = f.read()
print('got cert')
sslparams = {'cert':cert}
CLIENT_ID='esp8266'
Username='yourIotHub.azure-devices.net/esp8266/?api-version=2018-06-30'
Password='SharedAccessSignature sr=yourIotHub.azure-devices.net%2Fdevices%2Fesp8266&sig=bSpX6UMM5hdUKXHfTagZF7cNKDwKnp7I3Oi9LWTZpXI%3D&se=1574590568'
mqtt=MQTTClient(client_id=CLIENT_ID,server='yourIotHub.azure-devices.net',port=8883,user=Username,password=Password, keepalive=4000, ssl=True, ssl_params=sslparams)
mqtt.set_callback(lightLed)
mqtt.connect(False)
mqtt.subscribe('devices/esp8266/messages/devicebound/#')
flashled(4,0.1, blueled)
return mqtt
set_callback requires a function which will be called when there is a device message sent from the IoT Hub. Mine just turns a Led on or off
def lightLed(topic, msg):
if msg== b'on':
statusled.on()
else:
statusled.off()
connect(False) means that the topic this device subscribes to will persist after the device disconnects.
I’ve also configured the device to connect to its bound topics so that any message sent to the device will call the callback function.
Now we need to have a process loop so that we can receive the messages. The ESP8266 does not seem to run async code so we need to call the wait_msq function to get any message back from the IoT hub
mqtt=connectMQTT()
print('connected...')
while True:
mqtt.wait_msg()
save your python as networking.py (and make sure that all the code you wrote initially to connect to Wi-Fi is included) then run ampy again:
ampy --port COM4 --baud 115200 run networking.py
Your device should run now. I’ve used the Led flash to show me progress for connecting to Wi-Fi then connecting to IoT Hub and also through to receiving a message. There is a blue LED on the board which I’ve been using as well as a standard LED which is turned on/off based upon the device message received from the IoT Hub. The blue LED is GPIO 2.
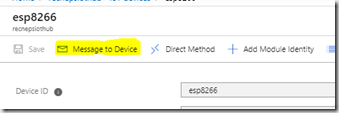
In order to send a message from the IoT hub to your device then you can do this from the Azure Portal in the devices view. Click on the device then click Message To Device
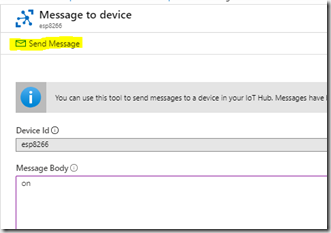
Enter the Message Body (on or off) and click Send Message
Alternatively you can do this in Visual Studio Code by right clicking the device and selecting Send C2D Message To Device and enter the message in the box that pops up
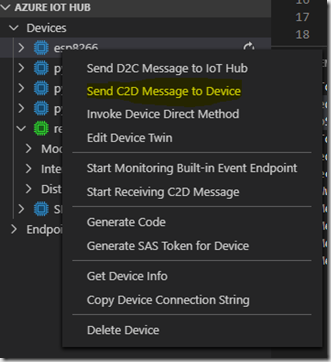
In my example the Led lights when I enter on and turns off when I enter off. ampy is likely to timeout during this process, but that’s ok as the board will still be running. As we’ve put the message retrieval inside a loop then the board will continue to run. To stop it running you will need to reset the board by pressing the reset button.
My next step is to sort out automatically generating the Shared Access Signature and then I’ll look at sending data to the IoT Hub