In my previous post I showed you how to set up an application in Azure AD and allow Azure AD users to access it. In this post I will show how you can give access to these applications to users outside of your organisation using B2B (Business to Business) as guest users.
B2B is a feature of Azure AD that allows you to easily add two types of user to your applications.
- Users who are part of another Azure AD tenant
- Users who are not.
If your new user is part of another Azure AD tenant, then when we add them as a guest user to you application and they will use the credentials provided by their own organisation. This means they do not have to remember a new username and password when they want to access your application. It is also useful as they will be managed by their own organisation so you will not be responsible for resetting their passwords for example. Another advantage of using their own Azure AD credentials is that they will lose the ability to sign in to your application when their accounts are disabled or removed from your customer’s tenant. They will however still exist as a guest user in your application but they will no longer be able to sign in.
If your new user is not part of another Azure AD tenant, then they will automatically have a Microsoft account created for them. They will also be prompted to enter a new password. Again this is not managed by you but by Microsoft this time, so password resets are handled by a link provided by them.
To assign a guest user to your application you will need to invited them to use your application. They will then receive an invitation via email that they will need to redeem in order to access your application.
So, go back to the Azure AD blade of the Azure portal and click on Users:

The click on “New guest user”

Fill in the form and enter your own personal message and click “Invite”. You need to enter a valid email address otherwise the user will not be able to receive the invite, as seen below:
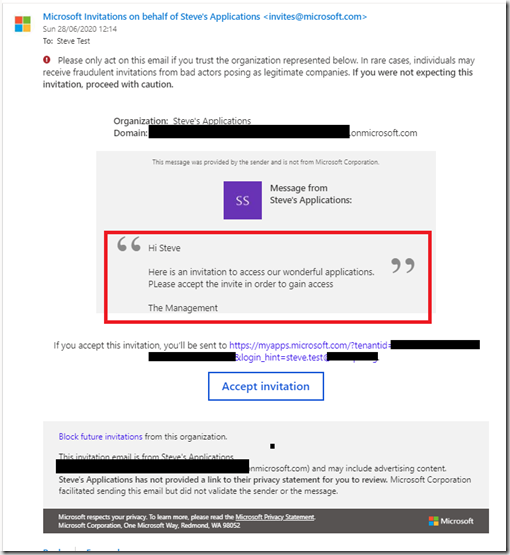
The text highlighted inside the red box was the custom message I entered in the invitation process. It is possible to change the branding of this email but it is an Azure AD premium feature.
The invite process proves that the user has access to the mail box linked to the email address used. Also, if they are using their organisations Azure AD email address then they must also sign in with their own username an password so you can be confident that they user is who they say they are. This example shows the flow when a user is part of another Azure AD tenant. If the user is not part of another tenant then there will be additional screens for setting up their new Microsoft account and password.
When the user clicks the Accept invitation link they will be redirected to a consent page which is asking for permissions to read their user profile from their Azure AD tenant.
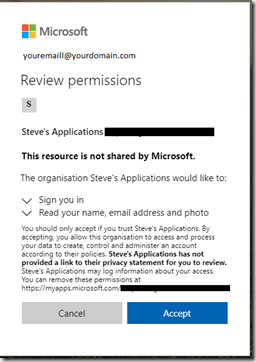
Accepting the permissions then will redirect the user to the application portal where the user can access the applications they have been assigned. As we have not allocated any applications to this user yet, they will not see anything,

To assign applications to the users, go back to the Azure AD blade in teh Azure portal and click on Users then click on the one you have just added to view their profile:
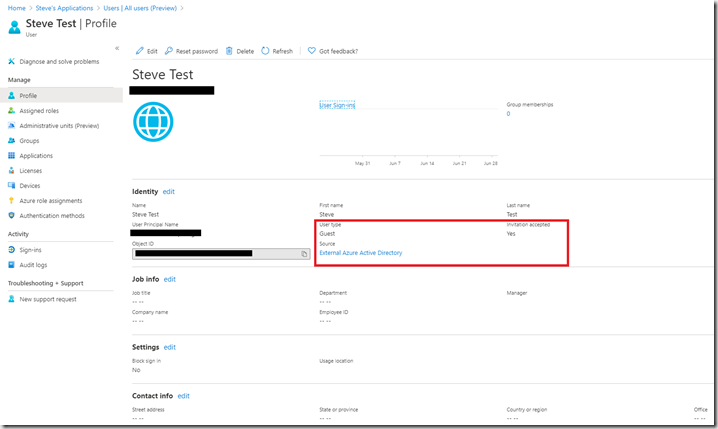
You can see, in this example, in the red box that this is a Guest user who has accepted the invitation.
Click on applications in the left hand menu bar you will see that there are none assigned. To assign this user to an application, navigate back to the Azure AD main blade and click Enterprise applications, then select the application you wish to assign this user to.
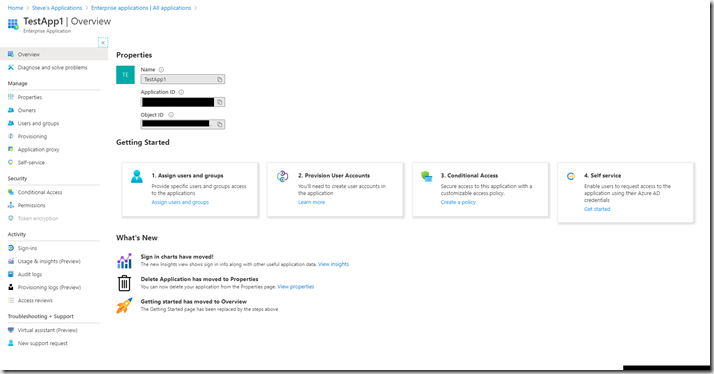
Click “Assign users and groups”, then Add User
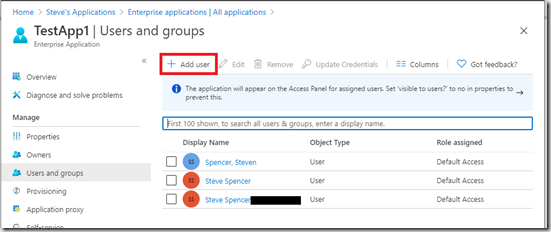
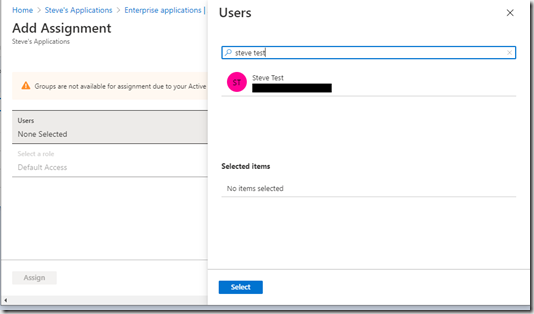
Click “None Selected” then search for your new user, select them and click Select.
Now click Assign
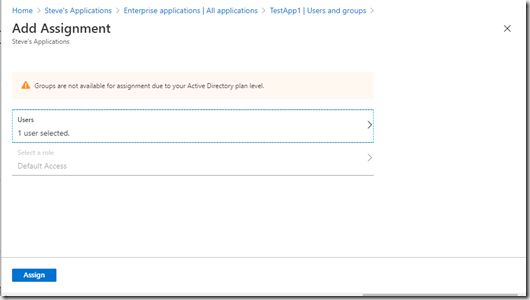
The new users is now assigned. Go back to the Application screen the user viewed after they signed in and refresh the page

The assigned application should now be visible and clicking the application will redirect the user to that applications web site.
Using Azure AD it is easy to now invite users to user your applications and when they are part of another Azure AD tenant, Azure AD takes all the pain out of federating with these new users tenants. Hopefully you have found that this is straight forward and this will have opened up access to your applications in a controlled way. My next post will look at how we can automate this using Graph API.