In my last 2 posts I showed how you can connect your ESP 8266 to the IoT hub to receive messages from the hub and also to send messages. One of the issue I had was generating the Shared Access Signature (SAS) which is required to connect to the IoT hub. I was unable to generate this on the device so I decided to use Azure Functions. The code required is straight forward and can be found here: https://docs.microsoft.com/en-us/azure/iot-hub/iot-hub-devguide-security#security-tokens
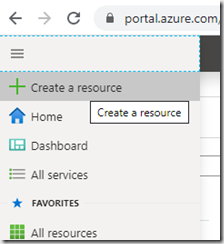
To create an Azure Function, go to the Azure management portal click the menu icon in the top left and select “Create a Resource”
Search for “Function”
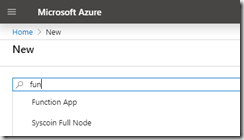
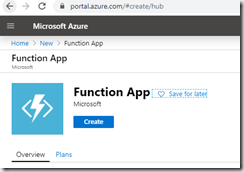
and select “Function App” and click Create
Complete the form
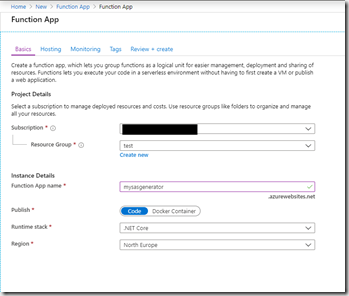
And click Review and Create to accept the defaults or click next and work through the wizard if you want to change from the default values.
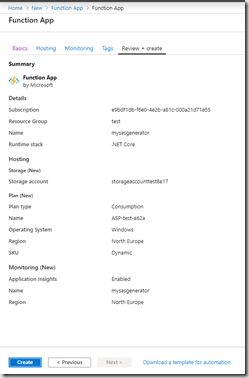
Click create to kick of the deployment of your new Azure Function. Once the deployment is complete navigate to the Function by clicking “Go To Resource”. You now need to create your function.
Click the + sign next to “Functions”. I used the In-portal editor as it was the easiest to use at the time as I already had most of the code copied from the site mentioned above.

Click In-Portal, then Continue and choose the Webhook + API template and click Create
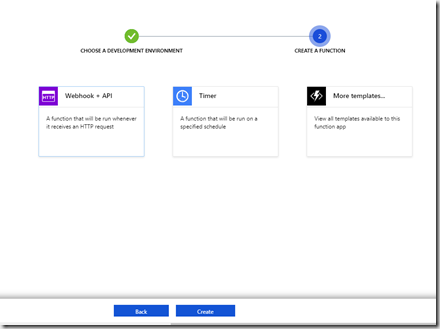
Your function is now ready for editing. It will have some default code in there to give you an idea how to start
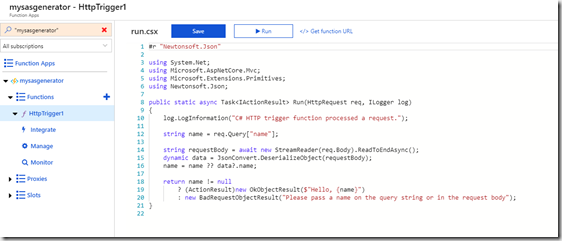
We’re going to use the previous SAS code in here and modify it to accept a json payload with the parameters you need for the SAS to be created.
The json we’ll use is as follows:
{
"resourceUri":"[Your IOT Hub Name].azure-devices.net/devices/[Your DeviceId]",
"expiryInSeconds":86400,
"key":"[SAS Key from IoT hub]"
}
You can get you SAS key from the IoT hub in the Azure Portal in the devices section. Click on the device
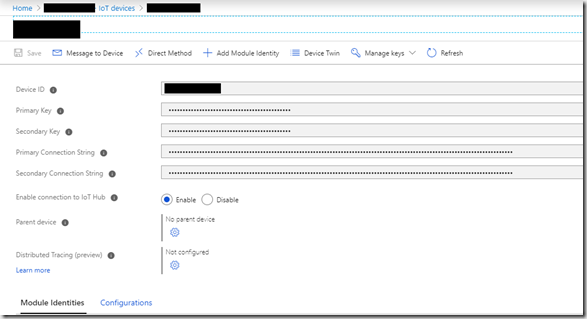
Then copy the Primary or Secondary key.
Back to the function. In the editor Paste the following code:
C# function
#r "Newtonsoft.Json"
using System;
using System.Net;
using Microsoft.AspNetCore.Mvc;
using Microsoft.Extensions.Primitives;
using Newtonsoft.Json;
using System.Globalization;
using System.Net.Http;
using System.Security.Cryptography;
using System.Text;
public static async Task<IActionResult> Run(HttpRequest req, ILogger log)
{
log.LogInformation("C# HTTP trigger function processed a request.");
string token = "";
try
{
string requestBody = await new StreamReader(req.Body).ReadToEndAsync();
dynamic data = JsonConvert.DeserializeObject(requestBody);
int expiryInSeconds = (int)data?.expiryInSeconds;
string resourceUri = data?.resourceUri;
string key = data?.key;
string policyName = data?.policyName;
TimeSpan fromEpochStart = DateTime.UtcNow - new DateTime(1970, 1, 1);
string expiry = Convert.ToString((int)fromEpochStart.TotalSeconds + expiryInSeconds);
string stringToSign = WebUtility.UrlEncode(resourceUri) + "\n" + expiry;
HMACSHA256 hmac = new HMACSHA256(Convert.FromBase64String(key));
string signature = Convert.ToBase64String(hmac.ComputeHash(Encoding.UTF8.GetBytes(stringToSign)));
token = String.Format(CultureInfo.InvariantCulture, "SharedAccessSignature sr={0}&sig={1}&se={2}", WebUtility.UrlEncode(resourceUri), WebUtility.UrlEncode(signature), expiry);
if (!String.IsNullOrEmpty(policyName))
{
token += "&skn=" + policyName;
}
}
catch(Exception ex)
{
return (ActionResult)new OkObjectResult($"{ex.Message}");
}
return (ActionResult)new OkObjectResult($"{token}");
}
Click Save and Run and make sure that there are no compilation errors. To use the function you need to post the json payload to the following address:
https://[your Function Name].azurewebsites.net/api/HttpTrigger1?code=[your function access key]
To retrieve your function access key, click Manage and copy your key from the Function Keys section

We’re now ready to use this in micropython on your ESP 8266. I created a function to retrieve the SAS
def getsas(hubname, deviceid, key):
import urequests
import ujson
dict = {}
dict["resourceUri"] = hubname+'.azure-devices.net/devices/'+deviceid
dict["key"] = key
dict["expiryInSeconds"]=86400
payload = ujson.dumps(dict)
response = urequests.post('https://[your function name].azurewebsites.net/api/HttpTrigger1?code=[your function access key]', data=payload)
return response.text
In my connectMQTT() function from the first post I replaced the hard coded SAS string with a call to the getsas function. The function returns a SAS which is valid for 24 hours so you will need to retrieve a new SAS once 24 hours has elapsed.
I can now run my ESP 8266 code without modifying it to give it a new SAS each time I want to use it. I always forgot and wondered why it never worked the next time I used it. I can now both send and receive data from/to the ESP 8266 and also generate a SAS to access the IoT hub. The next step is to use the data received by the hub in an application and send action messages back to the ESP 8266 if changes are made. I look forward to letting you know how I got on with that in a future post.