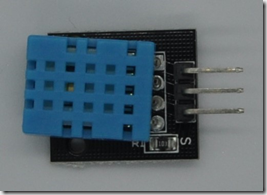
In my previous post I showed you how to connect your ESP 8266 to the Azure IoT hub and be able to receive messages from the IoT hub to turn on a LED. In this post I'll show you how to send data to the IoT hub. For this I need to use a sensor that I will read at regular intervals and then send the data back to the IoT hub. I picked a temperature and humidity sensor I had from the kit of sensors I bought

This sensor is compatible with the DHT MicroPython library. I order to connect to the IoT hub use the same connect code that is in my previous post. The difference with sending is you need a end point for MQTT to send you temperature and humidity data to. The topic to send to is as follows:
devices/<your deviceId>/messages/events/
So using the same device id as in the last post then my send topic would be devices/esp8266/messages/events/
To send a message to the IoT hub use the publish method. This needs the topic plus the message you want to send. I concatenated the temperature and humidity and separated them with a comma for simplicity
import dht
import time
sensor = dht.DHT11(machine.Pin(16))
mqtt=connectMQTT()
sendTopic = 'devices/<your deviceId>/messages/events/'
while True:
sensor.measure()
mqtt.publish(sendTopic,str(sensor.temperature())+','+str(sensor.humidity()),True)
time.sleep(1)
The code above is all that is required to read the sensor every second and send the data to the IoT hub.
In Visual Studio Code with the Azure IoT Hub Toolkit extension installed, you can monitor the messages that are sent to your IoT hub. In the devices view, right click on the device that has sent the data and select “Start Monitoring Built-in Event Endpoint”
![v NO FOLDER OPENED
You have not yet opened
Open Fol
> OUTLINE
v AZURE IOT HUB
v o recnepsiotu)l
> Modules
> Interfaces (Preview)
Send D2C Message to 10T Hub
Send C2D Message to Device
Invoke Device Direct Method
Edit Device Twin
Start Monitoring Built-in Event Endpoint
Start Receiving C2D Message
Generate Code
Generate SAS Token for Device
Get Device Info
Copy Device Connection
Delete Device
> Distributed Tracing Setting (Preview)
> Endpoints
"body": "23 54
"applicationPro
"mqtt-retain"
[ 10THubFbni tor]](data:image/png;base64,iVBORw0KGgoAAAANSUhEUgAAAcMAAAHVCAIAAAACawcPAAAAAXNSR0IArs4c6QAAAARnQU1BAACxjwv8YQUAAAAJcEhZcwAADsMAAA7DAcdvqGQAAI49SURBVHhe7Z0LXFVV2v+PCke5iSA3AZXEvKTSkBlNmoEZJvaOZTQj5dh/JpzevNaEGjVvZu9MFOKU95poZqILVmY584rlWJDZhcwsb3jPG3IHuV+V/2/vZ7Pc7HPhwDkHkPN8P8fjWs9ee62192H/9rP2ZT29IiJu11nHs88m+vv7KZkWCgoK169/tbS0TMmrcPb2Hzh9Tu9+rkq+hcr9u91Gjdf16lWy4+3G0gLF2sLo0SMffvihTz/dlZm5myxRUZNvv33i66//Y8AATyw6evREeHiYk5PT+fO5L76Y8uijj4SFjaWSn32WVVZWNm3aVKx71113urj0gxF927jxbw8/PAeLXnvtDVjEKlSDtKZO99RTCYMHByGxd+8PoaHXvfvuezk5x2iRBqzu5eUlVuxuNDc3X7ly+fJl/Guqra1UrAzD2ILeyv9W0L9/fyWlAkZDeSWcvHx76yUta77c1FBwvu7ccXyqj+y9XFXeS9+3d18X54EBVNJynJycIXMvvrga8u3jM3DWrJkQRwgo5PLPf35p69ZtVOzcufOrV6+BEYv+53+ez8vLJzvAKsHBQSi8YMETyEIWxTcs+AQE+Lu4uEhFr0Ego7KSSjLa2NioWBmGsRE2UFIcnEpKhZkjtrmpSTqsLzeVf72jsUTRMqin523Te/Vxkn2ny2S0nKamxs8/z4IywmEsLi7x9fVRFljGoEEB4eE37t//E2nr8eMn4F3CC77uuqHZ2d9RmW3b/l1bW4sEfOE1a1Zt2PAyvpGmpd0fWUmb4ZQ2NjYoJoZhbIQNlLSoqFhJqYDx9OkzSqY1lyvLmhvrmxvq+7h7ut0wod+QEfjo/QdLMqrTXWmoayoropIdA6N1JdVO7rwzEvqIDxJubq7e3t6NjU35+drrDJmZu5csWQovFd/iUkP3Rzp74RyFU1yTkTMfwzDWYAMl3bUrs7q6WsnIIAsjxpJKvjWNpQUln7xbsfezK/WSiwfntD73NI3x8Sn/9lPDi6Tg0qVy6BpcRSWv0yHd0NCoHqFbAzzoLVs+ooE8Phj7l5aWOjs7YVBPBZBAltLXJrKWykN8xcAwjI2wgZL++OOBNWs2Hj9+skYGCWRhVBYbo7Ekr+bET81N0vAfrqh+UAj8U92VK6X/ea/21CEqowGKeeFCLsbgGIkji6H3bbfdimE4LbUSVF5QUDhlSiRVTuTkHLt0qSIi4hbKIuHk5Ezpaw4oaMv/kpTKaYZhbEaf4OChStIKKisrs7P3/uc/n+ODBLLKArM49ffuN3RUr169dFcuNxZfvFxdXn/hlLLMGPv27Y+ImPBf/zV9xoy7b7nl5pyco2+/nQ67r6/PL34RdurU6TNnziJ78803UWG4sRMmjJ82bWq/fv3q6uqGDx/2008Hf/75rJfXAIzff/nLiKNHj2FFLEJhdeX4YBUoKeqcOPHW2Nh7YcEZwsPD/eDBw8XFJVJvDEC7Li4ue/Z8reS7E5KCNksXSZuaGvG5xp1rhul22OApKGvo49ZfP2hobyd9Q8H5xrJCxcrYGvihGNQ3NDTU1dXW1FS7ukrPTjAMYytsMLq3hsvVFbUnD1Yf3ccyyjDMtUsXKynDMEwPgJWUYRjGWlhJGYZhrIWVlGEYxlp63XrrrUqS6bnI9+6vyPfu62pqalxctNPHMAxjDeyTMgzDWAsrKdPtmDPnoaSkF5QM042ZPv3uV1/dFBYWpuQdGB7dOwSdMLrHQRUXF+fsLL1Qe+bMmcTEp8neAaCkY8aM0dSQkPDk+PHjlUzrJnAkL1my2NVV2qh9+/alpKwmO1CvpVkUHBy8fPkyJF56KfnChQtkBFRbTk6OunBXgV0RERGh6aEp0PN58+Jffz31wAEj72qr95Jg+/btb7/9jpKRdxe+1RuOU9rhw4fVZdTgR585c+bGjZuMtuhQsE/K2AAcUbGxsenp6XFxD+KTm5sLnVKW2Q5IIdWPD7JvvJFK3tDkybdv2bIFxqSkF0ePHg31gREdWLdu7dChQ5cuXUar6PV6Ki/AqQXKEhl5h5KXiY6+SyM3PQOI3SOPxGM/QD2Li4tpt5iSSKa9sJIytuHSpUsHDyqzz6xfv4F8KCgX9C49/d20tDehtrDQeHDhwgUw4kNOkLokvgcMGEBGM8AhLSwshOohjeZ27PgECYgFjAEB0jQ0s2f/pqqqatGixcKbe+GFJEPX6dSp0/B/lYzcDYjv8ePHlbzcYXSeOkZCbLhR2AraHLooIQrgIzYQYCkZsflQearNsH4B1p0xY4aPj8+qVcl0ehANiabNIJozrLkDoGmxLWh69eoUcbLEmYwacuRrMqykjA2AhsLjW7BgvpKXwZGGwWZmZiZ8H7irGAbS8QyPLygoCMa0tDS4kDgs1SXXrFkbHh5ONZgHo06ontr5RRrdgB0JLEJCWWCaY8eOYhWhSpBm6K+YggcdRrfJ10b30Mnx48eLrs6d+zAUHBonPF+64BAWNo4KiA2EkWQIRnyw+eT2Gtav3hyMsoX/COcRDaE2+N0orN6fRkFz7u7u1CvDmm2I+DXRFloUautoWDUnUGRk5L333ovExx9/nJWVNWjQoMceewzZTZs25eXl4Vf//e9/TxE7amtr//73v+fk5EirydC6Tk5KBz777LOPPvrI6CqaapG477777rzzTmk1GTgdL774IhJqe1NTE3rl5eWlLnnw4MHXXntNychQ5d7e3kjTKmJDyAhKS0vR9MiRIzUdLisrM7X5Dz/8sPjDpdXVFkDbq2SuffATwPsjJ0hcwaRRc1bWF/iG1E6dOjUoKBDpmpqa9PTNZIyJiRk4cKC6JNxGHPlqP9EUJSUlGJ4rGRlIOSxQN+xqJFBAWWAadAZ/VJMnT6a18CPu2rVLtA5hxa/c4vAejIiIaGxshNSS20ugFWdnZ/y1COdXDJlpq5GA5A0fPnzbNiUKDjYf0oaEYf3qetSgb1iKPUNuNVZBnyHZhl42EM1RVdixODmNGzfWaM0acKrAj6hkZMyfkMSvicqzs7PRSXTVkoZ6GK18UujCokWLPDw8lLyKW2+9NTExccSIEUpeBcTF8LYVaSL+yBYuXPiXv/wFsogsjMriFiBtKACEjLa5igBihJJbtmzBn/Xzzz+PY0Btf/zxx6FuagvaQm1QcDICoX1oDgXy8/OxB0QBKCDsqL9///6/+tWvyKjuMFmMbj5A/zds2ICSzz77LJ0AhAWVQN8fffRRKtljgIDCN0ECQ1c6bdDIFEcmvgMDAyGackEFHG9QJUoj0d7DD7VBLmktaAfGsDjmxW0oeJqa5kyxc+d/4EyhBgg6CbGyQCYkJISGromJT3l6euJksGHDRjihsJD/hfJ79uzBUjGIxrZjD9BW+/r6ytVIU4nn5l6ktBrD+pUFBmjODUirBV2DujnsIqxr4d5QX4zGB+dFZYEFoEtoSMk4GK2UFDsRMgr90ogpzn5w906ePKm+fiTAUAh/Oiig5GWwCk7U3377LdLQkc8//xxZGGmpUTqwCoBcwm+F2MFnVEwmKCwshOqpZ92HAsIF2L9/PykdzuH4+9PIYkFBAYzqtTQY3Xzz/Otf/4JMY0wk1L8nAaHB4QQPCGkch+rD0sz9DWgZiS8wIxACFIb7Q+4S9Asu3po1a0X90I6zZ89a4tgCuHUofM8998Bx271bG05GrSw0nEflcMAxmIWe0uVLtIulNIiGT7d8+TJ4Z7CgTFGREkoHf8xCJZFAltKG9ZPdEM25AWmc+5WMAermsK+wrlqF7YT63OZotFLS8+fPv/XWW25ubnCXhJhGRUXBI/v+++8/+OADsmjA0YJ9d9ttt4kjAedhyAQECDJEFlN6NG7cuPXr17/yyitowsJVDNFIJNw91Llq1SqNPwuphVd49OhRJS9bMKIXcZ8uXbqEAq6ursKPAP7+/vijFGVEh4Xrarj5hIuLy4IFC1D4qaeeUkwtQLjlR5FcLLm1ck0AQSFNAdBQ2i4MV/38/ITdDCiJ3U5jfMiimYEIgV0NtYIbS9IZFzcbyqUZ58LTROvqeyBPP51IPqMhUORRo0ZCbsRNMwJ2dMbovR386EaH+egbvkm2VLviAP6EhFtATgMSZurXgOYg9zgYaROwCv7gsd9oqQZqLiYmhv4msWMNN629QLXpqjRAzaiQ7Pjh6L4fOobu0bnNAdFeJyUx/e1vfwsxfe21126++eYZM2bgz9SUjBJwJDEuvvvuVn8QUCVok5IxgbhwCe8MbVmySpuoL0GOGjUK39BWgL/FpUuXkl2g1m4NcFefeeYZJLAiOknSKToMhJia2nzNpeEeTFbWF5A2/KkgjV2anp5OvpX8cFIc2YuLi196KVkqbQCOfFES5xiMEnBaVZapUF/CEw9C4sCGP4sVqRVADaHOFSueQ6/Uq2jUVoDeQt2gAvitFZMM7PCz5sogi7MmPG7U6eMjBa9FNiVlNU4V1LTYcA8Pd1qlvLwcmyNVJLvqojNfffUV+oyEYf3i6gSBHQvXe9WqZHQebSUkPJmYKJ2YUS18cFObA1APziJYEWnaIZpNay+iJ9jM77777rrrriM7egKvi7YL/rWZYUfPxviT+YMHD4aYwmkCZmQUUgIFgVhAXKC88NdgFDdYcLqmWzGi5BdffCE0Tr0uWeC7GV0FOmX0jpNQTDSNE7u4v6RWUlESaRJTujdFUJ9FeVTy+9///uTJkxh9a1oEhh02v/k4QtRKiq0TFnF9Vl2/XemEJ/MZy4FHOXXq1JdffsVKdWO6D8afgiLPtLKy8ptvvjHvjQro2p+Skd00fJNMQzimTJlSUVFBRlN0YBUArYSEYegh7i8ZBVqJv1r4L+oLmrt374bnGB4eTtcrZ86cSUZ5YfvQbL55oLPq67OMQ0GjY/z0LKM9iT74XZVka6BiGIMIl8ooISEhGD5j7ACvvqqqqrm5ecSIEfX19d9///2hQ4fOnj07ceJEyBPGTRAsjf+lXpcsGNoYXQVjhwkTJkB6YMSfIKQWbaHbw4YNQxbfGHGvWbMGNcCpRJbsoG/fvjAi+/PPPx89etTJyQndw7ARf8FoF4vwjX6i8mnTpqG8s7Mz+YzUIgpgQ9AWEoA6DM2lyuG2l5SUmNr8X/ziF/BAb7nlFpSMiopCiygpLK6urlu3bv3kE5P3FmyOHBCPIuI1YXRGF+mYzgRj7fj4R2Jj74+OvquwsPB///fPygKmR8Dv3TsEPLpnGLvC7zgxDMNYCyspwzCMtbCSMgzDWAsrKcMwjLWwkjIMw1gLKynDMIy19Lr+eiPTOzE9jObm5itXrtDDpPX19QMtmxaIYRgLYZ+UYRjGWlhJGYZhrIWVlGEYxlpYSRmGYayFlZTpdsyZ85AjR6nsQqZPv/uNN1ItmXma0cD37h2CTrh3j8MvLi6OZpkynLG4XUBJx4wZY7QGKGxISAilabJndbti+ueEhCfHjx8vl5Iw2p9geeJ9JDSzIIeFhS1ZsjgnJyclZbVi6jqwKyIiIiycp5l67toSrF/MPE1Zxq6wT8rYAMhZbGwsRRvGJzc319RsjR0GMgF3CQlqYunSZUOGSMEwwsPDIXmwpKWlRUVFCX9KHR8JWaMx3xsaGkTUE0F09F1CjK45ampqKIwzPvLPEeewYZM7GfZJHQJ7+6TQL6OTwAsvSfhHKDlz5sxDhw5NnDgRBaB35PqJktACij6i8SLhjZaUlJjxE8nHzM7OhltK8qEubLg6yj/xxOMlJaUeHu6iLXRj3rz40tLSyspKKix8XnSMAn4YbpRwgcn5FQVgERsIhEP91VdfjRw58vXXU1GbYf1UGKg9a3K3hcWov0mdp2rJQnt748ZNhg1hG8XuopL4Bb///vs77riDytP+pDgrtBWGGy43wkiwT8rYgIMHD+n1+gUL5it5GRyKOLAzMzPJP8IhjUMRdhyKEEoY4UVSPDh1SRzkcDOpBgFW9PLyMh9tzdvbG9+mgsRhXQropuRbOHbsKHqOPlAWDmlVVRVklLJoF91G59ExETpUdJVCgWIAjprhI8NCihwWNo4KiA2EkcQdRnyw+aSzhvWrewjxgoAWFxejcugdGkJt5HKq96cZ8LtA9dAfw4awVB1+FYm8vDwRRY1kFAVQHi1eulRu6tdkCFZSxgbAFV20aDES6enviptFNGrOyvoC3zikq6urKW4wfKL09M1kRBoOsrokvCEcrkhogCIYjRdP0HGOI1/t06mBQ4qxvJJRgQ5AQSbLUT9RyaBBg9ThZyCsZWVl5HyRRqMbkFrDkKKk4wRUjxw9bCBpE0Rn+PDhomZsPtpFwrB+dT1q0LeIiAjsGdpArIIVIZG01BT4XSjog9GGcHbBWQQ104arT1Tjxo3F7tq8+T2k0WJqaqqpX5MhWEkZmwGPDA4LEuvWrcXBiQTGhqtWJUNe8R0YGKi5qiCOc4CE+ZsqUCtThy6cvpUrn8vIyFAP3jWgaUiD0SZ27vyPu7s7xA5igTIkNwKMx9F/fBITn/L09EQfNmzYCCcUFnIzUX7Pnj1YKi7FYtuxB2irRcRvU2cCw/qVBQagb1BtJSMruFrQjYKeQCtpLcOGIIiwQzQNN9zo7jL/azo4rKSMjYHQ4CDE8Yn0mTNnoK3iQ56aUaBlJL7AUCDgFsGlEkNRNXSBb8WK5zQKqAY1w6EzdXEAlcOZveeee8LDww3jIarvXNFwHvoCBxwjbugpRtwog+3CUho1Y/hP1x9hQZmioiKqR30mQAJZShvWT3ZDoIlq8UI6Pz9fyZgAEom1SDGNbgj8cexVYLhz1L8IYfmv6YCwkjI2AIJCmgKgoQMGDEACo0g/Pz9hNwNKurbcQ4dbN3r0aLKrgcZhEbmBAAf5008/DdmCjO7atcuMP4uSkDb4vGaOfOjIqFEjhegIYBcXOjWgRaPDfDSHb3IDVbtCOhPQNQSABCmpmfo1oDnIfVRUFLm9WMXLy4vG6abAno+OjoarjnVNNQQ7zgfYcE1V9IvMnv0bpNFifHy85b+mY8L37h0Ce9+7J7Wi+7xoIr3lxi4OXfGwZ3Fx8UsvJUNcZrbcTYYxKekFHMzQOFGyxsS9e4BDWtwTp1YwXhYWgu6eq+96A/GcqRr0+YknHocKU1dFT5AmvaZrBdCOGTNmIAFQOTxusaXUliggNlxYysvLYYSWwajeRep795r6NVst1tLcu8de0tzoB+r9A2iHi3OM0YaofpwSKItfQfw66tqodcNf08wJzNFgJXUIeFa9bgUkyehDY8y1C4/uGaZTgRsYExOTl5fHMtqT6C4+KYYtcJQ0QxvGeuSLXI/87W+v//TTT+yTdiHisXxgOIpnrnWs8knxxyHuAACMWV59dRMOXSV/baLZqPYyZ85D4hkghhFAOsVdb5bRnodVSrp79+7hw4cL6Zw8efKePXs0V8EZhmF6PNaO7uHBlcivM4uL6N7e3uKWnxjFqC+xw19T3zMlaHSPBI2AxM1Wzc3KoKBA9Z1fch6pdVMvLwN0srKyatCgAB8fH3UBUTnddT148JC4u6qpR2wm0jhzzJ//2LZt29B/2KnD9GKyqBAY3i8WhUXl6DY2R7yErh70iaqEsc2tUK8u2vrqq69GjBjBo3uGsSvW3nESbikc0v3798Myb158Tk4OjWKQJbGzBBz5hw8fxlpQpYiICAgu0Ov70hvNhYWFcXGzIXbQAnpJDkvpFTe0Dj2CFKIYPR2NRVSnYNSokRkZGaIeWDAM17zFjHPAokWLoUfowCOPxKvlmB67o2rROr14R5uG1cVD2hBTCKh4UVpeVQGF3d3daVvUncQph15CxyIUoDpRFSqkwrSuVIWJrTAsKTqGDyp3cXFBlmEY+2GtkkJQICsPPzxXr9dnZX1BD1fT67oAOguxM9Q1o0DCSH0gW/AuoWtwYF944QW6xQkjvpE+e/YsPQ5Nb9FAWy15eRmySAVQDwQLTly73mJWV0svhEC+xZvU6l4ZhQrTM9LIYkeJt4DgXdJL6FiUnZ0NWaS+IS02XLiQRrdCU1LdMYDKa2trKc0wjJ2wwVNQOGh9fX3FUx3qF6hzcy9CYQ11zTxYC44npeFz0cvC4qFi6AWpM3nB1Bb8Wc07xVTYEAzSoWJI4JteRCGQNiOFkDBsF82pAwkjYYXcz507l9qFqJkfMmOLxGvX6DNaNywv+gawvVQzEmhRczYyUxJjf3VbDMN0AjZQUniFRUVFEDjKqg97KBoO+NLSUsq2F8gofC4aumLUTEZ6nw/Or1A0YPnLywJIvFrLkDb/FjNOGNdffz3EFJJKnizcSTGrLj7mb8hCdoW+Y/+gdbWOE+gDdldBQQG+09LSRM2LFi0WJycNhiWLi4vVbSGBLKWJ/v37KymGYWyEDZRUDaTNteV1XQC3kXxVuEhubm40nsVSMUGOeeAkCg8XY2oyIos6w8PDIdCkaBBxC19eFkCt2vsWMxQc8icmuSAvlS5WtgkKl5WVxcTE0DlGPa8Edld09F1IoCfoD7aFNlAUNgO2wrAktYU9T1kknJycKE3wZVOGsTk2V9IDa9asha7ReBNuF93vhv3kyZM0Ftbr+4oJcsyzefN7cDypKsUkA7mBFp84cYKy8EAzMzPFQDvJsmBq6FhOTk5i4lNYJTY2VjwPAKGEqBkGq4DAYXOEAoINGzaK7qWlvUlSThM4rlqVDIdaLqUAjxXKS5OSwdEW7yzDsfXw8IARPUF/6Eox+iYK46OpSo3RkuqO5ebmaq6TQn+VFMMwNoLfu28HdE+czg02gZ6CEiJuP/i9e4axKzb2SXswcFGHDh26c+d/lDzDMEwLrKQWkZT0Akbf2dnZ9nYeGYa5FuHRvUNwDY3uO+2Kh5qEhCcx4LD5hJt0yd78Qx1dArYXfwMd6FiwsRcUGcA+KWMDcICtXp3SrscnbIh46Jg+HZhBJiVltZlHzcwDVVK3rr7hCanqsIxiE7Ahhjcb6Xao4W1V7Py0tDfN3JzEIp5bx36wkjI9gTOqEENnz5594YW/dKasqx9nRtbwwQ/bgoGFl5eXZgMnt0Q0YboEHt07BJ0QfUQM+mjkCGNISAiaE1PDZGdn0zNekADzk93Q6L60tBRrwYJBtyhJFWqGlvC2xowZo/b+1KNXpNUzvIj66eoBlkoryK9FUHmIoKmoG+qJYwRUg/qJDjiM9PyfSKDMoEGD9Ho9qkUNKGO4Oep2v/vuu7Fjx1JaE+cDxebNi8fOqaysFI3SLkVi//79tJPRNE1hY3RunYCAAPEbkYXWUvdB/CJArI6fcuBAbx7dG8I+KWN7xGQ0EJ2YmBhY4CeKdyuQyMvLQ8L8ZDcLFsyvqqrCoBtplMzMzEQxmmumTY8PrcNrQzGIrGaGF2gB9EszCY68kgRJCbWVlpZWW1sLC1pEu7Cop54xAypEo5pivr6+GRkZjzwiiaDh5mjaPXfu3IoVz0FDoXFGLzt88823aAJrUZZegREvENOeRFXYcBTDToCYoir13DriN1JPGGT0F1Hvw4aGegtfq3E0WEkZ22M4GQ0S8MjocCXxMj/Zzf33z3J3d9+wYSPSVJJeeYAOVldXm5lXgaCpG3x8fAxneEHacBIcaR0ZKGxhYSF1Hm7Xhx9utWR+HA3wQ4WoCXJzc6kSo5tj2C4SZrh48SJOM+LtOOwr8XwespbMrWP4Gxn9RTSz5GCpha/VOBqspIwdEZPRkFpBuXC4QmVIU6AFwttCSUgtiRRGl9ddd52YOgtAE+k9LnwHBgbSyNQM0Ca0Ul5ejrThXDDQDlJtuHJiEhwCogMdVDItwH2jGtqcH4dA99C6uloNhptjtF3ziHMP9BRyqb7mAGW0fG4d8RsBw18E24ttaW/fHBBWUqYzwPGJ4SfG9QBCRkbSNUqT9tFkNzU1Nd99911sbKwYvcKBoiEnfciZMgONdk3NBUOyDk1HBwwnWzDUnXbNj4MtghMnttEoRjenzdODBnQDW3fvvTMx9Na8MNKuuXXUGP4iOBtBT0XfcKpzc3OjNKOGlZTpJCAuOOZxWJJ4mZrshrK7d3+Zk5OzZMliiClK+vn5zTH9fI+GpKQXoAgYh5J8G84FQ3b1JDgCdDIoKIjamj797vvvnwWL5fPjoCEKH29G641ujmG7ZDcP1po4cSKaU28F0rBYOLeOGqO/CM4icHjpQiqM8H/pfhSjgZWU6STIE4SbQ4c9vo1OdiNAtrCwMCHhSThHW7ZsiY6OppJGH4oUA3CqStylQSWQFc0MLwAapJ4ERwBHLz09ndqKi4uDcwdLZlvz42AETUvRUHZ2tnkfEBtuuDmG7aL/qGrGjBlmHgLNyvri4sWLdElUTbvm1hGY+kXU+9Dy6YccDX4KyiHgGUwYxq6wT8owDGMtrKQMwzDWwkrKMAxjLVZdJy2YLL3Mx3R3mpt1Vy43N9Y11166XF54pfTCkKqjyiKGYWwB+6QMwzDWwkrKMAxjLaykDMMw1sJKyjAMYy2spAzDMNbCSsowDGMtrKQMwzDWwkrqQKyde/tLs29VMgzD2A5WUvuS/fz95amP0AdpxWpT1j18u2gCH2SVBQzDdBaspPZi8qjAnFVxSHjGv0EfpGGBXV5uS45evCRaWfTml4qVYZjOgpXUXiTMuLGitiHi2Q+VvE639N1v8P1ARCi+4Z/uTLwHwgovsujV3z1z701yER0SyMKYu37u7F8Oh+VfT05HYfJt1SXNg3VRA3mp36y0aNpghmE6DCupXYDjeX3AgO9OFSp5md1HL57Iv3RLqB9lw4f6vv3VMXiRm785OX/qWGgfPo9Ejn7lk59g3Lr35xWzJpADOypQqgrGb07kz5k4sk2vFgWw7r6fi8hLheXDx6fRoq4iODh49eoUmnI4KekFo/Ml25CEhCfNTJBsQzqtIaabw0pqLxqaLueXVyuZFs4WVykpnQ6y+JePf0Dig+xTFbWNE0cMevC264sq6sj41XEpjnGglxTpAYN3GrNnnyro69ybjGogteR+ktNKbm/K9p9o6b/3/zzEx/2X1xsJMGkrICUQFJprHR/z4pKY+DTNKg9hffXVTSJYkwDyJKrCpwOym5Ky2mhwY/NotoI+FKnYFB1riOl5sJLaC71TnwBPbeywoT7uBeU1SqYF+KoVtUpQX6GJrz1yh49Hv1D//mQnThVU1DdeUTIqxHVS3//+BwkxKkS1tPRUQaW+T5+AAS6UtRPq2HPWi4s6CB2yb7yRaii4Ngd9Rs/RIjakvLycgspRBA6GMQ8rqV3QDOQJGvKr3VIC9n7OfciB/SLnImmiWhY7QH8XvbgIEOrv0XD5cv6lWsp2JsK7nDt3rmKSR/ewz5nzEIyenp6JiU+Z9/vgwBYWFlJsdyDqJF8V9ahdYBhhQRnhyUKCIcS0CoUwgi+clvYmspYINFWIBHms1FWk6WKFaIj864ULF1BD5reI6XmwktqLd78+EeztJp58gq7BzYSrKO6tj7/Ol+4pJcy4EQ7sl0fzMXiH0cJ7Smb46nhefxdnVEvZ/wq/7lxx1Tcn8inbaUCAhg4dunTpMnh2DQ31vr6+ygKZt99+R7h+bfp9h+W4pNAvdZ2wQ7AOHDjo7Ow8btxYZCGLmsDLsCxZsjgzM5M8zdraWlhmzpyZnp4OC+zz5sULFTYKmh4zZgwSFIvfw8MD39QcxfgTuLq6BgUFUUOWhyNlegaspPZi8zcn49bvgm9Io/V/J0yHl6q+lY+h+uqHbsMiqOfKrXvhxsID3br352X3hNMqHX7+FE0/+c7XqJbqKSyvuf+VT5VldkOv14sAnBA4yFNERER2djYN8zdvfs+amJQlJSUNDQ3+/v7qOqFxAwcOPHDgQFlZGcX4CwsbpwlZDAv8WYqZvGPHJx9+uBW+LcojDQtpLkmkKdC0l5cX9BdVlZaWojBSaE4dU5qoqalJT9+MBBQWaQ476FCwktoRiOPopelitP6r1TuUBTKXauqDFqbBjm9oHxnhsYryJLtYS+gviqFCUZjAKmqBJlCGKsdn5l8l1QCL075cvvlbStsc9XVS8jFhgQzRUiuBKqG2goICpGfMmEF6jQQ8UEg2uY1IhIeHa0IWBwQEGPZBhHROTHzK09MzKMjcsxCQxerqapS5/vrrv/32W4gp0mguP9+kjw+FhaArGcYxYCVl7AW8VOGXwZVzc9Pef7MQcm8hl0ir9RofurUF1xKSGhl5BwpoRtzA0DdU386aO/dh8k9NgfrhfoaH31Rf34DKKysrkYZdfQ2BYVhJGbsAATp79iwUkK5CYkzt6qp9eMsSsPry5cvg4mGETqIWExNDdQownEcB+ImGI27ob1BQkLjRdP/9s2Bp70VMuJ+hocP69tWjcqw+ZMhgCLr6GgLDsJJ2DRiPawb71zrq66R0TxxjfAjcqlXJsOj1fQ2vk8IZLCsrM3rvfvz48VQVVs/OzqbnT4G6TnxIIgEpJvmtatBEenp6dHQ0CsfFxdXU1MCSmZkpuipu8ZuB3M8TJ07gG25pY2MjPFN5CcMocGxRB4BjizKMnWGflGEYxlpYSRmGYayFlZRhGMZarLpOylwrNDc3X7lypampqbGxsb6+nh8aZxjbwj4pwzCMtbCSMgzDWAsrKcMwjLWwkjIMw1gLKynDMIy1sJIyDMNYCz8F5RC09ymoSZMmKSmGcXj27NmjpEzDSuoQ8POkDGNXeHTPMAxjLaykDMMw1sJKyjAMYy18ndQhMLxOemHYDGUZwzDWEXx6O/ukDMMw1sJKyjAMYy2spAzDMNbCSsowDGMtrKQMwzDWwkrKMAxjLaykjGPxP3PvLvgoCd9Kvj3s+9tyfJSMnRH9fPDOm8+//79tdtia7epubH/xMXyUjMVglZPvrIj8xfVKvnPh50kdgk54nhTH8JO/vlPv1AfpnHMF4//wEix/uGfi8te2vfvZ91TGPBCp/NKKGU9tUvIyODBSlz6IRPyqd7N+PEFGAH15eeH93x87pylvOVTzzu+Pzn/5PcVkZ6jFwIGelM388YQlnceWvvTozL/931f/m/bJxid+E33zKM2uaC+06zxc+lKWfixKdwxTe7LDDZGMdviXNYXRPzCbwM+TMrYBornwvjtWv/+Z691/xOfni8U2dA3qG5o8XPv9OuomJS/z0F0TxCF6DYFtSXp3J3YR1DBsWGBXuZCVNXXoAP1YVsqoeTqtoS6HfVKHwN4+KRRhdtT4BWveF74SvKf/Ny2C0uR8wdGIkuW1srb+ifUfwlGFJcTfu6/eaYC7a31jo5e7q3qpvKrk72xY8uuCskpPdxdxKMLZef73MwrLKsuqasnFUHvEwteDD1JeVTvE3wtuoKiWPOWP9xyANJMWXywpJy8P5UcP8YdFU/h8Ydkvhgf/89PsiNEh5NSg5wHe/VES5RuaLuMUAocRWdEN1HmuoKy2oVHtAdG2bM7ch8JqP07tgok9eXtYKHn0MJJPeusN19EOBOiMxgGkrory2UfOTL15FHpi6AnS3nv279vFThbrkkX0R2yO+ifTbPip3GLheIo9iTQwbAgY/VFgN7rr1IXV+1nt7YoNpL4hTZuDPRBz6xjY8fewavMuMRrQ/IHZBPZJGdvw5YFTEMTV82cpeZ0Oxzmcr5KKahxaOCQgHC5655inNsE3uVB06cnf3EnFgnwHvPlpts/M5UGxf8IhgT96//sSDf/K9x0/18/ZCUcIZeGQllfXQUYpi+MKHjHWQuVoYuRgP+g4LbppxGDUr2kUfHP459+s/DsOWkjS8IdW4uDHcejp1o96+OHuHyEB5FbDHUZDMGqUC1KSnXMG9q8OnX54WgQKoxs4gMkxR6NoWilqDAgl/NP3M39Q8haA3Yjeos/opKYzGvTOTr+4PvjeP/0NOz/Yd4DYG6bAz1ff2DQpLBRpbAhOb98e+Vm9Oeodotlw9EezJ+UqzWH4o5jZdaIwfl/8yiiJbqAz3x87ByM+KEPSrwa/2nWBPliKP8KbRw7B3kbfzPyBWQ8rKWMDcPzgLxWJmk/+Cj+CjGpQYMof19JhhuOQjODUxWLyMsxTUVN3pqD03kk3Ik2H+sd7fqJFAMKKY5LEBU3A0YPzSItwtFP9aBRCSVpgCI5PjLVxxFIPIXCQORx+SGN8+s5/9sqlWoHDklqE6PR1doK/g24UXqqi5vCNpuWCrcD5JvHBaOwlfH9x4CQ11zEgH6gHH8PbLA2NTbQtkAzsmaH+3sqCFiA08NFodegsSh47X0jFaKuhrerN2XPgFL7JpzPccKRNoWmIjIY/ipldJwrjR8FvAbmn6zxwM+XlOvwl4O9BswdQcvV7nyGBDUF6kNlO2gRWUsZmYGBFPoLRW6g4kOiIEqP+dgE5w1EHycOBVNfYREeXAINuJaXT5ZWUw4HVdABGiKOSMQacMgxUKQ1lQRMWHn5YC+tSWt0No4jrpPhA7g2dKcuBi0r1mPcEjXZJfflSyCLpEU5XQuLhftJPBjX08XQPDfKR11ZQb7gpDBtSo/5R2tx16BIGIpRGQmwyuoHzkylBV69lV1hJGRvz5MatwqETQEajbx5FY2cMAxVre4B7Bb8pfsZtd4QNVzukBF28I6CA0EEz4mIUuFdCKSAo0GIc55S1HHU31GmjwCNrs0ynAd8N3zhL4XRFHijAWJhEEJ8B9yzVnL1sS5u7Tv2jqIcX+NXw93ax/T+WbWElZWwAhFKM3aChPgPcKS3AyFH4EWLo3V7gN900YjAcEDrsBbCHBvpQB3CAQbLVFxAsATKN0SVd7kQWgmLYSpugG8G+A+hiLr7RJbKbgu5fIXG2oHTkYD80jQ/6gKapQGeCn+ZMQSnOUoVllXQZEZtz88gh4tq0XTGz69AHDESQWDp7Kv0oEHoP137IUgE40eh5e0+cNoeVlLEB72f+AP2ikeCTv75z/UdfwH/BB/KEgSHGsKs274IfQQWUdQyApzlx7LCCj5LoyDEEFZ66WLzz+6Oawwb21e9/hrVQecaLj1n4iCgqQcn/Ny2CrkWM/8NL0Hqsjko69swmuvHh7h/pMigE8Yfj55UFKqAFVID2A0bo+Kb7Tmj64z//4ccTF8xchRAlxXmrY6gvX4pLMZCzIN8BP57KpTLqzcHH6OVvQrMnFauM0YYMMbPrTuUWvbzwftghqc/+fTvagtA/sf5DZKlanI1oN7ZJm39g1sBPQTkEPNNz5wPpgWtsiaYzpsA+tFwouxB+Coph7AJ8RgxXxQVHpsfDSsowtuF/5t596f9W0ZAT48f1H31BFxwZR4BH9w4Bj+4Zxn7w6J5hGMYGsJIyDMNYCyspwzCMtfB1UofA8DqpsoBhGFvAPinDMIy1sJIyDMNYCyspwzCMtbCSMgzDWAsrKcMwjLWwkjIMw1gLKynDMIy1sJIyDMNYCysp41iEhYW98UbqnDkPKfnWJCW9gI+SYRiL4XecHIJOeMdp+vS74+LinJ2dkT5z5kxi4tOwzJw5c+PGTQcOHKAy5oGElZSUpKSsVvIywcHBy5cv8/FRwlEUFxe/9FLyhQsXKNs9gVgvWbLY1VUK319TU7NmzVrsAfX+2b59+9tvv4NEQsKT48ePl9aRof2mZFqg2goLCzWLqMKdO3dSVUzXwj4pYwNwVMfGxqanp8fFPYhPbm4uFFBZZjUNDQ1paWlUc1VV1ezZVgXesDfwdhMTn8rMzKQOb9myZfLk22EPDw/HSQIWbEtUVBT2GJXft28flcQHWfjLkE5aJMD5z8vLS6xCTJ48mXSZ6Q6wT+oQ2NsnxUE+derUl19+RXiLEJQZM5QpUCEWEBHhfwk3DZZBgwbp9Xp3d3f0ytNTCrQrlsqrSj7pE088vmvXrh07pMCWqHbMmDHknYkK1a6cMArvFa5uSIgUg4+6AZ2aP/+xbdu2YSdEREQIDxfFDh8+jMrJL0Y9tJewLnYaThLUAfIEIWGoPy8vv6GhXu1Ei8qpsFHIy87OzoYviVZgUddg6Jijznnz4ktLSysrK4WddjgS+/fv17i3Ym+IropdqtkVogAswk0mFxgONdZC5UFBQWb2NiNgn5SxAQcPHoIgLlgwX8nrdDgs4XyVl5cnJb2Igxbyodf3Xbp0GTwvDFTj4mZTMV9f34yMjN/97vf//d+P4RDFEf7II/GmrgagEmgf9A5pSOrQoUOpQmRJkvAtjMeOHRN2ZGHEIvXl0QMHDkJExo0bizTkA2oOCy0iIDpoC+uiPzExMWgdxWbOnEmuN7o9atRIpWgLYWHjILvYG0reGN7e3vjWtCVAi+gn2lLyLXzzzbewowOUhUOal5cHb52yhntD3VXapWJX4EOKHBoaSgUgo3CTsQrahWqTQw3xhR8t1W5ibzNqWEkZGwC3btGixUikp78Lx4eMalDghRdeIO+PpJDIzc01474R0Oi5c+ei5hde+Av0CxpNkgq3TlQI/xFGeLgoQMb16zdAs4YPH757925kYTx79mxAQIBUowzEpaysjBxPKGBVVZVGwaHs5KahfmguaouOvgurUIfxbVTxUQ91wCgkVeiJ0XUBHFKhj2ouXryImtEBpEn3d+78Dy0yujfgw0LTaeuI/Px8rIXCSl7eRbQtkHV4oEhERt6B76ysL2TjAUgqEkbrR4JRw0rK2AwM+shnWbdurfqIJeDXQA3xEaN+CxHXSSG78MUUq06HekSF0IgRI0ZAc3NzLyqLZaCApML4YHCqkQCIAobz6CqcLxJco6BOqBKloXSUMIVGrdRgNL1y5XPQevXgXQN6iO01qsXoIU4VqBx6aqjFmr0By+uvp8LThIU8cZwVsNaqVcni14Eiv/FGKgokJj5F98eAqTOBpn5T2+iwsJIyNmbDho3QAho1C3Aww6+h4SHGkoq1naSnbxY3XoS80gcecXFxMXQzKCiQChNwtZKSXhTFNBf44ItBFMgRMz8kF6i12NA1U18x0EBXNleseM6MDw55EpcvDMGK2Op7752JgbZwSAnDvQE1hNRiXI/NnzRpEu00KDiWQk8XLJgPGZ0//7EtW7bAgjLkkwK1SgoX3mj9tIghWEkZGwChJMcHQEcGDBhAaQGOSeHswA0kY3uBNOzZsycmJgbpvLw8unZJiwCWYugtjAsXLsAIF42Ka7KGYBUUQH9QmyXSAI3z8/MjVcJ3UFAQ2QWo8OTJk3FxcVQGIIGeoEuQ0V27dplpBWWWL1+G/tAlBaOgAxMnTkQZNKSY5AsXhntDYGqYP2bMDUiTCx8WNo58UpwJkKBTC6R29OjRSJivnyFYSRkbkJX1BZwpGv1BR+DpwIHCB9KGkWNCwpObN7+Ho5cKKOsYgNErjTfxrZgMoEt4cKngXkFQMFalOknH4XIKI2QOEgAHWbSblvamEDgBtAklTbmBGrBFmZmZdLkAynL0qHRTSwM6tnPnTnFJAcU+/nibt7c3zi7CiI+4mjx+/HiyoNvZ2dnmb4tj8y9evGh4IcJwb4iRO4xwQqHO+BVoKYb8GPjDwYfo49eBBb8d+aQQaPx20dHRMC5Zsnj//v2m6ic7I+CnoBwCjj5iD+jBKTMu5LUO3aOHjFKWMQP7pAzTEeCXYaRv6mGmHgD8d4zuLfTWGfZJHQL2SW0CxEU8yo49KR7X7zGEqd5zBeJxfaZNWEkdAlZShrErPLpnGIaxFlZShmEYa2ElZRiGsRZWUoZhGGthJWUYhrEWVlKGYRhrYSVlGIaxFn6e1CFo7/OkkyZNUlIM4/Ds2bNHSZmGldQh4CfzGcau8OieYRjGWlhJGYZhrIWVlGEYxlpYSRmGYayFlZRhGMZaWEkZhmGshZWUYRjGWlhJGYZhrIWVlGEYxlpYSRmGYayl16233qokmZ7LFZmGhoa6urqamhoXFyXkGWM5wcHBTzzx+K5du3pYFDzGJrBPytiMsLCwN95ITU9/lz5JSS8oC+wMGqLI7BYyffrdaWlvUifXrVsLiVQWMExHYSVlbAPkCXKWmZkZF/cgPkuXLqusrOqGIoVOxsXFpaenUz+zs7MjI+9QljFMR+HRvUNg79E9vNH58x/btm2b0ZGviKIuYsRDdmfOnHno0KGJEyeiwL59+1JSVpspWVBQMGLEiO3btx84cFAEZMdamze/t3z5Mh8fH2SxXWvWrD1w4AC0cvz48bCcOXMmMfFpJARU28aNm1BMMbWARSKWvegPELUdPHho4EBvGt0b9pMKMw4L+6SMDQgLGwdNgdYoeRVwS+fNiydfFaIDIYMMwQ4ZCgoKgjEtLW306NEQMjMlKysrYXz77XfQEBWgtcaNG7to0WIoJrTvkUfioY9z5jw0dOhQeMQog3U1o/4xY8aUlZUZyigaio2N3blzJ9bCuqgB9cCurq2hod7X1xdGU/1kHBnjSurm5qakGMYyqqqqLly4gARkha6W4htpGjtnZX2Bb0htdXV1UFAg0nAh09M3kxHpgQMHmim5c+d/kAAQU3yQQIFLly6RUQCNi4iIwICdenL48GHDmVhLSkqUlIro6LsKCwupZqyLGqC5mtrg/xYVFSFhqp+MI2NESXHifeKJJx544AElzzAW4O7uDulBAh4f3MOkpBehgLQIo+9Vq5KhrfgODAzUqBt0CipMafMlAZpYt24tFSAP0ZAZM2agAD5IiF4JTM1yrVZYpPV6vb+/f0NDg1HlbbOfjKNhRElx4t29e/fNN99siZgOGjTo+eefXy/zyiuvREZGCiNAAlkYsehRGSopeOqpp+677z4k8C3X12pdWrRq1SqM47AI30hjFaTxLVcggcLyqkyXceDAQWdnZ4y1lXxrMPrGQFh8yPUzivmS0MTly5fBScQijLjJQ9QA7cPAX9SAsT95lAS8VC8vL6ODcbUaIo16CgoKoKfC7u3tLcZqlm8R4yAYH91DST/55BMMbcyLKcTuscceQ+Ivf/nLwoUL8/Pz7733XhJTo7z22mso9tlnnyGNb6RffPFFWmQGFxeXyZMnKxkVtbW1GzZsQCXPPvusYmK6CPihJ0+ejIuLmz79bsXUAkTWz8+PLjuap82S0DLoNTmJUO0BAwaQXQDRzMvLi4mJ0fihgh07PikrK1uyZLEQUzSHDxQ2KCiImsa6+MuHBbWdPXsWaaotOvouutNl+RYxjoPJO06ZmZkZGRnmxfTWW2/FH/f+/fvx54vstm3bGhsbbf4wQGVlJbxRMwLNdAdSUlanS48WxdHIOjHxKTiPUFiwZcuW6Ohospt5frPNkiiwZ8+euXPnYunMmTPF1QOc+OniLL7RjaqqKhp642Ood4mJT+fk5KB7VGDMmDHwKKGw6Dw1jXXRc3Iz1bXp9X3JC7Z8ixjHoY2noKZMmYIzPP6wPvjgA8WkAkPsgICAjz/+OCsrC1nhouLvLDY2FolNmzZBZCGC8FXx5wufFEaM2e+88074pB999JFhVlSCddE3LPrqq69odP/vf//717/+NVwSeLJoWvz5wnewxLd1ZOz9FBTDODgmfVJi7969OA9j4KPkDYATWlBQoGTsAw5+uL1wfm+//XbFJCNG9yyjDMN0LeaU1MPD49FHH+3Tp8+HH36omFpTVlbm4uIyatQoyg4YMADZ3Nxcza0ALy8vJyenwsJCJd9+4K7C8Rw2bBjqV0wMwzDdBpNKSjKq1+vfeuut8+fPK9bW7N69G45heHg4huTIzpw5k4wY0UNP+/fvP3LkSFjwjWJHjx6V1uko27ZtQyVKhmEYpjthXEkho7///e/NyyjIycn561//isQzzzyzfv36gQMH/v3vf4cRltdeey0/Pz82Nhb2gICA7du3k90Ud955p/xE03okFFNrsPrXX3+tZGTgny5YsACrrFq1SjExDMN0BUbuOJGMurm5mZdR5hqC7zgxjF3pY/gAR1NTE7zRL774gmW0x9Asc/nyZfy4jY2NNE8HwzC2wsjoHs7L7t27WUYZhmEspI2noBiGYZg2YSVlGIaxFlZShmEYa2ElZRiGsRZWUoZhGGthJWUYhrEWVlKGYRhrYSVlGIaxFlZShrEv06ff/eqrm4yGPGkvqCot7U18DGMT2Bu0+MYbqZ3f7rUCx7t3CDrnvXuIhQhGDwzDzduJpKQXSkpKRIR688yZ89CMGTMorY5rD1CPu7v7Sy8li9BPEA4RBF+zOep6COxYCriv5FtAJTNNBNlvL+3aUjWan4bD9Nsc9kkZ2wC9SEh4kqLA47N06bLKyqruFpYD8hcVFZWU9CL1EOcVZYHcf8goEiKuHyyxsbFySBVpi3Jzc9Wb8/bb75AdCgtFRoIC7iuL7UZ+fr6SaicQetpwfChODH4vZRljNTbwSSl8SFNTkwhDog4NQnz22WcjR44U0+6NHj3697//vWEcEVEJ1akxUhblRT0UqsTb21sUO3bsmLAIRGgToF5dnR01ahRaFCU1dnlViYMHD1IMlWsLe/ukcHnmz39s27ZtRt0c4RAJV4jctEOHDk2cOBEFhG9oqmRBQcGIESO2b99+4MBB4Vthrc2b31u+fJmPjw+ywiWEQIwfPx4WQ6cYSjpmzBijnrJaVqgzaHrq1Kkvv/yKcFGNovYT1a6faJ02AT5paWkpegsLub1YMSQkBFnafNqH2Ce33HILvGBN53GMiC0tLi5GDfgjN2wLW4GDQq/Xw652kFH5vHnxr7+eKiyiV7AgTa437cOgoEC1E0175vDhw8Ko7ozovOaHk9pwJFr5pPfee++iRYs8PDyUvAoIbmJiIv6albwKms7ZycmJEgD6uFAGwoQs/oC+/fZbWmQUiiPyl7/8paKiYsqUKTRvNMDqqOTxxx8XMqpGRHxSRzZFH5599llk8ZcqwpMIGe0w1BPUOXz4cAoqxagJCxuHQ+jgwUNKXgWOOhzD5KviGMPRiKMOdhx1QUFBMKalpWGX4mA2U7KyshJGuIFoiArQWvAfFy1aTF4huYTQyqFDh8LfRBmsq3G7KCyoxgjQNP6cIBYAPzG1i82BJC1YMJ/KtAn1H2doNG20dVRVVVVFgaNpEYqhq+gwuo0stAx/wE8//QycR034UqxCW4rTCRKwmGrL19c3IyOjTQcZW4efDPsTG4tdjR2OerBvUW1hYREtQjGxZ2gtAAtk9OzZsyiPfl66VG7qh3MoWikp/hxpclKNmE6ePBlO4smTJ48fP66YWsBfM3w3uAyQSxwYQgQBFt12221wFT///HMKPmoelJHdJRfD6LtGgbh3QmRTATYNhzTU+dKlS4qJUQGNwNGOBI6iN95ITU9/l4J9RkbeAWNW1hf4xtFbXV0Nlwdp/Nbp6ZvJiDT+isyU3LnzP0gAiClF/UQBwx8Ch3RERER2djb1BMc/qqVFBMRlxYrnoFzonlrm0DREE3XiI0SExAsJFIb/KBc0B/UfbjJld+/ejb8ZdImy998/y93dfcOGjUhjt0CvUQBptAJVCggIQBpNQwRhQT8LCwvJaBQzbeXm5lriEqIV/GRIREffVVZWRqvgTINvdEN0ia51YLfgm4AFgxtqGv1MTU019cM5FK2U9Pz582+99Zabm9ujjz4qxDQqKupXv/rV999/bzS8KAa/0D4MSdThRgjoLxbhtGnUozSERBkDJRp3AwyraUp8LCKLGrQFmcYfAWVxXEHmIHZqNTeKmGwfiD9086AnzzzzDDbQwrOCAwKZoJ2JowsOEbwVKCAtwjCQAh3jOzAwUKNu4pAG5ksCNLFu3VoqAOdLsbZmxowZKIAPEqJXAtJH8gSFPmLID+3AIgAhRpbsAKNmcvosicYsTicgN/ci1JkuNOHP8rrrriOVpKVwPyncND7jx4833FIcCErKBKbashBsC1ahVkJCQqgniYlPeXp6QgdxEiJpxlEMZ0U0BNBVKKnaAtr84Xo82jtOJKbYxSSmkFH8OZqK0gwgZ9Cvo0eP4hSqHuBHRkZC/rCITrzmIWkDX3/9tTpQKI2ply5dKrRVA06eHYhsKkb9NGBXrGahnqAb9957L0feNwS+DKRB3KvRgDEpxEh8yKk0ivmSOLAxrsRfIxZBCjWBFwkc5Bj4ixpoKK0sUwHj66+nQmfhHgIMpSFnpCb4g8foanrrx33gS6JmUxsoUAs39AirYKyGNE4q3333XWxsLNqipbCI+z/4GL10ax5TbVmIcMORxmBU9GTu3Ifhn5IdZdAKOapqDM9Plv/EPRUj9+6FmC5btsy8jJIXSTpIt2VogA+mTJkCYYUyGhVBf39/HHjCnSRpwx83KrnvvvvI2CamIpta7zOi/0YH8nS28PLyUvJMC/BDT548GRcXpxEgQJcm1Zf8TNFmSfhc+LMhNwqiZngVCH9C+PVjYmI0x7lg4cIFoocYwuNXRgLDW/yyaiHAXxHcUvREdMZocxrQf1Q4e/ZvKAtvDp0ROr5795c4FpYsWQwxxe6CRxkXN5sWdQDzbbUJtis6Opp8ZLifOJA1PxztyfDwcKgzeqtYZdRNY1vi4+Mt/4l7MEaUFJCYVlZWfvPNN6ZkFNDQnvw18u9ogP+rX/0Kf/TIqm/1HDt2TAgfua6wyEsUKHrobbfdZnQsbwi8XZQ3jGwqL2w3cKtRG3UM39gQQ1HGn4v6egKjJiVltXzXIk6ME3EOxkEItmzZguOW7GbGyG2WRIE9e/bQoBg/t7h6gB8dhzRdlkU3IFI00sRHc3hDzuQHm6RFGG+tWbMWSoFhvvqOCiBxuXgxLyIiggpju9A389cf0T1UiBVpFXFDX4AsJDsh4UnIFpxceHZUsgNP2rfZliGQP/woVB7b9fTTz9Dm4DszM1NcahBXPLATfH19T5w4QVmBumlUWFdX2+YP5whY9RTU888/D8URjyjRo0s///xzQEAARJPKEFBbqOqjjz46bpx0LV9YkFA/lkQFIMEQWXJyCVEYmHoKCjoonm3SFCMLobGrsxi2Y/AOrxN29IGuM6ifxwLqnlxD2PspKIZxcPgdJ4eAlZRh7Irx0T3DMAxjOaykDMMw1sJKyjAMYy2spAzDMNbCSsowDGMtrKQMwzDW0uv6641M78T0MJqbm69cudLU1NTY2FhfXz/Q8V6LZhi7wj4pwzCMtbCSMgzDWAuP7h2C9o7uJ02apKQYxuHZs2ePkjINK6lDwNdJGcau8OieYRjGWq4ZJU1KesGSCBAMwzCdT2eM7oODg5ctW+brK0UiJLZv3+6As2p3ITy6Zxi70g6fdOzYsf369VMyKjw9PcePv0nJmKCx8WpMiKSkF+WY4+xgMgzTQ7BUSb29vePiZi9cuEAjppDRxx57bNasWZZH46I5t728vGiecJrtPF01czhENiEhQS4rLV27di2+1UYkaHZuLKLZubGULIZlWLIZhrE3lippaWnpK6+sgfypxZRk1M3NNTl5VbuicUFMy8rKxowZCx2Mj9dGyj58+PCQIUNIIsPCxlVXV6E8rQggkVhKAc2PH5fil5B6IgsjFlH4HVGmA7HGGIZh2kU7RvdFRUVqMRUympKyury8XClkMSUlkvIajZR9QI5lSE7umDFj1DF2IK+DBgXs2KFEu12/fgOKDR8eSuGbYDx37lxAwKCSkhK93tlyN5lhGMYa2nfvXojp448/vmDB/A7LKBg40Ds/X4o35+urjZQNDxR+KLxRDPb1ej3pLAFxdHbW5+ZeVPIyrUOH34Sad+z4ZM+ePYmJT1GUNKUcwzCMfWifkgKI6caNm9zd3fr27dthGYVEQo7J9zQaKRt+KLxRDP/z8vLJ/RTA2YTfqmRkqquNhA5HPUhnZmbGx8fThQKGYRg70W4lBbm5uX/60/+sWPFch2U0Li4OPiN8T1ORsmF3c3PHQP7w4UOKSQYrlJWVTZ+uBDRfuHBBaWkpHFhTocN5mM8wTCfQBc+T1tTUrFmzFppIWRJWjNCRLioqTk5OJic0KekFiKk6W1JSmpKSQumQkBAk4M/CA1XX39jYmJ6ePnDgwBkzZois+TDljoDjPE+KP6fY2Ng2Y9N3GPrboz88xcQw/N69g9A5ShoWFrZkyWJXVyUEtBm5wclv+fJl2dnZmhc0NDV08okwIeFJfKekrKasIZDpmTNnbty4SfgBDEN0ZHTPMIZAZaBE9EAbPkuXLqusrOrAFWoMWcRVb8goxiskcN2E6urqdj3wxzgI7JM6BPb2SeFLzp//2LZt24z6j8LTJB8zN/eicDyLi4tfekm5gEMl582Lf/31VPXFH+EGigtBdIEoKChQ7SGS4B4+fFgYyfP18ZEu++zbtw/OpqYnmt4Kn5QaPXTo0MSJE2GhdefMeYguGQF63VlcZdJcsGIcEPZJGRsQFjYO2nTwYKvbgwTkDOKofvkCxhUrnoOGQo8WLVqseTZDA+pEzagfIoh1ZS9VeiQDdRYWFtEiFEMrgwYN0jx6DBk9e/YsysPJvXSp3LAnqFMpbQDUNigoCCXT0tJGjx4NbYV0In3x4kW420hDdt3d3entD+oP6ldWZhwPVlLGNlRVVZEmQp7o9V96mNfoyxfSCpaBOlEzEtHRd5WVlZEXSc/PQUYhlAEBAUiPGzcW32oph6WhoWHz5veQhreYmprarp7AzUxP34wESiKt8eKxXcOHD8/IUN4QQZ1oi/rAOCaspIxtgINGThlk65FH4uEGQoBoEcbXmpcvyG4JqFOv15eUlCCNoTS9f5GY+JSnpyd0EE4oXFGUmTx58v79+9XuLVqBumkc3g70REi5Bui4eEMEZdCWza+ZMNcQrKSMDYCT6OzsbMopM/ryhYXAkYSSkrO5b98+UcncuQ/DPyU7ykDHyVFVI8RdYE1PNGB7hUurlnvGMWElZWwA/NCTJ0/GxcVNl2fzUmPq5QtLwFrR0dE0iIb7SdcrlWUysOfl5YWHh5eWlmpu+KBdV1fX2bN/gzQG4/Hx8db0RAPaKisri4lR3hBRyz3jmLCSMrYhJWW1fDsoTgzAs7OzoThgy5YtEESyr1snTYQIBcTSGTNmUFapQgbyh3WpcERExNNPP0PXRvGdmZkpJlhIapksEQrr6+t74sQJygrQ7po1ayG+KIwK6+pqjfZEKd1+EhOfxqifrhWgn+onEBgHpFs8BdXLw7f/wxvK1//a9YGkhoM7dU7OziMm1W591nPJR+WvzdXVVSrlmI7Cc+YzjF3pYp+0V39/6ePugyQSuj56nYunrl9/JJBtbtb19vCjMsoKDMMw3Y8u9kkhkfopj0m66T6wuTyvl+cgXWOdrlcfuKWUba4o0jU3NXy+qbmiQFmn+9HQ0HD5cpOSacHFRXnlsTvAPinD2BWbKeldd02NiIhYt2695RNEYVAPb9T5tt+WHf5SMRnDa8ztjV+/1VxV3FxZpJgsgCQDUNbJyUmvd9br9X36OCGrng+FqK2taWq6DE1saKi/fPmKYjWNLEqNSsY0ffv2RYv9+vVDAq0DZUHnwkrKMHbFZkragSn0PRe+jw7UV5aWZn8cMPV3irU1+bv+4R1xb18Pb6hB+fpfK1azXLpUdunSJVMyB12DqN1zz4zBgwe/9dbbENC6ujpLNNFWODs7OzlJE1+5uLiQZfr0uydPnozE8ePHP/hgC7qHtHgTcd++H9SKD7ufn197301kJWUYu2LL0X0HxJRG92VHs6GkFzJeU6wtBMc8CiX1GhVh4ege/mR+fp7wQ69doPLDhw8/fPjIuHHjVqx4NjMz8+2334HgxsXFHTt2DEvbOx0RKynD2JU+NjyocIgePHjwxht/ERl5xw8//NCmork+kOQ8crLObWBt7lH3YeEVJ/YpC1rof/3NVad/dA2doB82wXl0VOORz5QFLYSFha1c+Vxtbe3PP58+ceJEefmly5cvK8uuZSoqKs6cOVNdXY3t+sc//pGVlVVZWfHjjz+999778Gh/8Ytf7N37fUFB+y4ck5gC7CKaPYRhGFthSyUFQkwnT779+++/h5OoLDAGjuzL5QW9vQfX5p00o6Qu/iGNR7+4nHvkSvEZZUEL/v7+0IXk5OQeP9GZ7FE20kOREFak2+t6s5IyjP2w/VNQOMJxnCsZ+/Paa9prAj2ec+fO4SxVVsazZDJMd8HGStqvX7+FCxd4eXmtX7/B6LwPavTjovUjb9c5K9HzTeLcD8VQWMmqaGxshKwoGQejpKTE8NErhmG6BFsqqZDRV15ZU1TU9hNLNR8k1mYkN5dLsZrNgAIohsJKXkVlZXd5/Wn69Onh4eFPPvnkH/7wh/79+ytWe4LRuvmLJwzDdBo2u3ffXhkFVj4FdelSmYUNdQJ333337t1fopNiKrlOYPDgIdjtSsYsfO+eYeyKzZQ0Jibm5pvHb9r0quXqZs2T+bW1NQ4+YYSzs3NIyHVKpi1YSRnGrtjyedIO0OG3Rc+ePePIY9tevXoFBga6urop+bZgJWUYu9L1s+pBJeFyYvyORO/6qqaczKZjWb1qypDVe/o17vkHEkpRFY4so/Icw0GWyyjDMPami5UUnqb0qSqW3CZ4nZcbdLXluroKJJDt1Ut3pbKQyigrODD9+vXz9PT09w/AoL5bTY/CMEwXj+47TFFR0aVLZUqmJ9Knj5Ner4d60rwnFt5ZMgWP7gmaHzox8WnKXrskJDw5dOjQTpteupObuxa5VpUU0pCbm1tb23k3yjsA5I/mglLyFkBzVvXr59ILDrnt6BwlDWuJJo+0PULA43geP368kpGDMnWyJtLUB87O0gQ0mkj9nYA8gVlJSspqJW8d6m2hPQnLzJkz2zulA0N0/XXSjgGhCQ4OHjo0xMfHx9t7ID7u7u4Y87ZLtmwO/i779+/v5+c/ePAQnKLwjTRky3IwfsdW2FZGO4c5cx5KTHyKosnjs2XLlsmTb1eW2Q51UDxkKRA0LbI30HE5tooUcB+f7OxsCvt8LQLRjI2NFdsCp8SaQCwMuFZ9UvPA84L7dfnyFfhfcMfq6uqUBe0EitbmsNrVVZkcD2PwrtVxM9jbJ4WczZ//2LZt2yjmkhq1oyq8SHJ/Dh06NHHiRGGHFqsDIhm6YNAyfKst6jJIt8xDuA8W9SL0Yd68+NdfT42Lmy2MaG7GjBlICPdZ+LyG3q4Zf03t3FHTSKAq2snoEvY5NAt7RrPVojDQdB4JSNvy5cvgKCB95MgRPz8/SlNvo6PvQv3USdFt0RDSqLCysmrQoACsZTg+QE+mTp368suvCJ9a7A2APuzc+R/8oOfOnR83biyyMFJzpjZB/Mpoa//+/UFBQZod2OO5Vn1S8+DPGp4dvFT8/PhLwh9lx8AfBGowDxqiT7eV0U4gLGwcDmPD4JrYh5CwnJwc8n1gITUEOOqwe2FcunQZfinY1aGecWTCiOOZCpvi8OHDQ4cORStULdUGC3RBLIId3auqqlJLCQpERUUlJb2IVb755luyoDxW1/STGDNmTFlZmaGMop9w7nbu3KlumhZBGdEH2LGWiEIqtjotLU2ESjXsPApDRs+ePQsjOpmXl79o0WLoO5TrkUfiNRuCemhDIKOQOXSJFo0aNTIjIwP2wsJCnELISOCXwol/wYL5Sl6ne/vtd9Cl8vJyVEXiiN/Cw8Mdqwu5Jww3gX5lGo5AssPDw5WijkTPVFKm84FUGV40pPHv5s3vUXb37t2DBg0iTYHzkp6+GQmshZEyFKS0tBRqhZMTjIbaZxQ4mA0NDSNGjBg+fDgqhwW1QYACAgIo/L23tze+oYMQNWmFFmDBkU/1p6amomm4w+gGbQIKUzfUoC0lpQK+IXSK4ubThqBmWgThIztqgypRT8RWQ8uQRisQPsPO43SC7aL9hk6ih0gYgj2JbosNgTeKHYhdR0thJP8UHdCE/kdDkGYk1FFaNeDUSL3SYLgJ9CtnZX2BbzSK/kjlHIxuoaS9PHzlN0elGUudRkU5jY12mfU8sp5LPtL185CLXMNgZF1bW0OfiooKHJAWUlZWKlZU6urGaI5VgVphc3MvwhUiTVGDjaUHhHHMkxIZap9RcBhjxeLiYkiVCOCMoS7sOKTRNGQFThMapeOcQD9hQaNKvgUMb6kGJAw3x1BbCXU9SKNmzYrYaqiSkmkB+wTdo7Rh5wG2S+w3M6CYpgMQYiXTAoy0ezVgAA4vEomOBaxWb4L6V3ZMulhJKW5oD4gteuXKFehdZWUl/moLCwvwVwVOnjxx4sRxfFMWFBTkl5aWWPiBQCirXbiAes6ePZObm4v68Vfb3WaBUg/MNaglKSgoEIe04WSyQjhI7+6++26sRU6lGVAtPDISXDhHNMKlD12kI10GeXl5qFxeSQF6h0aVjAw6gOGqqAEum3oVVOXl5SUGzmrU9ViugGqMdt7UmUmDZkOQzs/PVzKWsWHDRvTZ6G9nOereGkq5I9D1Pql+ymPOt/22vrIUiSt93Z1GRzmNjGx29UK2obzQedLvpNdJO4u6ujrhBhp+Ll0qg5ABCCKOFnD+/DloHD6nTp1ENj8/DwpYXl5O5eGNKvXaAvy519RUo/68vIunT59Gc2iom0gqHMCTJ0/GxcXRhT+AxMKFC6CGrq6us2f/hoyTJ08WogY7hsZIQJ6ioqJIELEIu/eOOyZjkEsjVlPguF2+fBlOKhhBk/upuRQI0DqO8EGDBmncW7SC+tEoKWN8fDzcZHRMXM00hAbOS5YsFmI6Z85D+KDmoKAgujaqVnbLMdp59X5Di+gh2TVoNgT7HHLf5hkIUOcpDQ0dMGAApTsG9ZbG+OjJ6NGjye5Q2ExJ77pr6p/+9Iynp6eStwBpBhM3b7ifZYe/LM3+uOxoNr5Lf/ikdN92kS3L+UryT928UVhZzRYkJb2QkJCARH19fVFREf4iSRChjEibAiXJW8QgnbSyw08FWA9ah/MLScU3PGLF2nWkpKzeuXOnGKVClT7+eBtkYs2atTi0yAiVFLcv4Ih5eHjAmJj4VE5ODl1SBFAiPz8/U3qEwS9VtWpVcnZ2trhBDMcKokmL0tLeJEEnkYLXZngrDN1Ao2ga5W+8MQxuMiwojGqpEiE0ArQlVsEHri76DIVNT0+Pjo6GhbokNsRyDDuv3m9oEed3FNu9ezd0SvPgl3pDYmNjLXwaFL4/RJ9axPlvy5Yt2BA6W6Aqzd22NkGLqIF2Ak42+/fvVxY4EjZ7Cqr7xBY1hfxYjBSZGa7ib37z6y+/3PPNN18bXsC6FsHIOigoGN9K3gB7PwXVXiAWZh4q0jygw1xbkBCLU6aDYLM4Tjg+2xUOD9R/90HD0d19AkfVFee6Dwu/kPFaxYl96g/Fcern4Vnz8fN1X/5TWa09YPBbXw/HsQ7uBoZvO3bsgBNXUlL85ZdfYljUHVw5myBfpa319DQ3RiMxBd0hjtP11w8fNWqU0bh+jzzye8jrnj1fKXnmmgInwjvuuOOLL744efKkYnIMbHmdFK7opk2bqqtrcFKyZJjv+kCSS8wyaSY9s6AAiqGwkleBYc6rr25auHABxkQYWaxdK92CBI8/vsTHZyBEE8C1ocuXGHseP36sp0bswKmr4RqfHwsDavyISHRggMx0IXTNga4VzJ07NzMzk56+cihs/44TDfNdXPqtWpUCT1CxGsNpVJTOxdNpdFTpD5+YiXfvfdPdTTmZutrypqPa59TwEy5ZshjanZwsvRgDSf3uu+/ef//9njFmby8BAYM8PIw/NNbdRvcM08Ow/b17HKg4YJWM/YE0fPjhlh9//PHMmZ+XLFnyzjvvdFsZ7devX0hIyEMPzRk//macwPBZvHjxZ599dv/9sSL7r3/963/+51kYZ8y4h/zrWbNmxcXFDRjgpdRiGts+KsAwjOXYON49xIKiOa1du+7SpUuK1QT9oh7t4zusWe9am3vUXLz7IWOdBgzq4xvSeOQzZUEL/v7+paWlf/vb3+D8wudSrN0VuITYJwcPHsjLu1haWlJXV3v+/IUrV5p//vnnoqJCnH6GDx8+aFDgrl27YNy9e3dZWVllZSUWffvtt5Y8JODu7t63b18lY0C3uk7KMD0MW47uhYxaHhSvlxx9pOxotpnRvdeoiAaD6COEv78fhvPX+vVBW+HvH2AqrCmP7hnGrthMSTsgo9Y/BYURvWNeEjWKmVCjrKQMY1dspqSdHFsUQBSgpErG4cG4fsiQoUrGAFZShrErtr933y5odN+B2KLg8uWm06dPKxnHxtXVLSDA38y0fqykDGNXuv69e6hkB2KLAghHYGCgknFIsAf69+8/aFBgUFCQI8+OyjBdThf7pASG+f0f3lC+/teuDyQ1HNwJh9R5xKTarc96Lvmo/LW5urpKpZwBo0ePPnnyxJEjR5R8ZyHPpa9Mla8GQ+zeva+enOAJinvusjtom0u6/fr1c3d3hx9q5k69hvb6pJMmTVJSDOPw7NmzR0mZplsoqZVAGiBYkInKygpTagXR8fYeiJK1tbUNDQ2WvOkEwerVq7f83Qur9+kDkexjuXgZBR1A07W1dQ0N0itJbT514Ozs7OTkrNc7w+VE005OTqbuKZmHR/cMY1d6gpIKIBO5uRdMiemQIUOFDkLOoGLQ3ytXWj3NTqE99Z0VkUl2WqVpfkBDQyOUDgmop6SfcMxNz0jSXlhJGcau9CglBVCK8+fPG3U5PT09/fy6+4zRdoKVlGHsStffcbIt8OMCAozLZU3NNRDDg2GYa5GepqTA1dXNxcXI25DkjikZhmEY29EDlRSYmhLpypXLSophGMZ2dAsltXlsUXd3t169eikZFb1791FSDMMwtqOLlZTihto8tmifPk6GE8jr9Xorn2FiGIYxio1n1Wsvvfq666c81mfoTZd1vfoEjtK5DeztPbi3zzBdXzdkr8CJ9B/R57rxl3/+XldfraxjGS4uLvJDpsoTUdDQwMCgPn0c1yel2/eAZ9VjGJtjs6eg7rprakRExLp16y0MhwesnMHEEurr6yEd9IC9YpIR0fGUfE+Hn4JiGLtiMyXttrFFG1reaJo3b15FRcV7770n0m+++abmyXzb0qdPb0uuJ6AzAQEBSBw/fpy6Z9QYFRU1f/58elx/+/bt7Qp2xErKMHbFlk/md0BMe1k307MGKGZ1dU1NTTXG9ZAMxdqD8PDwgDQvWrQIqrpmzVpLIpsT3U1Jw8LC5s9/bNu2bd0hdNr06XfHxsZSzHfFxDDtxMbvOLVLTKVwoX30V/q6k09qMiJexL2966t0lxtqPkhUFrRAB+ShQ4cgnZs2bTpz5oyyoEczevQNf/3rX1NTU7uPkgYHBy9fvszHx0fJt+U1m1dSqi07O9sSv5uiIoorv9jA9PR01kSmk7HxvXsRqPmPf3zC3d1dsZqg4eDOhmNfShOSmqexDsWkOaJaU1tbc/78+bfffjszM2v58uUOIqMgJ+dIbu4Fy2W0c2hoaEhLS4uLexCfpKQX4TUnJb2gLLMzGIagRWoaMhoXF5eQ8KSyjGE6Bds/BQWXR9wxtxMVFRVnzvx84cKF777L/sc//vHxxx8pCxyG5557Tkl1S6Dya9as9fLywsAZWbiNFA89Le1NsqjRLEV25crn4N7OmDFj3bq18E9RBqJM4dTblEh4oxDT4cOHox5kUSGqxYpoAhZkX311Ey0CqA0ftRHNoVF1W7Cb6TzDEDZW0n4t0ZzWr99gPtg90I+L1o+8Xefc1jRxzv1QDIUpd+lSWUFBfo+8DGo5K1as6OZHNcS0rKxszJgx0KZ58+IzMzPJYZw5c6YQMmC4FMYVK54rLi7evn37okWLcb4kRUOBpUuXDR06dM6ch+RVTXLw4CH8eYSFjUNDqFD2Uh9EE2iosLCIFqEYmh40aNDhw4dpLQDL8uXLzp49i/Jwci9dKjffeYYR2FJJhYxaGBSv5oPE2ozk5vI8JW8CFEAxukja3NxcWlpGdofF3d0dO7n7338vKSnBd2TkHfjOyvoC39C46urqoKCrkQ7MLwVQLjiYu3fvRhqqCpmjRxrMgGJ0Fo+OvgtqTtdMDxw4iG/IqKhh3Lix+Eaj+CZgaWho2LxZelICZ4LU1NQ2u8cwhM2UtL0yCjwXvt9/7nopdpNMcMyjmg/ZUQDF6HXSpqYmozPmOQ7Ozs6xsbF+fn6kU90ZaH1+fj4SGKqvWpWMATK+AwMDNecA80sBNnnu3Lk04h4/fnybpxA4knq9nvZPSEgIrZiY+JSnpyd0EE4oXFGUmTx58v79+yG7tBZAzVBStQW02T2GATZT0ilTpri6ulouo6DizQWVHz7bXCX9xefv+ofRDxahAIqhMNI2nPz4WgRH8ocffvjoo492/0d2pk+/G6dV8gTPnDmD0bH4aO7Im18K1DeU8ElMfFpZYAI4klBScjb37dsnVpw792HsNLKjDFx76p4aGCGySkamze4xDLCZkmZkZDz//P9aLqOgubKoubpUd7nBa8zt3hH3eo2KwLf3TXd7j58hsl6jJ6IAiokXnPr3708JRwNeP3jyyQRSBMXaLYGMxsXF7dmzB2NkqBU8aFMXN80vBVgfQ/W4uNlKvi1QVXR0NP4a4VrC/Rw9erTmgjLseXl54eHhpaWlqFyxyqAz8AZmz/4N0mFhYfHx8W12j2GILp4zn6Ym6eXm7XH/8xVpC11ilknPRfVxcr7u5rpPX/b4f69WpSc010vXvMST+c3NzRcunK9riTRnCE1OOnCgN3yi8+cv1Judk7SurhYVKpnuSu/evb29sTneSr79dPLzpPAi1S8OkLDSeKK4uPill5KxOeJ5UsOlEDuI14wZMygLu6gc/U9v/bgoJE/9PKmogbJUD6XhXZI/Sy3u3LmTHExkZ86cuXHjJnRYXRs9Emu0e0gzjJouVlKiA7FFGxoaKisr/f39J0y4+dixY+fOncdfP8X1xFG9bNmyAQM8NYdcm0BuIKxNTZdRuaw5TVeuXDYvxHYFQ1Q4oTgxYMipDlnaAeytpAzj4HQLJb0mgADRRNFQWOhRrYTtw5lAN6Geffv2dXV1sWFUPlZShrErrKRWAe8VQJsgq5Rt16MF0EqaNZW+oaHKAlvDSsowdoWV1C7U1dVBu0SaZpyiENBkBEaDTdkJVlKGsSuspA4BKynD2BWbPQXFMAzjsLCSMgzDWEu3UFKbxxZlGIbpTLpYSSluqM1jizIMw3QmXXzHCRKpn/KYpJvuA5vL86TZTBrrdL366JycKdtcUaRrbrIw+ghjCr7jxDB2pSujNMuxRQf2GXpT2eEva3OP1hXn4rs272Rt3gmRrSs+7+I/7ErBCfisugbbPwlvE6ZPvzsx8anGxoaTJ08qpu4HiSngKM0MY3O60iftnNii3QH1m92UpVe51e+nGzUK+4EDB62JKa32SRsa6r292SdlGFtig+ukY8eONfpyjqen5/jxNykZY0AZK9IWipmeL2S8pvmQHQVQ7NqVUQ1hqoncc3KOxsfHBwcHGzWicFLSC9Onx7Rrhi0zwK1nGMYeWOuTent7P/nkH8vKytav36Cen4mCjHp4uK9e/dfS0lLF2hpbxRY9f/481Hzfvh/gtSUkJJB8i4l/gDAWFRUnJycvWDC/qqrK3z/A19fHvFeIFQcOlGZgCgkJwbeIl6lpRe1yikqwlLqkno4Ilvz8vDFjxlDfqP/btm0bOHCgoVFMvwI9LSkptd4nxbiefFJrppViGMYQG4zufX19H398iVpMLYzV7DQqSufi6TQ6qvSHT8wp6U13N+Vk6mrLm45mKgtagOgsWbK4sLCQNAiadcstEdDKCxcuCPWB6g0ZMoSMCxcu+PjjbVDSoKAgmimK4l9idbV+iXpmz54NxRSzq1FUdKieaEXuxdXBO9LoT2ZmJsrTlFTffSeFGlZLLfqDYiSLokxAgBQ4QGMk1QY2UVJoqaykGOA3NDQ0YqCPLORVXkqlGJP07t0Lf+c4QRYUFGLXSU+V9JY8fOxWfDs5Ofv7+2HogD3bgZ2Jn0ZJdRSvwBCPpqJzhdVK/ipY4qmrOHPRuDOjwc1vsG+/+qv1uPkN8e1bV3ReyWuyhkgFnCrPXGwdH8g7MMTN6crlynOS3StwsIdTnyaDQtYgddup2sJtNI+8I4vPFbYRgk7eKPfLJdgVvXr17t3bycnJBqN7/AG98soaLy8v6BSG+e0KeW89cLIoyA8ECAIHASKBO3z4MNxJGAcNCtixQ5r3F0ZoPSUOHDhIHh+KublJ06RHR0drYv7A3cY3vE5SNCyCZI8ZM7akpESvd6alGlAJylB5NITOwNOkRQJycgmUqa6WfjSjRluDI1/61Xv37uPkhA9kAeilf3r+tPnpO2zYMB8f3z59+rTssb60D5HAyXXw4ME+Pj5It17Loo/1+AQOHeLfX8m0AkuGBg5UMsSgcZPuaOHm6xWjTP+AIa3q6e+PfIDIX81ef/MdE8MGkVXKTAoLlFJSgUAf5FtVPjBwqP+AAdeFSrnrQwP79fUbOmywXN5oT2CcNG6QthJ1YVWn5WI3jx429PpxtOwOrKtaRCjdIyMKiKpabz6QduTVDTYDNmqwf38oqAz+KmzzPKkQ08cffxwen4Uy2rHYoubBOJri9iABiRwxYgT+1HNzLyqLDYAswkejtDrmz4ABUswfsgvgGOIbkrpnzx6UocC/tEhAZQhZc/WQaSUvoy6ARegkEkaNtqWXfPIEJKPyMazv25dmouJPG59+/VxCQ0MHDRokdheOH+xAJADcVSwNCgru2M5UDk4r8A8ZERrspWRa4T90xIih/kpGIuJX99zqf3mvzGWf8MgH78IhouAVHNqqHk3+aha1XrVfzUgFwiNv8y1qqfxXEbQ8pH9T/zFhEc4RNw7tl9tS3kRPUMnoW++hSopcQ8J/eRfJXfmpH8gyIuTq9uQekWxuQ0f4KBXt/eFUOezXT30w8gY3uR9YJTRihtwTeUeh8ntG6mT71cpbaLVh5pAKDh6gZJzxx2CzJ/Mhphi9uru74Y/JQm+0A7FFzQNNTEtLEyF3Fi9eXFxcDMmwMB7kvn0/iHWNRviA55ifL/UWXifKYBQvbg0J1N4lXBUM98gLViPKwLFF9yh2m1GjrYCM0rfkkfYhd1RSAfowbYLBlr+/f0TELQMGeMnzx16lXz9XnLCHDx/e1HRZUdZ2Iv8cVgGBGD7YqABgyYiQACXj7Bz+27tuHdIr/yDlDu4q9Rz7y4nhlIOIDQ5tVY/X4OEjxkX9bqXC76aMhXxIiwOg3KLc1cal8p6lH3+dK2UO6vqPuDUixjn8hl9A+3Ir+/3i1sciQnQHlfIme6KuBGsNGTd6tFyEkJaqlFRG6rZqG8H06VPG9q/5Su6Hc+7XJ3sHSz0B0u4I7n3kP1KzhpWb25EapD0QTEpqS5+UyM3N/dOf/mfFiucsHNR3ILaoGSBYeXn506fHqKXtgBx1XRgXLlygET7B4cOHRo8eNd0giHxQUBAZ58x5yM/Pjwb+hOEwH5WgPEoijYZuuSVCHU6d2LlzJ5x3qlNcUjBqlIvbkhYllcAfAP4I0H/GMpyKiorxm06bFu3q6k6OJHTTxcX1uutC8MN5eHgUF5fgoKLSnQzGmkP8PJRMK7BEPbr38B881LXXMSWnXVFaqq7Hw2/I0IGVn72k8Fm5H4a00mJ5bNtSTqqDLglI5a82Vu02UMopxqNnG2+ICKz8QrajvMmetKpEvl6gvjjRuglCqqq1DZX5udUoGXUBaUHjWaXVox+ueelNdEjF1W1pAxTE6F6WUdsraXvpQGxR86SkpFRXV1FMXXxI0RITnxZGyJyhh0hAueBjimjAdCcKwNeGEMMCgduyZQukGdVSmbi4uG3btsFCJQEqSU9PR0ksRYvirhHsEMfExKcSEhJQfs+ePdTQkCFDNmzYiAJGjbaltVsqoL8Epg2w6/bv/xH7KyZmemxsbHDwYDc3D0jqpEmTlixZ7OPj8+WXX/Xu3Usp3U7ol7AGDy+fgQNclUwrsMTHy0PJ9OnjOmCgz8jrJyu5PpNHhapXlJaq69Hkr2ZbtSdnXKSUVOBqY2NCQlx7FUtG1yvFffrsfy1xUfLHsMMwOOQGqazRnrSqxKVVjaB1E4ShDV1CE0pG7olSwPSOIq5uSxuoCkqXzPDbW3/v3hq6+dui9BQUPRjQY6DbzUx7wVnnuuuuw3k0ODhIMbXw1lvvfPvttw0N9R3bt/X1JsM7WsjvXtl2V/HqB/8s3Xptze9e3navbtvMJ/6u5Cf/6d0nJxR8PPMJyUn5/cvbZuqUtMTkZ99+ctTRq/VIhZGf8zzlr2avriitMt6jet/LDz6fJRfw+c/Mx6X6RGHdn979b92rqr5Jq3h9PvOjQOM9UVeii3z23Se8/nO1h62XtoDNvxdrq4ySxWcf9fxqt83tKAK7664yeVvaAB2eUib2DOhKn5SASjZ+/VZfD28ketdXNeVkNh3L6lVThqze069xzz+QUIoytgBuKdMBrly5fObMmRdfTP7oo49Pn/65oqIC37t3f/ncc89/8823dN9SKdrpSEOLPr2VjEL8uu0gdoST04j7pdS6eZL1y7889PIPQbGSYfv2+4N+XPPHf8qlZaRr6Op6ekvZq/mr2X/88d/nR8iVLPf94t/nWlaSClyv1L18zImXf/u/X/bqNSLAs3XfqBWTPZEqwWLiaiZyZbpUcPkvPZUm1sfLJST++cS/z7W0+/6KSNly778vRSyXLct/WfJvuSdArk7dGQ1tLRdIm9C6YNf6pEQHYot2Dj3SJ2WsAYcMhEAazfXq3dx8BU7o5ctN9Fhuh7HeJ41fnzGtKPmBlW26Uox54tdlTCtNeWDF50reJPPWZdxZmjx7hdjjXe+TgubKInoZtOaDxKajmU2HdkJGkS1fc18XyihISUlhGWXUQDqbmqT3xOrra/ENV9RKGWV6Bt1CSRmGsRK3iGUZYPPKSMXAtIcpKz+Qdt+sUCVvAf0nyHv8g5VTpFy3GN0zjCNj/eie6XJs7JOan/yJYRimR8Kje4ZhGGthJWUYhrEWVlKGYRhrYSVlGIaxFlZShukRKM/xKA/lMJ2M3ZX0rrum/ulPz3h6eir5TiQsLGzt2rWGU4gKkpJeoBnsGeYaJ3LlHybospNjYix4P4exA3ZX0u++29vUdDkh4UnLxTQ4OBgKCDQz4EET33gjlbWPYQwY7t2/+siX/LZol2F3JS0vL9+0aVN1dU27xLSxscHNzTUy8g4lLxMdHc2B2hmG6YZ0xnXSjonp6dOn1UGQ4JAOGTLk+PETSl6OQ5eW9iZNFap2VDFmJ+PkybeTRTPMRwGaulQNaqC1xMykon6jUUYYhmEEnXTHSYjpH//4hLu7RUGKjh49qtfraRp5AIe0urqqslKZ0ATSFhsbu3Pnzri4B5cuXQaRJXEkSaUIIkFBQXBs5eJtgHVRA+rBWsiiEtQvAtA/8ki8ejpnhul2TBkcoMs/z1dIu45OUlJQX1/f1NSoZCygpqYmLy9/8uTJSAfLIUIphigBYTWM4gn5Gz48VBRLT98M7aa0GShMiCYoaWlpaUND48CBA6kMw3RX4tdlZGT8QbchZlGqYmG6gE5S0n79+i1cuMDLy2v9+g1VVZaGIIbL6ebmDn2MjLyjoaFBE9rIMIqnj48P5M9MJFEzaIKSwpKamhoVFQWL4aUAhuk2pC6KiYn5m25Bxrp4xcJ0AZ2hpEJGX3llTVFRkWK1AIypz50791//dU94eLjaISVEME5AUTw1kUSRQJbS5jEMSgr/FK1jXJ+U9OKkSZPERQaG6Y58fj5fFzCYnyTtOuyupB2WUeLw4UMjR450dtYfPHhIMckYjeIJ7SsrK6MLAgAJZ2dJSTFUx3dY2Dh8Y5WQkBBpcQtGg5IKeJjPMEyb2F1Jp0yZ4urq2jEZBRjR5+bmiouYAlNRPDds2IixOY3TsSJdJ6ULqTR+HzNmzJkzZ+Q6rmIYlDRMfnYVaRjhF1PlDMMwRrHxTM/jx9+0b98PSoZhGAuwxUzPkSs3L/P+LGbR60qe6WQ67949wzB2I2vF3/YG3Mfv3XcZ7JMyTBfD0Ud6AOyTMgzDWAsrKcNcwwwbNkxJMV0KKynDMIy1sJIyDMNYCyspwzCMtbCSMoxDEblyc0bG+nia+uSDFZHCuG6enGwvUtSTtl75nyc1tXKKLnLFBxkdnh/AJpXYhpZdJ0d8of3GSsowzLWMpLCE6lnaq0Y6bbRB/HqlrIz2mVxaav5Mw0rKMA5F1vliXXXRSZ3uZGmFLv9ipwQsOVVaLU+fmnUxX1dRirY7gvFK4tfdp9saI5GcrZuQ0OKrvi7NkCWTvNdnVovrbY5THykraGNhzVs3y+fUqQolJ9Oy66SJY6pLT0kmfjKfYboYa57MHzZs2OnTp5VMx6GXTbfq7psVKmVPbRWznWIAmzDBjdKnt8YsbJkEFU7ffXJZCSqPMe8s3UfijVVN1jgYqi+L0O1NsUUgP6mrNxwxqAoe5bSi5AdWmjtnoMyNPxntKm1FcumdbbyMa3eftAtji6qh4CKGUfa6M9On3/3GG6k8oR/TOYTeN600RXLJtp4OnaWMiOPXJUzIV5y1raeGtTh30Kz7AvbKhWNS9lbLRXW61J9O60JvbBlKz7sxVHfqp66fByD+xmEdjxUYv35W6OmtlsxmYHcl7Vhs0dWrU8woCApAEy2fgJnm0k9LS6OJRxWrrUlKegEf6hvNKYWPiArVAXbs+OSRR+I181tbAvYMx55i2supjxRvLvWnU7phkiJGrpgWWrH3Q0VHUhd9dMptdBSkNH7WBF32BkMvMnXr3mp5RRB/Y2h19odtTuOftfIBG0WWluJUu53+VFQl35gCkMKrRjOESrMWSFy9FDBl5bRhp7YKN9wsdlfSjoXDszkdnkvfQqD7er1+w4aNSIt5o5cuXebm5q6O1tc5vP32Ozk5R6Ojo5U8w7QL6YpkC8Xn2+HOfZ55pCL0RunODDzBU5+aHVDblvj1yybo9iarVE/WaInkomkZm1eav1CaupDKgq35EctkMZWkOf8jS2O6dMYdJ2vEFDJEvh78u7S0NyFYcLVWrnzO19dnxowZYrROBfAh2UKZV1/d9MwzT8OSnJyMdlE+MfEpCnVHE4+KwgTSZDRVp7qMoac5efLkvLx8jcNL86LS3P5YZeXKlWia6seGqAOXIosOCy8SDQG1UXSbdgJqEG47LSIPHWnUj+/Dhw/BDad1GaZ9hHq7iVs6PoOFBkUGBigpk2Rl5lRLA3wM7U//ZKEGWU/8+oxZcB5nrzCq3FlfHqnu7z1cybWJdI1CYkrUDf2Fo7psAqVNK3In3bvvQGxRQUhIyOHDh+HiHThwcPr0mNLS0hUrnisqKt6+fTuN1iE6KEY+oAgy6uzsjIZgXLZsWUrKapRPSnoxJSUlLGxcZmYm7HAbR48eRWKEGkRs0ePHj5FFUyc+okxi4tNYKoBgeXl5QbyUvAmCg4PWrFmLPnt7e4vApehMfHx8UVERvGaa1R8qOWhQgLo2WFCGuo21sC5qgHCPGTMWS4OCArFjAwIGIY0aqqurDmBPHTxUXV0tArEwjMVErrwztDonE6oka9CE+5Wnf+Lvj3A79ZmkVieLqmmYD+M6cT9KJmvlp6eGTfvgzoC9Wy0SUnkMbtVMgIqMmg4IGD8Lo36VrMsPgZrUxHnrZtF11c9XKD6tRPLeCvnmvgmxBp2kpKC9sUUFZ86coSnrIS56vTNEhOwEVEzEE4Wqnjt3jjSlsbHRMPQTQFVUG7Tm0qVLSJBy7diRQR7l+vUb0IRhnXLQPW3rAqNXD9C3qKgonAYoixE3RXvGuLusrIwugEL08I3VRc/HjZP0UR1tJTLyDnxnZX2BbyGR+fl5UHZ0HnpaUJCPTUAaNVBz6HZDQwMHTWEsR/hfN+S03OmGmqTQtKdgVkB2Mt17yVq5Ya9uwjLJOK00Zav8FJAAPp2bm+5Ipg0ufVqAdCkT/4XOkrsoId8ra7lIKjFLp3rkAEiXIHS6Vl6q9KS9gvRMVUeu23aSknYstqgGSBUUR8mogPs5d+5cGnePH3+TOlKeIZAbuiO0alWyr68vLBBHZ2e9RgcN64Tw7dmzJzHxKRqPK+VkNKH3UButi8JwJI1GLoGjTZWjzIABnqgB5wlSw8mTJ+/fv59kXeDr60PBUfAdGBgIiSQJvu66EPQNog/dRBo1QPFpFYaxmKwVsxXvC7R6YEjlmqnsojxEJ3WRgT9ILq0lWHvHqZXnKCOLprhIKqG9ZSQ9Udv6sVY5PquCUd9W2l7zd/A7Q0mtDIrXJhjbYuSOkS99NENvNdApDPa/+y4bxTBOF51RRyQljNYJTUSaxuOoikoCjcSrI5UalVGwb98PVACfuXMfhkyTEwr3083NnVRSDRxzUR4fVAv3FgP5G2+8sbKy8ssv96AM0tBTtTPLMJ2NNDru1HtN7UN+92mWz95k0+P0jmF3JbW3jJKgxMXNVvJmgfsJ0SSvDYPoAQMGIEERSUVsUfS2tLTUTJ1Gh/mGWmwGuJ/iEq0ATmheXn54eDg6QxcBBBBWPz8/uv6rpqSkdOzYsSTiGNQjDQs5s9gWvV7P/inTedALmtJzppbe7+4C6N0nW8sosLuSWhlb1CgQC4oVSvfB1fFE6da2Us4AKBRG6DT0njlzJhxPssPlFLFFg4KCUL9hnRAyysbFxW3btk0tdqTFll+UhAcKx1ZcPRBPAkBhfX19T5w4TlkB6t+yZQsFUsVHPF2A8s7OzviWyxxEOj8/T15DOk+4ubnZ9cEvhmmF8oKmTR4Ovfbgt0VtA6R26tSpL7/8iub6ZldBzx6kpKRQlunOdIO3RRlr6bx79z0buJkNDQ0LFsxX8l0K3OfRo0ft3LlTyTMMY2fYJ2WYLoZ90h4A+6QMwzDWwkrKMAxjLaykDONQGI0+YiPoRUwJw+gg8ntEbc0k0kGoXQvmxrcfrKQMw9gIeuPo6oylNiZ+va2ln7h6ApDoWBOspAzjUHRF9BEJ+Y1MOzwSL0EKbtlEoiaoViauvjqrXvvge/cM08V0j3v3UgCSCf3lZIV4mRJD8ht/SimdRhM+Cfs8yZxcNG1ZhGSuzm4d2wMuXoL3p6oX2OUQI/KMUer4JRKqRlUhT66WlwROetRfZWmhpSp5LijJoOmGsItK5OYW6P72qXdC6yArUoevhi2R2hp9RNpSZUN+ujFDLn91txipnH1ShmEgH/fr/kZOWfJe3YQFV52y0FmSmhjYh81a5iubU/bqIhaYnxaP5hNJztYM+mUZLaZwdqBFeaesvF+3gUxSkLs/SJdWqYatpyW5pEVCkWmSZixSAzWUXq6XC7aKlKdzm5BAQVaS91aETmvb9wydJc13JbVwqmWCQaOVs5IyDAOpWtTylqc0W7Obr5hzDj4XaVxrOxw00jJpkjo3bxEcz3Lm3T+hv7HYHp+vWNTiWrZzkmbB1alUgTQHoDKTv0RLkBXNZrYwZeUC1bqgpbw0A3RAIJTXeOWspAzDtLrroh1Hq1FNoa9Glpj2Ic3Abzxis/x0AdF6Gun2oARPthj4qkqL+a3ioZ4SQf3g/LZcPTBSud2V1LaxRcNUkTYsZ3pLkE581EE+bAt6ZRiVxHo6tsk2B5tmj62zEvHLKnmmg0hT3+taBs4Gw3AVJsI6deDOlRS23hhKRCbqSscfA1C7ycO9lUuxZhB3nNqYh1TGSOV2V9KOxRalyZjFR+jIgQMHHnkk3uikn7SWUcXZ0aEgnWYqtJCElrhP4iOmcbIcM5tsOdgK0Qea3MQomjMNpFMUTkx82szErxZCcqz5fa0R6I79sgA7xHDGbgdHUUN5eCsbWkPDXoPgTJErFmCQ3pFozK//dKq/+oKsCkWv5XChsoFQRT0xjzQSD71TeXa1dYRU6zFeud2VtGPh8NSTJSclvRgVFdUNHaI2SUlJQf/lKaWlqFNI2zVMtCmgGvIOlCauRmfq6mqVBZ0LZJrDr3ZXUj/MrlaijyR4H2nlk5oY9van6CMZyyLy1ffcqaSbEg6E7vMoo3XposEw2aw8Qp+6SH7kSLJIKDeF5FDPFExkmXdOK59UFfVEVKIEDpk1TOcmV0UPMGEkvrVY1UObPn1ltPJOegoKGvrYY4+5ubmmpKyGtipWE8BneeKJx3ft2iV8DfgO8+c/tm3bttzci5TAIhyZcXFxzs7ONTU1//rXv3/1q/9ydXVFYchWcnLyggXzGxoag4ODIOJff/11ZOQdGzduCgoKnDlz5qFDhyZOnIiSZ86cIT9LPQcdqp06der27RkPPfSgukIoINQ8JCQEFmwjFUbHlixZjGLow/79+4OCggwdN2wOTdSPo5c25Pz582PHjkUlO3fupNVRTNRJ5X19fciIMmKT0YGqqip//wAsRYtr1qylaVLRf+x5JLBp3t7e6l0HoKRjxowx7Jh6B6KqsLBxM2bMoEWHDx/x8/OjPtDSuLjZJSWl6CHaovgu2BWNjY3p6enUlqgNu6ugIL++voE2R4DOUw2a31d0DwXET4YdPm7cWHX36LfDjyg2Gd+HDx8SRvFbUK8OHjwkWqFFFAkG6fj4+NTUVE2FXUg3nsEEOjWttOXxoKvMW5dxZ6nNp52/pumkO07WxBYF+FsvKyujUJoEjgccBhSeE+M7CI0m4CjKiFie5eVS5DsCRxr0rk1v6Pjx421GMIUiiJCfaCg8PJzWNQ+kgYKeQlMMA52SjJ47dw5GeJGXLpUpq7UwcuTIHTsysLSwsJBm9UdPRNBT6BcFp1JDU+5rtlS9AymeSlbWF+gGfim0++c//xlbjTMNpBy7V6M1mmiv6LO6NnQPnVSKtoACHH6V6cF03r37DscWJeDOKCmZ0tJSHFfmp6kXsTzVwMFJT9+MBMQRfiKF56RFZoAQGEYbVYf8REM4jKWibaEOegoXiS6A4qimQKdwxDDy3bxZ6iHqTE19QyqnAgpArhy0DGeCm28ef8stEdgQOnlgRcPYBKgHZwVsqfoiqWF8U008FTMYRntV14ZvqlADfi/DOfyxYzn8KtMD6CQltT62KEaUIrQGwGGAARoOQqgDnDLF2k5KSkogW0qmLeBLGkYwhXdDEtYxcGDTvRcR6BQHNg5vS+oUncd3m/GaUCEcPfKmxRVnw/imZLccdShAzalOAyqH5ioZDr96zZC6yGg0kdcX2eu9z2uWzlBS64PiYdiL1TWeDpwXDDwxFJ00aRIKKNb2YLlsAQwP6aYNfeiyI7xC4dKSu2Q5WNFooFN1nZYAVRKOFdxDNzeTT+BhS3H6Qf3wBJHFyF1sDsU3pWIdg04thDpNcPhVpmdjdyW1iYzGxcXt2bOHxn0aLBnmq3F1daU7tupxpRgGgunTY6BNctmr0DGpiTaKg9nNzZXGlaht9OhRZLcQqJ6xQKdSnbNnSw2hzvj4R6SipsnPL8CYFwN8El9sGt2/UoP9L840YWHjUD8S8O8M45t2GNTm5+dHteE7KCiI7Go4/CrTg7G7knYstqgY/eETGxubkrJa47lAZd54I5WGcpASLMXhoQ44qpQzoKamxsPDg8aMOTlHqVq6voaqXnjhL8ePH6NRs6ZCw2ijOJhFyM8lSxZjvCk1YDFY3TDQKYxr1qyFiFAP6+ravqubkpIiAqP27as33M+7d3+JfYil+ODkgfrRClw8DKs18U1hhEihXbqcihExlNeS5y7VteFUdOzYMWVBC2gRNVt+wjPaPQCF5fCrTDeE54LqUchurPSID5RFMXUFED44gJqTH849HH7VKBzHqQfQeffumU4gLm42PeKj5LsCDLEx0Da8jgk3s4HDrzI9FPZJr3ngW9Fj+aCo5SUCynYa8DfpKXqk1Y/rM5bQnX1SeWJQ6S0m3foMaSq5HnzLXpqNdIKbdgZVo8Svy5gVkJ38wJdRWIVe/WKf9JoH41Nxw5peIlAWdCLQzblzH6Y+WP8YANPzMB44RJqAyjDik42Yt85eYaOMwUrKMIxJpBmb5LnvThZVm5oIqofQjhAmLYFbPj+f3zLDHo/uGaaLudbuOMkxPHLyJ0SE6k5v3aqbNWuY7lTL5Cby1YCWJ5rlcB0644FDdBggt54eWsQIMQ682mlFyRt0C6g20SKNtakqJQAJjdNlSwsitIk8Ub82yMrVaCKtQpiYD7LSGhv7pCyjDOMAuE0YXZqcIk3aBHVLzq4OvVEeo89bJ19UlflImQzZROAQOUCeNP0oNI4wJ6OEW8QyCnkitajMawdllC5ZyjVIM0utm9fiXaID0Ep5gQhtYirIitEQJhIiyMpHp9wi7jdzIYJH9wzDtJuW8BunPr3qpkWuvDP01Ect4ZjsQUvIk6tRSaZE3aDbu0Hpgzw3IGm6CUwHWTGBCLLy+k+ndAGDTYerYiVlGKZboYo+kpEh+ZgtVOdkKrIteZ2yZId6u7XMlAq0lxEMsTDISvvpFkray8PXc+H7SLg+kOQ0KsppbLTLrOeR9Vzyka6fh1yEYRgHIWvFbGk8TbQdC+TqEF7G3C0ji4OstJ8uVtJe/f2lj7sPkkjo+uh1Lp66fv2RQLa5Wdfbw4/KKCswDNNNyTpfrFMG13D97mt1P8l44BDp3vfVqJ8dwUwIk1Ol1f1viDIYj7cRZKWjdL1Pqp/ymPNtv62vLEXiSl93p9FRTiMjm129kG0oL3Se9DsklKIMw3RjUhduPUWBQxK8P22540QYCxwCUhd9dEqJepLxgfmg+SbQhDBRXQ34fMUGKRi9YpabNBVkxXgIk3Zhs6eg7rprakRExLp169sMLiLAoB7eKGS07PCXiskYXmNub/z6reaq4ubKtudAaWho6NWrF71swzDXBD3zvXsHi1BiMyVtV6QmQr422gveaGn2xwFTf6dYW5O/6x/eEff29fDW6ZrL1/9asaqg9xTr6ur++te/fvLJJ42N5qbl79u3r6+vb7AcLWPEiBEQ3PXrN8COrDoEEL2iY9Qo7IWFhYaRkRimA7CS9gD6WD7RmXnq6+sPHjx4442/iIy844cffkBWWWCa+u8+aDi6u0/gqLriXPdh4RcyXqs4sU/96X/9zVWnf+zn4Vnz8fN1X/5TWU0FZDQ2Nvaf//xnQkJCTk7OlStXlAUmuHz5ckVFxYULF/bt27dz504ob2lpCdYaOnTojh07NmzYMGDAgBkzZpw5cwYiu2jRoq++2rNixXNubm5kLCgoQEP33DPjwoXcPn36fPbZZ0q9DGMFly83Kan24+XlVVamDfbVLRgf89Cw2q+2ZJ1R8j0cmykpaK+Yuj6Q5Dxyss5tYG3uUSgppFNZ0AIpqWvoBP2wCc6joxqPaJXr+uuHBwYGvvRSclVVpWJqP/Bnjx49CqGsrKzcvXt3aWnZ8OGh2C0hIUM3b34PygvLLbfc0tTUeODAwa+//vpf//rXzTff7OrqwkrK2ISeqaQ/7HjHYWQU2FJJgRDTyZNv//777xsazEVJar5y5XJ5QW/vwbV5J80oqYt/SOPRLy7nHrlSrP1dIIK33nrrW2+ltemNWkhzczNUde/evVVVVXl5ed98801NTQ1Edu/e77A5p06dhA+Lz6effoICxcXFvXr1UtZkmI7SM5XUwbD9vXuIqTUxRNsFxukYg5u/NtoBUCHOB++//z5Es6ystLa25vDhw+qrUSjwf//3fwUF+UqeYRjHxsZK2q4Yovpx0fqRt+uc+yl5Uzj3QzEUVrKtgReppDqdyspK8043wzAOgi2VtL3B72o+SKzNSG4uvxp72SgogGIorORb07dv3y4cYlsSZ4lhmB6PzZ6C6kAMUeufgqJYkqtXr66oqCBLJxMUFOTqass3JRgHhOM49QBspqQxMTE33zx+06ZXLY8hav2T+cFyyPh+/fo+88wzX3/9tWLtLJydnYcODeGbToyVdK6SKrN5qub3ZGyAjWd6bi+9+vtLL4P20fdyH4hRfC/PQbrGOl2vPjonZ8o2VxTpmpsaPt/UXFGgrGMCDLTr6+v1eufKykrL37PqMH36OMEh7du3r5JnmI7SBT6pNBey96cts3Yy1tP1791DJeFyYvyORO/6qqaczKZjWb1qypDVe/o17vkHEkpRs/Tr18/T09PFxdXX18+uI269Xu/n53/dddexjDLXKp9nHqkwN9sm0166WEnhaUqfqmLpJjy8zssNutpyXV0FEshi3HylspDKKCtYAIbb8BYHDx4CvfP2Hkgfd3d3C1/Gx+qQ4wEDvMS69PHx8QkODg4JuQ4jekg2D+oZhhF08ei+k2lubq6rq62rq7tyxcizU66uLr1792FPk+lkuuKOkxyL6W9tB/xgLKTrR/edCfmbXl7eA42BRSyjjGOQdb7Y7Ybb2z13HGMKx1JShmGI1IUxn/ou6+isoIwWVlKGcUCkWEk3/hRjSURPxhJYSRnGMakubTWrPWMVrKQMwzDWwkrKMAxjLaykDON4TIm6oX/+eb5CajtYSRnGoZDjaEph3z/kV0VtSLufzO9ADNEOM2fOQ2PGjGlv4DkK7rRlyxYRw45hujM8F1QPoN0+6Xff7W1qupyQ8KSnp6diaovg4OC1a9emp79LH6RhUZbZAQjoI4/Em5FRCLS9+8AwjEPRbiWFK7pp06bq6pp2iWljY0NaWlpc3IP4LF68+MKFC8oChmGsgB3SbkIH37tvV3R7eH9PPPH4rl271H5iQkLCwIHeSISEhBiNMl9TU7N///6goCCM7tWF8b19+/a3334HCZCU9AIZUX7NmrUHDhzA6H7mzJkbN0ozSM2f/9ihQ4duueUWZ2fnM2fOUFXjx98kr6rUI2rYt++HlJQUWsQwnYY1o3umm9DBO07CM/3jH59wd3dXrO0E+nX48GF4qQcOHJw+PQaCC+Lj4zMzM2GELIaHhytFVYXh20ZFRUEuYYQsurm5L126DHashXVRA5UnIKAjRox8+ulnkpJe9PPzw7geWgkBLSoqxlqQUdSAYlgdH5ZRhmE6Rsfv3bcrhqizs37u3Ll0nZTEC8BJJNfy8OFDer2zt7d3ZOQdyGZlfYFveJcQR6mcjCgM17WwsHDMmLHwXocPD92xI4OuFWCtxsaGcePGysUV4O1SAdSGtQICBikLWsjPz4MWa/SXYRimXXRQSdsVQxSor5Maun65uRcbGhRRrq6uavMqaklJKSWwFtalNNZqaGgYaDp8v1hLDdT53Llzq1Yl8z0o5holcsUHGWDzSp7ZqQvpiJJ2IPid5ag9REMXkhg40Bu+JBLwZIOCAsmItfR6fUlJCWUtB8oOfYeeLlgwXzExzLVD1soHYmJithZPWLCCtbTLaLeS2lVGDxw46ObmSmN8DN5Hjx5FdhAUFETXRufMecjPzw8lMWAvKyujC6ywYy1nZ/3Bg4fk4u2Gh/nMNU3qT6fcfIcrGabTabeSTpkyxdXVtb0yqr5O+sYbqVBJZUFrII5btmyJjo5GsSVLFu/fv19ZoNOhOYgm7FiKMigJY2Li09XVVRibw37LLRHJycmWPF9F12GxFkQ5ISGBehUVFZWammrJ6gzDMBqujegj0DuM6Nv7shPDXBPY5imoeeukCUcX8iugXUPH790zDNONOFVaPezGeCXDdDaspAzTI/h8xQMppdMyMjLWs5x2AY4VW5RhuiE2G93fWZo8e0WWkmc6FfZJGaanUHyeZbSrYCVlGIaxFlZShmEYa2ElZZieQPyNodVFJ5UM0+mwkjLMtQ29dz9r2KlPV/Jl0i6D790zTBfD85P2ANgnZRiGsRZWUoZhGGthJWUYhrEWVlKGYRhrYSVlGIaxFr53zzBdjPX37uPXZ8waJqcq9nbhq/eRKz5Y5vupPWf2i1+XMSvUHts4ZeUHCRPcpFT13pQHVnwuG80wb13GfaFySinPPinD9ASqs5NjwFWJgei0Yt08ZYERoAta1sXTk6qq8FCarKVApDIyPmiJjALRp8ptR+TKzWa3zhI+XyGFcInZekrJWwAEXVpFkV1WUobpkaQuapGGUx9JqUWvKwuM8LpcNiZ5b0WLIscsspljGertVlGtUyKjxN/oU10tpzqEvFHdcr4rVlKGcSyUWKQyHXTl4MNedU7h/H6wcoqSAbLX2bry4iNHfORZqOfdqPvs03xdwGC5vNGewAgH1rCSq4VVE7DKxZZN6K8LvY+WaZxf4mr3YEQBUZW1nqwKVlKGcSTmrVsWkb9VdjtjPjoVel8rEbQBw2ZNK5K9WqlyMYo/n5kTcOM8eKS6n4RrbLonbhHLqJLk7OrQOxXJphCqsMg5hdSFkg2uNPnd4AH5lVlo5SwfGn1jFd2EhKvXE1C5dDG3deXWw0rKMI5D5Mo7Q6uzP1RG7q8v2nra7YbbzYpJ/wnLyH+D7xch35Ixz+mtpGW61386pQuFekYGBiCX9eWRgBvXQUhbLhqY7UlLJVirur93+yOmxt8f4XbqM+UiQNbKDXsrpJ4oVOxNlu+JdbRy47CSMoxjkX+xPZcZlfsqEhp/sC1OllYoKYnPM4/4hMpCetXevp60j+pSEzePqnMylValu0w2uxzMSsowjkVAoHBCIwf7KCk7MNy7vyJn8nR/WStmi7tebt7yE0T27InShAx6oqTsByspwzgOWZk51W4R9ysXDefdP6F/R+fiU8bFkSs3z7oqWSoiV0wLrTiSafLBTNv1RJd1vlgX2iqsaupPp3XiGqjck70fmnl0wRawkjJMj4SeJ5Vkju5r033qrJUPJGcHzJIMGRn3BexN6dDwVrqsGSpXssz7s9bPYA5T6l42+gg9Pz/c1/jV1Xb2RHpoFEjXaqkJ1R381IVbT7W0S/fuUxfGbC1WrvBK97Xs/+AUv+PEMF2MTd5xmlaUrNzqYToOTj/TSi18x6l1JFf2SRmGYayFlZRhegJuEfJYtgNvczJAfqWVLoZYivJ8mPwYrE73/wFt8ul4dGsY+AAAAABJRU5ErkJggg==)
This then displays the messages that are received by your IoT hub in the output window
![PROBLEMS
OUTPUT DEBUG coNSOLE
Azure IOT Hub Toolkit
[10THub"bnitor] Created partition receiver [1] for consumerGroup [$Defau1t]
[10THub"bnitor] [9:12:39 PM] Message received from [recnepsiotoøl] :
"body": "23 54
"applicationproperties
"mqtt-retain": "true
[10THubFbnitor] [9:14:28 PM] Message received from [recnepsiotoøl] :
"body": "23,54
"applicationproperties
"mqtt-retain": "true](data:image/png;base64,iVBORw0KGgoAAAANSUhEUgAAApEAAAFSCAIAAAAl3RMbAAAAAXNSR0IArs4c6QAAAARnQU1BAACxjwv8YQUAAAAJcEhZcwAADsMAAA7DAcdvqGQAAFJrSURBVHhe7b17dCNZdf9bM8NzNJjBsWnRGXcYqXm0eQgGFENgQO0O44V4Wr2aNDeBQJCbRdyeP4gjfhfWQleslZsfWk5ywTaPtubyI8kKDaZlVrgoy/zSbl36wuCfwsNDcBNoOQlOGjU2AjwRryHk7vOoqiOpSirJJcklfz9rVk/VcenUee+z9zl19i3Hjh3TAAAAAHDguVX+HwAAAAAHG8hsAAAAwBtAZgMAAADeAOvZAPQP6M79zXe/+115BQ4r0LMBAAAAbwCZDQAAwDVGOPLGVW677bZbbrlF3hxWYBsHoH9Ad+5vDrht/MyZM6961at8Ph9dVyqVz33uc8vLy+JP+4cE9j333PPLX/7yoYceolc8+tGPpsCf/OQnP/3pT8UDhwTIbAD6B3Tn/qZVmf24xz3u+PHjj3rUo+S9PSQLr1+//rOf/Uzet85rX/vaWCz2+c9//pOf/CTd/s7v/M59992XzWb/9m//VjzQNqRbP/GJTySZLbKzt7f3/e9/ny4e85jHULI3Nzdv3rwpHz0EQGYD0D+gO/c3rcrsZz/72ffff//tt98u7+0hhfWDH/zgP/7jP8r7FhkeHn7Pe97zjW9844EHHpBBmva2t73tOc95zp/8yZ/s7OzIoNYZGRkh8Xzrrbf+13/9F93SxX/+539ubGyQIH/Ws5714x//+ElPetK1a9cOuNimOcfTn/70QqEg73XC4fC3v/1tyoW8dwBkNgD9w+HsziQVaOD+wz/8Q3nfAT70oQ/98Ic/JLFU/67x8fF3vOMdV69eJZkngzrGgbWNP+95z6My+ehHP/qVr3xFBmnaC17wgre//e1UdF//+tdlUIvccccdFPPu7u63vvUtuv2N3/iNYDB448YNuv21X/u10dFRktZHjx6988476WI/MwMVmn/Qv27FJjh16tSb3/xmaiSZTEYGaVo8Hr/33nv/8i//8vLlyzLIAY1kNs3RJiYmHvOYx9D1ww8//NnPfvZf//Vfp6amhoaGKIQmO1/+8pe/8IUv1Dz5i1/8YnV1leZrlj9/61vfWiwWxa+IN77xjU996lPF9b/8y7/QNI1+QqWfy+VEIEHPUPXUvN2IUDzTHq985SsTiYSYhNI0M51O/93f/R0F/v7v//7c3Nw//MM/UDj1UpoqUsJe+9rX8h8xxMP02N133023jzzyCJX7hQsXFhYWvve971GvpsAXvvCF7373ux966CG6EI1AQFOt8+fPy5vWednLXvaiF73otttuE7c03xRlZVmSNYVPz9CETjxPrT8ajX7zm98UdaH+nHrI0tKSuBbUVyVdvOY1r3nCE55AF2pLoAqif42f0ytogvmJT3xCjYGSRyHir6FQiD9ovpQySN3yYx/7mAivaVp/9md/JsKBJXbdmdokTfM//OEPr62tyaDOQFrdM5/5TDvxKcTb4x//eHnP+fznP69Ku/oYRIeinihu62kss6mNvfOd76QxRN5zqOM0iLCeBjJbhRJPgurP//zPKX4Z5Iz3ve9999xzj7zRtK9+9avvfe975Y3CgbWNk2SlmqUGpopny8CWoFojZVrIYxr0aDSgFP7TP/2T8ad//ud//ulPf0rjMOX0a1/72n/8x3+IH7YNja6UZrqgZNOwJgJdgSTL2bNnDbEtBPbFixdJ6IgHHNKkLvf29qhHieH+vvvuo1GVqvaLX/wiDdA04D73uc+lP9HArQpaCqfbmp/TUE7layliDalDUJX8/Oc/P3LkiLglSLQYnY1ipn//9E//VNzuEyGw//7v/94YEehW/KkeeoaoEedUJg888ACJ6nPnzp0+fXp7e1s8rEJTwle/+tV0oYrzfULNV4g0Ic+EUKTbmpJ0UvgCIWjtCpaEaDgcpqmGMdOiSiGB/YMf/IAyZTxAF/QA9ShKD9WUkRLBi1/84pqpGD1z4sQJEv/CHEdpIGrmCgIjI/IetAhJyrvuuosmmtQqOi2zG0NvFwloW7a1Ab2Cui1d/N7v/R61Ohoxe1sIlnzmM59RZTbdyqv9QQK7C7ZxkpdPfvKTb731Vr/fT3Jahmoa3VIg/YkeaG82QH2fNCKaif7qV7+iCxpODfVXmMqf9rSnGbePfexj9ymzSWDTYE6KFl3TBf3rotgWspnEtrhtT2ATTr/1+vd//3eS1vKGI2Z8JLBJDaWSNYZjuqCSpUBxS9AQTxM9h6UpLPskBsQtCZtKpUKCnK5JGIhAV3jVq1518+ZNQ4jSBSmdFChuW4ImxTQHlzddhDoYiVLqEjQWy6A6mhY+FTU9QEJR3tfxjGc8g8StIbAJqhT690tf+pK4pT/RA/QYXVNUpVKJOpKaJEoDdSd5w6GQQCBAvzLGCEoA/dao946imj2Ixrd9ANUFdaKvfOUrpL+KEJLiy8vL/48OXVMIiTSSZ8LyQf/SNYXQNamYH/jAB+iZj3/84xROgSRRjF/x+KxR30KRyNB9QBFSGoyXUpwkkMQ1QbfiXWpgA6jLi+cpOyKnArvwGkQ50MOUnr/5m7+hW7omxYZ0DLpwmAYDGkOI+ut9Qv2LZA+lrSn0WHsCm4bld7/73W9+85sf//jHUzyzCnRLgfSnZDLZ3uhNcvrb3/72Yx7zGBpzKAYaZAYHB8WfyuUyjTxiFkjTshrx1AZCYJMU+L84dEG3FCj/7AYkoakB0yhH0EUbAptwKrOpsGomSjT3IVFK1XzHHXeQRJehHJK7FEgXAwMD/xvnRz/6kTroq9Ao8L9zhBpNMzKqDCEAaGT/9V//9evXr/MHmZCgof+P/uiPGogo5wwNDX3jG9+QNxzSg4XhvVVI2aX8urv+4RDSPmmCLK5rStJJ4RNUwvSAnRZLRU1lXmORo85DSrb6E5oTkMSl+qLr73NIsRZ/IuhJmrpSVEKhJ4RRXY2WnqFeJ5pNDSIjlK/9rCkY0GD6kY98xBhSG9/2BySqv/Wtb1FXvfPOO2kYpRAa5s6cOfPqV7/6Pe95D1Xl1atXKUQ8bMnRo0c//OEPk7ZKAola16c//Wn6Lf2KQoSMr4fC6a804NKTBIWQJBN/6gQ0HFEe6UWku5AGI7LZAKripz/96aTo008oO5QpMRWwC6+BAl/3utdRoakGdrqmqSeVJ120sbZt6NbGxf6h4ZT6Hem+NVAg/enUqVPCqPmSl7zErh6bcvfdd1Mkc3NzVOaW0J9I0IplxDag8nzwwQdpBKOB7haO/IOrqAL7PzkdEtukq9zKoQsZ1CJNZLYxXNK1MMDS0EwVTCE01ltaMlVI/6YZqDC6vvGNbxSBNdAUiR4gDE29WCzSv9SqSAbQOG6osDSsLywskGZJHckutm5Cs7+3ve1t6+vrv/3bv724uCgM5j2kpiSdFL4KlTYJRSEahfRtG5pd1SjN1OXS6TSJ9kQioYY7wciIMMXvE5pf0pzSmGXevHnz4Ycf3t3dFbc1f+0DaNAkUU0CmwQMTc5OnDgh/8B5wxveQCp4UwFDolcIdRrlKZK//uu/pmuhlhlLVzW8/OUvp38/9alPiVtqEjSyOxQMJICFpitw8iua/4lcUNpo9lyTzRoowhe84AXGTIV+QpmiAccunP/IhDq+mI60IZgbINRrgQzaN8I2LtVeBQqknNK8hFQgmn/QZJpqVv7m8FEjsEVgJ8R2PB5/6Utf+n9z6IJu5R9aoYnMNoZLQzyL9ezPfvazt99+uxh8aSCusXvQbY0xlgZBGjgcSgIaQ+nnz3nOc4LBoJDfKjT6f/KTn6TYWh36a6Bh+ilPeYq84dCtGLtJ23NiIP3FL37xwAMPjI2NnTx50rBy1MTZaahISTpSicl7K9TCr7dQGUYRMSWiyjVaLUEx061hjxIYPzGgW2oYhuZNF9TWn/WsZ4lzDwxo2vflL3+ZwmkuWBOtyEhNs+kEly5d+oM/+AP6V9xSW3rLW95CjVzc1vy1DyDpRYJHCKEawUninG4/+tGPiluHGAL1ne98JzUnUsHlH+qg2YCxXH3jxg1qDHYCvgYSwCRODIxIHOJkoeqRRx4pl8vyhv9EaJx24Sp+v5/+NaYjLkIatotKNkHzKhI5XN2tggKpp8/Pzz/+8Y9/xzveQfrGBz7wAfmbw8fznve8hx56SBXYAiG2v/GNbzicazZGbDqjAYc6I0EXdNuG2G7z7FJqCl/72tdo8KWhlrJE/VbYYwm6oNsas3NjA2w99HPq3o973OOc/6RVPve5z1H6DdMWXdAtBQoTt1jYfuELX/jiF7+4Ji8N+N73vkeRvPKVr6RrsdvZxSlzPTRroQkgFVHjUjIKn2QtVY3QGyidt912GwWScH3sYx9rp4jzuP81HA6LX1F1v+lNb6LY1J9QMkgwiM2cBjS1osfsDGI0jVCjJe677z6S+g1s+KANaKy56667DCl79uxZkjdCA6Y/RSKRfD7fqkSk56UsffWrX//61wud2xKfz2cMdtTwSBz+4Ac/ELcd5UlPelLTr3VpAqFOGY2f2IWr0JSCpiNvf/vb5b17uKtkE41t4zQyUB399Kc/pX7d3rJgf/CRj3ykXmALKPAv/uIvWp3X1kOd5SUveYm66Ywu6JYC6U8ixCHNvwGwg4ZXqnKxmZxuSUSJ/kma2ac//WkakalZCNO6CBQfCAnTOkHXYrCgX4kfko774IMP0gVBcwLSs0nGiHhEIAkJ9XOmfY7vouwSiYT4iItE9R//8R8L+/bi4iKFr6+v03WhUHC+DkdPkp79f3DE92CdMJgPDw+L1QpqT8ZHVkRNSdYXfi6XI8XoNRzxSR4VL4XTXylEjVOEC4SlXfxK/JXUNRK6xk+Mr/v44yb0GD1DFzQi0IX6YRjFL17BIuXPGB+AEUYGKeXf+ta3jIzQb6lI+SPAEUI803zUEMzURMVOtDe84Q0kjVSJS6rw7bffTv2OHqa/Wg7i165de93rXkeKWgNRLaD2QGoExSNe/Vu/9Vv0OiMZ7SFEPg0IpKbcf//9Yg1b/InmBCJVFE7th4YgEW4JJePf/u3fKHmUSIqKfiiWD+zC5c8UaBB/5zvf+aEPfcjuo68Dgt2+cRqd/uqv/ormcNQZr1y5Mj09/Za3vOX973+//DNwGxI3X/ziF2ssQBRI5b+3tyfvnYEzVQDoH2q6MwkVGiYMYxJBcoiE7tbW1jOe8QyaQItA0rTEp9sk0cW0j2QzqZikhZMUrImEZADN1MU1aZw1Qov+SnMCETiufI1N4lBNBj1m962XGoNATJrFz423iw2MJLM/+MEP0gNHjhwRtvdf/vKXJLAtpxSU96jyrZeRWSP7/CnrcKMQ6K/i+2yROxJ+9ABpLDS1pZfSD8W34J+v/ujcLUSu3YJU7UceeYSmwsaF/EMrkNZOpZHNZkulkgyqxu/3x2IxKsC2v9IWUKk+i3+Qbey6NaBJyd133/3Nb36zO4ac3gKZDUD/gO7c37grs13htttue+tb3/qyl73s1lutV1p/9atffeELX/jYxz7W3pzA4I477njuc59L0wt5X83Pfvazhx56qAsbYnoOZDYA/QO6c39zAGU26DJt7kEDAAAAQJeBzAYAAAC8AWQ2AAAA4A2wng0AAAB4A+jZAAAAgDeAzAYAAAC8weG1jYtjznrC2NiYvAIAAAAcg/VsAAAAwBvANg4AAAB4g9tuvfXWXzTknte+9eX+769vluS9yT2veesrgv/1pa8X5f2x8d993b13/epLX9+imxe85q2/HZTXjGOn3vi63xw042EPhwe//7++Ke7NW/OH7Ccvff4znriz/s3v8QdGbxHxGQ/fMf67rzz2AyVt7CfPvO1L//E065SokfziN0797mufqd8wqv6qQ9l/xXElHyIk9ESRcjPZjQpKQMX18qfwvDSCpXbsKXqpHht/zfMf+fo3vyfzZRS1hD38fFE+KkqaRRk+xciAmmAdVo/PH6hNuRkJK6iXPu9pMss2KLnjz9/Fs1BTPq8Yk7XJUv7Sp1hGqCS+BqsCZO/6zUGrUq2pTXbbepOoo7WKqHqpiXWB69hk875jtwz+5vOfuK6/mtfssbq4m2ehFqt2y1I4dlREzq7Vbs6wr74a1AYgsKsI53FyrMuQNR6LvllVa1U1bmJmU/khL4fn8O6jJ++psrieqleTdUrsKoJnf1RvKvRbEYl1u7IrK+sUVmXTJlU12JU5b28/+F8/f77expQ3VmeBpcqi5TOUBEtYmei9lf117BkiheaTvFXrY77EqiTV9NRilymvMTAw8LOf/exXddzS1FH0K97+3nt+nH3/RdW5zSvOvffFzIWsTunL77vweXbx7LPvij39sTzs59/5zPs/8RC/ZDz7jbOxY/9mxsOevOu72blPiHv1lt74Yu6ytvTlB7UX3fMwj0eJWdN+8h3jyeq0sbc84SGWGMuUsMAnfvV9H/2f7Oa5b3zX65/w1fdd+J/8V09TPd/cfFA+wzAz+/Nvy3cZKaQ0PshiYFgVlArFI/PShPvOvfdFsnT1N5r5qkV52EwMy9rTROZL3/7Ok54usilQMmtms6pC9do0AksPfubhe+7TPqdXlhWWMRBq6X3nh08/JkuAkv3ch43ar0b9Cc9+VR6JqqalVLTIvm1tttIk7GixIqpearYf6+JqmE3e5MxoOVU5lZE3z0ItNu3WTKFSmzqNqq8Kln2lmwssK8J5nDpqGVZ1w7q+WVVrSo1X1YJSO0bB/vw7X/7usRfx8tST9xRZXE9RurNVbTaoiKqKFiVg266sy8oyhZbtoTH1ZV6VNsu+Q1S3w6qfKH9i4Vp1i1Vq5yff+c7DTzumNzwj3HbMZ6jvVTJbNVxbZcqb3HnnnT/60Y/kjcItwn97A16f+OCLf/Txd134irwHbcIK8sd/9a6PFuR9f9Hfuetn2ungk4kPhn/88Xd/FIPCQeIFb/8/f/+JhfvTK/K+OXb1SOFP+/b96c/IW2/RL41zcHCwXC7LG4Vbm3L7wJ133vE4eQPa5/Yn3HnnEx4rb/qO/s5dP9NOB+e1jUHhgPE4Viu3yxtH2NTjS+4OPvaXO/LGc/RL43z0ox8tr6q55a677pLi24Y3pT/1mqfyq4e/+sG3/ff/j1+CFnjZf/sf5+/hVpyffHXhLf/9Czyw33jT+z916od9m7t+pqUO/tJ3/Y/7X8DbMkaDA8dL/9sD9z/p/33Du/5S3jfnze//1Kvv5lf9MDT1WeMcHh7e2dmRNwq3jIyMyEsAAAAAHACe/OQnf//735c3Cvg+GwAAADhYHDly5ObNm/JGAd9nAwAAAN4AMhsAAADwBpDZAAAAgDeAzAYAAAC8QfM9aPGFXCzAr/YK6bPJPL/sPpHkcmJ4NXo+I+/dJz6fiwU7kcfx1PJs2MeuKoW5M8k1HugtpuZzp8o9rH2CNYAxX3ElOrMkQxrSsdrsMC1m0wVa6uAieezKcdmaP9GK2ehM5zowaBnq15NBflU/NFEPCm3ss74axe8Ac+R01HLaaJwHmX3tQausp6OEWQpUnVXMT8k/WEDVVst8nJdv7mIqIh+qvXUKVWout5yUv6PRR0TuHpHUxYa5c8Ja8gwrvmxR3jfFLF4ja25BReR6nK7SYoFT62qj2YBq6jo4h3eu3EJVf8qneFtecdyWx1PTY1phjv0oCoEtEAXL6X1nJPHGqkYVqGL8iQW1YEwf29n4rOCsh8bnJ4M0++S0pauIkXOuUJH3JpbjWMuN05u0ZxvPzLCyYUJIVEkjnWCJPxtNF/b0ocHFrhsc9O1VtOHj/CYeGqrU165jeKZ6Pjtj/TnmlwUVXdROp8blXw45okM61j4PRm22TovZ7BRsjD6nbW7J2/ZhPXTzihdtSx2CZpmz4ZKUZAewgzMDFRt/SPJtZSmFZlOU0p0JxeCkA7E9PuLXihu9bsn9x6Pk/13CtE5wcd7O0ENt2jTDUgOaKCtGFcOOZ0a+u7k5FCJdIDMV0i6vliYnRqgPrFmnhAKntcXV4URNJObD1Ex187tpM5zM5SbZ/2nOcSbF0mX+SbH5UODETnpRmxZRtZf9eCzsozTwtxD51Ay/Iu0zMXg5uhES71UMTTbWJyX7MtwMCSRyuQS7MDPLOqqMRc8joZahtmdx8q0CxRDamCtPCFuWapsyU6iUiajlC9q0eJ6nxL7AjeQpeTTtZkE9P9KAZlmbhJqdpk3ChpYrQs2+UraWBW6VTR6omalSb1liwgM82MgpK5bBVZ5AFlV7RkJSjodXo2dZjYRlUJtEjvo1rbblWFaEZZPgf7BDyb5iO7Xqm/TktHZhdXBWFK9qaDUrwigrljxjGU6W50yGkhcqF4bC4YFKYWVzdDLsM8vWqjatKyKSOhWkZ4w21rSD2zVaixQ2yqZjmKCtbF7Na8HTlZ3rMrCGpZn00eXEqVRkiWffruXTdE1eqSgFblSxqHqzMKvG/BrMArEYxw4Fru5Bm5pPjJXY3EzOxZZdnkIGYiQU9cgNG/j2lWv+0BRp2Zo5p7NPiW8sISJJr1eC1Ox4oFBuKITfSTLnWVhhj3UVgeiN1GhiQ3LKmV7XwrOmNZ4iZ32pOvJWiIcCNDW1bn80txUpz275wjH+Tuquk35peFwpmSkZT53WFnkoT+E5lhKRx+wWG1bEn/SGTl3d0OyzpbGEnEFXlyEPakwwxsYOIl3QwtPSchWfD23wKGpqTdMGwgnx/FyhEpigCrIrcNWuYyLsZpQwGg3ZXwk5QlnWZqtNogEtVAQbzvRwMzs2BW6ZTS2zsaUF2aSUo+gu8YVEeFdkKF0YiimmwmCMjXo8qoHwaUdmzGqobPc9CJLsJNjwShXNDaoyhQ1GibomYQ8Tcnr2CVn19n3TF54VZUINLDihl1V8wbRpNbfKBMIkVlmlT1IiqWxHT7IU2tUmUVcR4ydHB7hEtMKiXbU8ohrZpEiCsep1DUesXdnco0iW50ONfEflb5S0gUFm3rRq+VQLrL6ZIGfWdYaekviCMRxki4GYMxt7Ffbj2GHBRZktppCXZPktzVDLG7234QCod2bCmEs2YisrR72ljSKNY1NiFq/lr276Q/MksvWqa5gSPRL6VUU0u9aInx7zFS/L7p1PLdIQQCmRkPzgDajdyBuipzxDuR8aofxE7h3V1hflhHTpkpmSteSMFA8OUkLjiFZYlM9nLpHcYhKClWFxpaV5Os2yxfP5K9cqPrlgkZkxehSrNT+zgkj05/kwMSjn3h3C1SbhtCLES/VwA+sCtyWTJQEmn+AvErmg6V0xK8s2n7xc9J04aXS24opQU5i89x81grsKn4HxmZM+qeKF1niUcNwkpk6HB4zsGzTqm3qZqI2ToZZbE/YKl/hsyUw/0bA27SuCJL0Y+RQxXNuuGpeVNfobzcbZIvnkWTbdCQZ8NJe1XW4vlsWM2LLlC7HK5tNM1+foNZU5bwwpvWycnsblb71KN0TbdYapIdVpRU24Xt6TVwzq4UNBLrLN8NZS0hqVso3aWbl2Rb6VaYEtCbzmmPr30ozQCY4Ps34luj5Ne3Q7IWGMCLmcNCDbExz0tTp5coI+Xgh9i6PbxATmMicbJgxrYedwq0k4rojjgwNWL221wJkAk5OAkyc0qaUxhVtXYgjd/M4xFxFJcAoxcKCwrQjHTYJN1vfKVqZb275pSeY8swmJumhD52M0qs0GFcEyyHRNecuob1fEvhptu2oDn+5UCisFjVq1pbKu273thyAbpswtyfoSBmgNl2W2Mm+KjAzJqw5Ao6HsnHzRRe3hcnreyZSoGgAbl92DzTkaa101mAYijigEZjXV9PmQ1a7LWpTJE6NWfWmL3W0abJitktRBGa/znfMdoaON06oiqmeWKq0VOFMNWatgKp26n8soWE5T0+6BYf8VwWyz1rTaN4XsZN3E72RflSXOa3Ntu6Q115VV9lVW1tMaJ1DRlbaXkoukSlkp6/FQ0IjccgiyhhnSjZ3kzL4N2sBFmc2NTmOnpcDhxqvV9ub4cnrIFoqqNDOdSHIi2Ggzqnsp0fLbuzVClK8v6quePCXSYuYGzMipKcs8keR8gxWszEbRNzZt/QAXmawMz1Xp2dd3KrXGwKWN4oCx/GygZJz3NB7oDPZ5j89UGvS+HV+wrs1q6gu8IcVyRS4rNsbFJmGBTUVwWasu4QusC7wRzGg/NBK/d7SkG36F8t3OgmWPcakirMtwH32TSVMFKaji803NVK3VJjOe2/bZWhqWVZMUsu+sTLNfq4yP+Fm3jZw84dNHEhM+Ea8ULrCm2GgIskY3hEzNV+nZzcb8GizGsUNDezI7rn/Ax/ZNEELG5FNn0ut+aa9jGxPaMg6zZRth9EsMXq7WzAIy7sSJTbHJ8PiwdYdqMSXSkszsWuIVylCYOc/2SrBAfRNN5nw0uyutYWyHiLv6zdIM32zCY8/lprVLcq3IEvZwKTwrHza+TecroCLNicFrVXo2s3rpxkA9m5kZvndGhBGiNs2Mzw6uOlHW2f4X/nv+KYuYbudTqzSiiagndgpO9Oz6AtftadTexCuUJcA1UgU0vQRE9q1r053GaYdNRVS91MiOTYE3zubqbjg2VlK+nCEFkW094z9h2C49toPo4Nx6qZShK7hUETVlqLf81vqmzCaH7SPTG63RRybKK01bvk1t2kDZV5pKE/lkV1YNUqgPHSw77SyLiEZI8wDWbfkuP8NsoHdkvi1O39dt0/KtoWa8pY8Sp8oFQ8+2GfPlXjY2KRF/NSO3GscOC47OQZvYaav6QRVNvmHwOP2du36mnQ5OI3uvz8UDddBslX0w1sg6XYNdPVJ4aMOdNbLu0y+NE744AQAANCdy1G/7cTboNY5kttwZiEMi22NcHFXoaJ0GgO7jvIMrn96CvkBavKu+/M6nznjRsHpIGmdz2zgAAAAAugls4wAAAIC3gcwGAAAAvAFkNgAAAOANILMBAAAAbwCZDQAAAHgDR2eqyEPm9tryxesSEdVlbEeIM8euncjjuOHpudq/rB1TNv5oDwOtlhWwgnWWMZ/pmnpfOD6po8vt1mwqzHmrGzntHnxQ7X0LN8f2Q+aC2hPsa9+4PAXeFGbqmX+MRsf1UU+uhR1Bx76lU74Hrbl1Cv/02Ti1kZpgk8PzWoYdhNn4MMLmCE/PLXnIkF4HlC4tP/JmOEwPL41qh7stRaJWXNXpgGbtNz0vU34xKTESw48XNaqbv0imp4Wyso8E9AB2wLXu/qFrokh6SfGWwG4N1mctxjSlZ6l/5Z1CUH2ip3i+poOY/lKBd2jPNm465xe9tFGfWeLPMlfzhgcY9456Dg769iqa9IYbDw1V9tH6eKYO6Il3zBNASQyIzAFRtSS2gInV0E7NUcmR1LnRTemd3oH/fFlxBDvXWhfPNCjYefi3wfB6xM4lFi9lbtkqmnQUGA/5K3b+rxrhSiT9CTvUusuSjPkGNV1PgsZwYbmPmc3UPD/0m8FO6tZnrsyh364MLgbUPpub1jZb0BnAAcbl9WxVr2pT6SGFyVS4SfZUiRauO1ZHvru5OcT9QE2FtMurJc0/wp+3TAkFUjuuj8R8WJmc8seYR1jDY0e1Qi8wk0eB9IARVZvZt6LKQxE/Z19158ffWFNKE+W56MxVeauTT57Vh4mljWKV18Jai0U1zNeWpMq5UK2H/yYwl/hGykub1/zcJ3Q8pK2u7qo+B51jF4mNtqFYDtScWjaVqkhUC5Biq+DoWo4ZebPJEI+ZXqS3IuV520gUy5aZGMtsGk+qMbBAJWvqrU1ZmfE4cIpM6A6VFWyzaVXg9Lr5FA9fTsZ5kpoWoxVi9DDqyMyRXTYtEkMhlqOETSQs5XHjjWpTsWxvZvup1p7VdiUj51VgesggRJlEUqeClfVLQvNhDoGEa7vx1ESgUsjKYOqbwvNVJDk9eDl6JrXNwx3CX11dUOCA4KrMVmZ/jjS5VgnEJna4zsYiN1r89hU+cNOwbU7z7VPiG0uISNIkb3S3fUIvqbER8bkwMw8YDl/FeX7UpWNDUndMM6dSZt+jyNmie3Xk7qB4xGN+6KRpwZrMeXeNk/FQoLJ5VX+/4pSXuTG2cq/rhO2rm36S9zTTMrx2to5lJIq2oVoI4vPMMxIP1quSwTyH6k1F0U0jydPaBRGWLmiGs0Xm21QTZoYV0lsq0tUSDbhG5MycUD0cW0ETQdEOs1u+cIw/bhsJDaCGbcM0Bdlk07SBKXAnlcbsStGJbSIh4WS8kXWBBkiZx1ayddGijPUW2bTtm8Ew9Z2Vom8sRjKGnm/Jz7TJQDgxO8g64VyhEpgQkdtkkyXeTIxS+5ajhF0kLOPijRRuNhWb9iZWf2od5SmGNFNF5lXJnjQcpYt+zSxMen8Uvjj5/JsZHXUPxayQfcLBJQ1u/bx2cPhwUWZXzf64e7VmvU537kawFtaUraxs+kxNDJKcjhz1012eDdzzyrDdMCV6JMwnsXTa2hLx02O+ou7GmLmE22MpkewV0nwrR7uRW8Ni00cfLmOqyopPOFoT0syVdY1rYT6UmCMLR1dBYsGtVVNBHwifNnSjVo72pfm+1NGZzKA3Xtkc4tXW3oBiGwnNMIpZuaGG+SNX/OzaNUilBnXyqRm9SLkbYzFJGj85agyXiq0icu+otr6oF9GlqiZhh94OMxQNn/fYRSKsLIvVVdMwmxZw96xSaPMXid5hE8nU6bBW/0ZrxHyXz2B00aLuZqrNZoO+qeuI+3VIr0+kmItxUUF2ZcX78orVUp3FKNGgwPU3qk2F4XTaUe3qOzNDE5eGtckRSn9MW6H5jWKmEvr6pJZl8zZpdGwdPl1Q6xEcGFy2jZduOOrnEmOlk89nZaAjrpfVuT8buINcZJvhraWkNXS37XWYTuaZCHRv2V71En1OW12v7MfrDrMT0OjjYOVeDsdUOzsTutGPDSj6YkFog0bqOpf4tVS53VXLhAY4v6y2nbb3IdRFwmS5YUtUHQZkZuYKmvRzrOjBVFNGjmxs4OaEcm27ZAzEU6Ggrq0eH/ZJNxsMR8bkojHDXJoRqrNdJMxJfH0h22bTBibAxCQgcvKEJqcdrUbSOvXZJDrZN2lU0XVNkqxnuepsl00WbtuXa3FeVtLyZNPe7Gjaj6rwhWfZZn5iZikyMqQXqWFjoI7GElzalkUB+geXZbayKslaUsdg1iHR2bj00jsnQ6o+nUyJuhJMKZFXHcUQnzTwacO+tkc9bgzUDOf5DqkyG5h702auO/HZZ87MlJdyAzvLlD6Xb2ztt8Y2EsOWyDFmJ3JTOk0Q/TF1GNVzlN0NJ6TYZiZHaQOvmlCySaGUrGybtJkjfX+lpD1rpGUk9hMam2xaw1RAZh4fPzmqGVKNaCkSd+jWKKFilU02A2sJZ2VlSF+79maJssYkzIf2sEZITUVvY/pgWCxXTI1fmMrNZSzQN7gos7ldaOy0bJpVm5VaRIoHtqhmOZvlpiR13KnBvZTw7VfV26z40qC+xFVt1OoG8YVcTMuqIoFbsB1tHdAFtpUhnauVyhJdFfFY2LdlaEwSFtuJTYcW1O7BFcpYw+0zbBneihrpKCdG6mIENxobctWohcxG0Tc27aQKGmAXCV8ZiSk7oTgOslkDi2doJH7vaElf2bGNhEZ/sa2JtTdne9Cc4mLfdIxtWVFf9oXPKcaVBjgpcN5UTNOCjl17M+BzYnPJSV194xOLmqUWUYayqZiDIUuhkR2+BmGY/VoGe9AOLo+S/28NtilGStNJUjjkmQak8Wg0jrM1FoKdGFDbeJ2wNJMN5WI8kuJKtjg5IcOJgAjmqhuf5MaHfdoO/1M1LaaEJgfGwMRfoZwwkDlvJIfNbc+k8pnzUW0hR5En2N9p6m0z3XYTs8CZKtZsjOOyWYoZZlGfZSWQXGNjgR7C/6YXoyVqJEqBKGVFgWfbqWG+x7gsr9vGNpJ88qxGiZSVr9ca28Rr2jPNJlGVTbM2M5fWJxK8bVNgYb0SHmahbJn5VEKveoY8zYM0dW0+ZxQsi6c1SwbDLhJS17TUMoWzxBi11jybQbPq+f1acjWWi41RtPyWYRPJWnLx3uUETwmFZLVESPzZDdwZJVrDJpusd6t9Wa9Na2wj4ZZqWWtmDA7aGx9WeC1XVzGL2UxGZmYllJNNUdamLEPxUrMXyxSK7JjJU1OiDNfg4DN1zmLa5OgctIkdo3WCtiG5O1F2cvIR9bFTZfePY/MSjsuqy9RUDRsNtXbEM9g/4yTkBld7X/gHta06hk0jOnvEJGiHI0eOvPZ1r5E3Ci6vZwPQx9QsNMZDQfXLNwAAcJGlC5n6/xzJbLnpRt1VC5wjdyBbr81bI/dau/2B+8GnjbLqIuzTPs38QJF9pn+ozSE9R27krl3sB84Q58Yoa0PAAzS3jQMAAACgm+zLRwgAAAAAeg5kNgAAAOANILMBAAAAbwCZDQAAAHgDyGwAAADAGziT2fILnMP36REAAABwYHAisw2fwR4+6wcAAADwOk5ktupiHQAAAAC9AevZAAAAgDeAzAYAAAC8gQOZPT7i10rbWMkGAAAAekpjmR1nns/PaYvwNggAAAD0msYyOzMTjUYvaNO5eQvX2wAAAADoIg5s42vbJc0/gi+zAQAAgJ6CPWgAAACAN4DMBgAAALyBE5l9vbznGwzKGwAAAAD0BCcyO5+8UPBP4rxxAAAAoJfccuzYMXkJAAAAgAPAkSNHbt68KW8UsJ4NAAAAeINGMjsQCMgrAAAAAPQa6NkAAACAN4DMBgAAALwBZDYAAADgDdyV2ZHUxVxuIS6ciywnI0bg/BS/bJXx1HLTo86n2KtS41okuZxr+1x0VyJxB73oWN7bLTcAAAD9CPTshjBZLlC+TTcDxQSlCfEF+Syn9ht38VfIZgAAAE1xV2bnt3e1ys51fnSaVrqRl8EdpViucPfe+Rslba9M724H60ji85NaNspIr2vhWV3/XmLezjjpwlBMNyc0orgifxCNnkmqnsin5mNDxeKevOPoRcdcs1TKRRkKAAAANDpTJRAIbG1tyZv2iaQuJgYvZ7XJGD//tJg1vHGPp5Znwz5xvZWNnteddJMiO2mclSqej8/nYtpKdGZJBNbcWhNJLifGtMJctZhsD5bU0c26qEhLnthJn0k1mp3QM6ENy6SKXKTLp6h8muQFAADA4aHHZ6oEJyfKc0zNzG4FY9KeHJ+fDZekApotBnSFlaTjpL/AH47OFSr8UU3LbGxpwZBuiJ4KBbXiRu+FXDwUqGxebdOcEF+IBbeyENUAAAAc0iWZXVyRGmpmo6gFmOyNJCeCe4VLUmJlZlaKvhMnSWjHY2FtfbFeM85kCxX+QyIeClbWL+lauS351JlaW3SbRFLnwr6tVSMqvlWNIKFrBjYgyE5rZ5iG9PHURKCYNUwLAAAAQDO6vgeNrRzr7G63oKKuXdncC4bYXi3SbourDc3R7hJfSIS1QlqRr3w2wEjvTOQuphovaGfOi2eJbGkswcU2mwSUVvQ1AgAAAMABXZfZwUGfsclraMSQdpGjfnllS/7KtQozj0+FglsbXZN28YVcjBTis0nLOUL+6mZlYPC4vGsKs/Azxk+ODhjKdyIsrpvJfgAAAIecLsvsSOpUsHLtCsk/Lu3Cp+U3TvHTY77iZSYXr+9UhJGcAueNHWqcfGq1GJhYPuUvZB2JbG7B3pf/UCmwjU1zdcRjYZ86geAfVdtK36n5mFj/XktKPZ2RLuzxjeU20wIT8Y2Zg6/LAAAA9CVd24PGxA3plKPX9F3WJLfmhFtuIuZfT4vdWPnUYkELJ1jgRHkuW/2tE+mpPp+2ecWFJWoHsCVn+l8wxpPI4PJSX8xmxDRluzvBDPiaVqV5szNSJOzLsX2sry9tsNJQjBMAAAAOFV341stNnHxb1VuYaj5USDdVmtuBfTUX3q2eJQAAAOg7+sJ/NrMtd3X3WWtw23WHBDZX7iGwAQDgUOMRPVueslJx54AUAAAA4ABjp2d7zDYOAAAA9D19YRsHAAAADjGQ2QAAAIA3gMwGAAAAvAFkNgAAAOANILMBAAAAb+CuzI6kLorDwtjhX6YPK1cQx4Iy5utO7+RnjXXovG7x3r4/MXTf2eRfkLOqiS/suy7EKa0WFQ0AAIca7+jZ4oxu06O2y5CkcXmSITCnGoyOvKIVOpVNN4nPTwbZAez2x7wDAMDhxF2Znd/e1So71zXtenlPK93o2oFlmRka4TtyXKg+V9jX6WOVwhxFQRi+OA8e+85m/kZJ4x7bru9UWvOyWsP4iF8rbkjH6gAAAEy6c6YKPyh7gF/uGUd7xudzoY258oRw3mWET7Hg9M5EYowFV9arTxcntXV2cFXRwCLJZfGktlVzrqfyUs30zWU+r5+qpoTo6FGxw8OZm5DaZBjhytFs9Lpp7cLq4GwsyML1N7IEj27qx7exd53YZDmVGdkI5fjzZrFYRm5TVoQ8IY5QDomjwFPl9AVtWjzPs9NGNpWfqM7NrAu2ATwezekZdnVVDAAAh41enqkSSZ7WLghFM13QwtOmohmMsdG5LjwQSwzz4LmCNjbd2JlmPsX0w/R6jcmcy5XdLIuEoQuA8dRpbVEEpde18Dm27CpiyG4xiSX+ZMj+zHl2R39SIQnEDhXnD7JIZo1lV194dqLMVOp0YS840VyfDsaY7zL2hqLultQ+cquyIvE26ZdK/EpJeVjTBsIJ8fxcoRKYoDJsNZsk+BNjJVGC6XV/TF+ijiSnLQoWAABA5+mGzM6nZnQFK3/lWsU3bHiqJNVQDPrV4aRHCnHCXFv6BoUa2RJTp8MDxawuk0zWkjO6HskdeKtOMx1iuvommOfQvWBIegHXiitClazJps54alr5LaE/n9nY0vxHSSY2iNyirCL3jmrri7Jsly6pKTGfb7cM46FgcUWKZOa5fGD0pDF5CoRa2h3GpwvOlGwiOOjjNnYAAAA1dGUPGqmDcg9WrtY8q2LjGZoLs9aIHPWLtdU6SP+WKckJu3E7VMrVbr2bQfq3fGNpJSrchHPMVVvSdHWjtLPIeVkdH/b5xrircYZhr+bsGV7G88mz6ksdEhkZMryeE8LgzyABnN2SPsU78mlAaKNTWxMAAMDjdEFmx+dnw5puj60zYivYbFxqYy8b2w9lRXwhEdak5XkfW9BVtfX4oCoprSGVV7zSiex0FrleVqahm9O6bG4E37xtYCrKwpYedX1LndgHtxHq1Gd7AADgcbqiZxtylxuHeUA1wmi8UWvKZkunA21tIV7aKA6oC+cKUtpFUueq9OzrOxXfiZMORAWzYwdPGYu7E8G9wiXXJKWDyJWyymwUfc3W+2twnE1mgQ9ONv5Cmn0d4IQI+3R72Wk6i+W21iwAAKD/6ca+cXX7cWHdHx5e5buf4vOKxZVUOqkjmhuhCcv93gLxJ3UPM8fcPa7Gr+7ilqK6uF7wj6n7k5WoZCRVKSSMbdXK1m4jhezng5dlLlhqRTbZG8194yYs3Hp3tFXkNmVFWBaX2DdubWFuIZtVZS43q1cXuFnajeDxYN84AAA45QD6zyZRMVGuH8cbyZtDi01Z9SWQ2QCAQw/8ZwOPsLZd0vwjrRj8AQDgkACZDQ4amRn2rXkO540DAEANPbSNAwAAAMAC2MYBAAAAbwOZDQAAAHgDyGwAAADAG0BmAwAAAN4AMhsAAADwBr2U2RF2pCX7nie+kOvzI6bHufeLBSffLsXnhe8N/pN5009XS7gSSWscotoEAIAe0Q96NgkJC08VTFx17APfqXmPiiXrsgIAAOAFeimzmfct7jHz+k7FzqlXnyA8Vjk4mls43mAuVdhxYK06/TRwJZLWOES1CQAAPeKgnakSSV2c1q6VwmNBbSub1WKxgOkSo95lhVbrOER4rdBqnF5wb5iNDusm7XNiJ72oTYvYFCccpv8M6TmDnYZd43i7yk2I9J8hPWowKHLh88PwvcEgTT20kd6ZEG+s+pMd/NWakyetqCo9gfTwIb2bbIREOmVZseelN5eaM8DrvYwAAABwEw+dqeILnyin5wqVQIzkaHq9EgxxC/fUfGKslOV+m6MrUnPMp5j6mt1iMk/8hYuQzAxdMPfYJE0Fzb1r+MYSTERxD9+6N0wSTjG/jJn5imYLw0JjpgSQVOZ/iOreLCLJ09oFEZIuaKYnUOFtmhJZSyAm3kix+cZOd8qMr2NTVpLgJJu1UFh2yxeONUoL80G+K8o1XRiKwdIOAABd4yCuZxcvCw21uGoqlJHUqWBxpZO+nkgGcxmWv7op/TePnxzVCosyDZlLxuzBhnxqRp8ZMOfTvuFmPqD1NzJv3068YvDpQntKdnO2siLmDKVlaMReDsdDgWJWCvt88nLRmTduAAAALtAPe9BagVTnnIG6obpy7YoUhkw08slBcNA3EE7IZ3O1huV6+CZtQfOHDxjFDX06tDQTbeAIdXzErwVjMpc5xXU3AACAjnPYZHY+eZabdTn6orU9pgGcoxiT64jP88Vm8WB6vSKD+xBjxYEDT+cAANAtvCKz89u7mjRNkzpbrd5d36lYWGjZlulgaD+fJi9tFAfMZekqiuXKwOjJOms226pNjKemO6Fncz1+n+vH1mVlhzSSs+mIzM/alc29YMzRh+YAAABcxjN6duZ8thjgRtnZwVV9D5ogn1osaLoR2xQnmZmVYnBShC6nmq4WW5CZ4VvPRBSEaUtfSy6ua9zHMwvmr+QL3uJ1s4Obpp7NjjchYgG2zY0uertpy6asLFCenCivFPT85JNn2dYz/nsG9qABAEDX8Kb/7Kn53Kmy8TEVAAAA0E/AfzYAAADgbSCzAQAAAG/gTds4AAAA0L/ANg4AAAB4G8hsAAAAwBtAZgMAAADeADIbAAAA8AaQ2QAAAIA3cFdmyzO/VN8bAAAAAHAFd2W2dFztnxTHeQIAAADANTpgG2duJBx4gwYAAABAK2A9GwAAAPAGkNkAAACAN+iEzM5v7/pG74WLRgAAAMBNOqJnZ85HV4cT7XqtBgAAAIAFnZDZkdTFXGgjGo2eSa7JIAAAAADskw6tZ1fKRXkFAAAAAFfAHjQAAADAG0BmAwAAAN6gAzJ7/OToQGkbK9kAAACAq7grs/l547Nhbf1SRoYAAAAAwB1uOXbsmLysIxAIbG1tyRsAAAAAdIUjR47cvHlT3ihgPRsAAADwBo1kNpRsAAAA4OAAPRsAAADwBpDZAAAAgDeAzAYAAAC8QROZHUku54iLKXjpAgAAAHpLE5mdT52JRqPZ3fB0ElIbAAAA6CWObOOZjaJv+Li8AQAAAEAvwHo2AAAA4A0gswEAAABv4ExmF8uVQCgubwAAAADQA5zJ7LXkmbnyRC6XW4DgBgAAAHqDM5k9NZ87py1Go9Hz8NcFAAAA9AbH69m723l5BQAAAIAegD1oAAAAgDeAzAYAAAC8gSOZHQ8FKzvX5Q0AAAAAekETmS3OG48FiqspLGcDAAAAveSWY8eOyUsAAAAAHACOHDly8+ZNeaOA9WwAAADAG0BmAwAAAN4AMhsAAADwBpDZAAAAgDeAzAYAAAC8QfN94/GFXCzAr/YK6bPJXn3yFUkuJ4ZXO3ngeXw+Fwt2Io/jqeXZsI9dVQpzZ5JrPLABU/O5ySC/cvZ8P9FqWQErWGcZ8xVXojNLMmQfRFIXE4OXHUTV5XZrNhXNpZx2Dz6o9r6Fm2P7Vha+JA4a+9o3XllPRwlTmJF4q2J+Sv7BAurJtczHxZffF1MR+VDtrVOo3+Zyy0n5O2qCInL3oAGrYe6csJY8w4ovW5T3DqCpA/uJ0qV5TgUO08NLYzk1Lm9NRFTNS5vlXVLlz80u3ALxfb+OkRgeg5EA3kJkplooK/tIQA+Iz08GSXZyuiaKiln+Pm8J7NZgvdViTFN6lvpX274pnq/pIJnzrPTS6xV5D7xAe7bxzAyrazawil7aqM8s8Wej6cKeLvujM67N6IKDvr2KNnyc38RDQ5V9tD6eqd4ZEhoSn58Nl8SAOFfwT1pJ4irYpCq0U7AqjUjqXLi01VwmRpLTo9dEfWWLgZgyMUqEd8VQWRVui5x/RKMrpfCsSPnxwQGqqUG92vyVPX7VGq5E0p/kU2zm01VJNj7i14obfSw7XYULy33MbKbmE2Ml2Qm3gjF95mrTN5kgn9Y2W9AZwAHG5fVsVa9qU+khhclUAUn2VMknrjtWR767uTkUYlPKqZB2ebWk+Uf485YpoUBqx/WRmA8rk1P+WCI8oAUnxd9qFHqBmTwKpAeMqNrMvhWR5ERwr3BJDIhrydUt3+i9pqTkb6wppYnyXHTmqrxVIUkc1gqXNuStSbXFgqBx/4w8/C6zsaX5xMRoPDURqBSyYtKVubRe8Z04af6mMUuXCntGykub1/whVkTxkLa6uqv5jzqNRsEuEhttQzH5qDm1bCpVkag2CcXgwdG1HDPypjMqFjO9SG9FyvO2kSiWLTMxltk0nlRjYIFK1tRbm7Iy42FdoDk0e5ZXBrbZtCpwet18iocvJ+M8SU2L0Qoxehh1ZObILpsWiaEQy1HCJhKW8rjxRrWpWLY3s/1Ua89qu5KR8ypg9v9gTITLMomkTgUr65dkJ8wWKgOjJyncpm9Slx+8HD2T2ubhDuGvri4ocEBwVWYrs7/oSjHYXB1skUBsYofrbCxyo8VvX+EDNw3b5jTfPiW+sYSIJL1eCZ6SHUzoJTU2Ij4XZuYB3eJH7Z7JMOrSsSGpO6bXtfCs2fcocrboXh25Oyi+UK/vVKQEtSFz3mYKP56aHtMKF/ZhS2CGjc0rInJWyD5tQGq6rbJ9ddNPcy2aaW20b3axjETRNtKFIUPbiM9P+gtzPFivSgYrE72pKLppJHlauyDC0gUtPC0jYVYKTZiLVkhvqRTmuNGIBlwjcmZOqB6OraCJoGiH2S1fOMYft42EBtCYX9qoTFOQTTZNG5gCm3UF+cyWoejENpGQcDLeyLpAA6TMYyvZumhRxnqLbNr2zWCY+s5K0TcWIxlDz6sT0xYYCCdmB1knnCtUAhMicptsssSbiVFq33KUsIuEZVy8kcLNpmLT3sTqD6VN3gsUQ5qpIvOqZE/KJQBdNWcWps2rshXQD32ab5AVv3XfpMGtn9cODh8uyuyq2Z+2NNO811HvEp2cJvPUwpqylZVNf2mjSEPQlBY56qe7PBu455Vhu2FK9EjoV5V25E389JiveFmOm/nUYmGPpUSyV0jzrRztRm4Ni00ffbiMqSorPuFwZGeLx0jeLFo/yYcSc2RRmZpn+2Xk/J0jdIJJLctkgzRsNIWp+AP84HomM+iNVzaHeLW1N6DYRhIPBYpZuaEmn7xcVCwBdg1SqUGdfGpGL6j8lWv6JGn85KgxXLJGyMdKytq9o2bBMnOCRYS16O0wQ9EMjVCy7CIRVpbF2qppkE0LmDYWkEKbv0j0DptIpk6Htfo3WiPmu3wGo4sWdTdTbTYb9E29jRkmpTbRJ1LUNvZEBdmVFe/LK1ZLdRajRIMC19+oNhWG02lHlSGNRDVNXBrWJkco/TFtheY3ipmqrb5ZB58uqPUIDgwu28ZLNxz1c4mx0snnszLQEdfL6tyfDdxBLrLN8NZS0hqVss3SUOXaFflWJgLdW7ZfSy4yhZ5NbnLntNX1Sjtu1kj0DjkdiE2Y8hcsrihzAkOPoQwywVnatpwEGOgzM67QqGVCA5xfVttO2/sQ6iJhSTJsiUL/E2Rm5gramEiLogdTTTFtjwfb2MDNCeXadskYiKdCQV1bPT7sI81MPu3MmFw0ZphLM0J1touEwlUri8Q2mzYwASYmAZGTJzQ57Wg1ktapzybRyb5Jo4qua5JkPctVZ7tssnDbvlyL87LiMzDb9mZHfRU3wheeZZv5WSdciowM6UXaat8EHsRlma2sSrKW1DGYdUh0Ni699M7JkKpPJ1MiX8GhlMirjiK1GeJsUhv2tTHqxUnEGIYNGnH4tbJWZwXJrVlmCjZta8VyxdQqhDmu3GT6YM7MFIHNf8Uypc/lG1v7rbGNxLAlcox9hXJTOk0Q/TF1GJXbJKPZ3XBCim1mcpQ28KoJJZsUSsnKpjJmjvT9lZL2rJGWkdhPaGyyaQ1TAZl5fPzkqGZINaKlSNyhW6OEilU22QysJZyVlSF97dqbJVLSM4T50B7WCKmp6G1MHwzb6JvAg7gos7ldaOy0bJpTp6UhtA2kMYotqlnOZrkpSR13anAvJVp+e1dZCGTwpUF9iavaqNUN4gu5mJZVRQJfUGy+dUB81yFZKQpRasbD1Uplic4U2FUGc25vDJ8T2ed2TsO0cEDgCmWs4faZ/A3rsbpGOsqJkboYwY3Ghlw1Si+zUfSNTTetgsbYRcJXRmK1sysH2ayBxTM0Er93tKSv7NhGQqO/2NbE2puzPWhOcbFvOsa2rKgvG425GU4KnDcV07SgY9feDLgFPnxaVnHV6hufWNQstYgylE3FHAxZCt3qm9iDdnBpT2bzGs0xgSqMimJAIY2Hzyg5bP+Fagh1DFviEjaoxODl6q00ARl34sSmOPmEmQ2taDElcjsoM4GKVyiNNXOebQlhgbpII+HHFDIewuy93VBNRIEz2NaYZutMclsQ35zCLertbAaMx9iBFYq1VkSST55lG214aGL0WrVEd4jFHuPWsY2Ep3BIVhkhJyLKJl61Sciy4ii1ybbdSoP57OCmoWcvXdLzLpGilDR1tmtMBjqyhdZjFwmpa+wDPxmqG/AbZ5P6Zl3VryVXd8OxsZKy9m8TibIWQ+0tu8WfdQl3RonWsMlmdV8mGpqdbCOhXiJrje8jkzO5xu3N3A3Oa7mqitnuP2VSzpa3ZVPUa5OXoawgYzCUKazvm2aTqBqugUdxdA4a9dt2hmZQBcndibLDc9BOlXt45NwBwHFZdZmaqqFbttmnC1IH1MHsQIOrvS/8g9pWHcM2z3f2iEnQDvCfDcB+qVloZFsEsGQIAOgijmS2NJCqu2qBc+QOZOu1eWvkZrF2bNrepo2y6iLs0z7FNs4+0z/U5pCeIzdyw9jbHuLcGEff2YIDQ3PbOAAAAAC6CWzjAAAAgLeBzAYAAAC8AWQ2AAAA4A0gswEAAABvAJkNAAAAeANnMlt+gXP4Pj0CAAAADgxOZLbhM9jDZ/0AAAAAXseJzFZdrAMAAACgN2A9GwAAAPAGkNkAAACAN3Ags8dH/FppGyvZAAAAQE9pLLO52+Zz2iK8DQIAAAC9prHMzsxEo9EL2nR7PvwBAAAA4B4ObONr2yXNP4IvswEAAICegj1oAAAAgDeAzAYAAAC8gROZfb285xsMyhsAAAAA9AQnMjufvFDwT+K8cQAAAKCX3HLs2DF5CQAAAIADwJEjR27evClvFLCeDQAAAHiDRjI7EAjIKwAAAAD0GujZAAAAgDeAzAYAAAC8AWQ2AAAA4A3cldmR1MVcbiEunIssJyNG4PwUv2yV8dRy06POp9irUuNaJLmca/tcdFcicQe96Fje2y03AAAA/Qj07IYwWS5Qvk03A8UEpQnxBfksp/Ybd/FXyGYAAABNcVdm57d3tcrOdX50mla6kZfBHaVYrnD33vkbJW2vTO9uB+tI4vOTWjbKSK9r4Vld/15i3s446cJQTDcnNKK4In8QjZ5Jqp7Ip+ZjQ8Xinrzj6EXHXLNUykUZCgAAADQ6UyUQCGxtbcmb9omkLiYGL2e1yRg//7SYNbxxj6eWZ8M+cb2VjZ7XnXSTIjtpnJUqno/P52LaSnRmSQTW3FoTSS4nxrTCXLWYbA+W1NHNuqhIS57YSZ9JNZqd0DOhDcukilyky6eofJrkBQAAwOGhx2eqBCcnynNMzcxuBWPSnhyfnw2XpAKaLQZ0hZWk46S/wB+OzhUq/FFNy2xsacGQboieCgW14kbvhVw8FKhsXm3TnBBfiAW3shDVAAAAHNIlmV1ckRpqZqOoBZjsjSQngnuFS1JiZWZWir4TJ0lox2NhbX2xXjPOZAsV/kMiHgpW1i/pWrkt+dSZWlt0m0RS58K+rVUjKr5VjSChawY2IMhOa2eYhvTx1ESgmDVMCwAAAEAzur4Hja0c6+xut6Cirl3Z3AuG2F4t0m6Lqw3N0e4SX0iEtUJaka98NsBI70zkLqYaL2hnzotniWxpLMHFNpsElFb0NQIAAADAAV2X2cFBn7HJa2jEkHaRo355ZUv+yrUKM49PhYJbG12TdvGFXIwU4rNJyzlC/upmZWDwuLxrCrPwM8ZPjg4YynciLK6byX4AAACHnC7L7EjqVLBy7QrJPy7twqflN07x02O+4mUmF6/vVISRnALnjR1qnHxqtRiYWD7lL2QdiWxuwd6X/1ApsI1Nc3XEY2GfOoHgH1XbSt+p+ZhY/15LSj2dkS7s8Y3lNtMCE/GNmYOvywAAAPQlXduDxsQN6ZSj1/Rd1iS35oRbbiLmX0+L3Vj51GJBCydY4ER5Llv9rRPpqT6ftnnFhSVqB7AlZ/pfMMaTyODyUl/MZsQ0Zbs7wQz4mlalebMzUiTsy7F9rK8vbbDSUIwTAAAADhVd+NbLTZx8W9VbmGo+VEg3VZrbgX01F96tniUAAADoO/rCfzazLXd191lrcNt1hwQ2V+4hsAEA4FDjET1bnrJSceeAFAAAAOAAY6dne8w2DgAAAPQ9fWEbBwAAAA4xkNkAAACAN4DMBgAAALwBZDYAAADgDSCzAQAAAG/grsyOpC6Kw8LY4V+mDytXEMeCMubrTu/kZ4116Lxu8d6+PzF039nkX5Czqokv7LsuxCmtFhUNAACHGu/o2eKMbtOjtsuQpHF5kiEwpxqMjryiFTqVTTeJz08G2QHs9se8AwDA4cRdmZ3f3tUqO9c17Xp5Tyvd6NqBZZkZGuE7clyoPlfY1+ljlcIcRUEYvjgPHvvOZv5GSeMe267vVFrzslrD+IhfK25Ix+oAAABMunOmCj8oe4Bf7hlHe8bnc6GNufKEcN5lhE+x4PTORGKMBVfWq08XJ7V1dnBV0cAiyWXxpLZVc66n8lLN9M1lPq+fqqaE6OhRscPDmZuQ2mQY4crRbPS6ae3C6uBsLMjC9TeyBI9u6se3sXed2GQ5lRnZCOX482axWEZuU1aEPCGOUA6Jo8BT5fQFbVo8z7PTRjaVn6jOzawLtgE8Hs3pGXZ1VQwAAIeNXp6pEkme1i4IRTNd0MLTpqIZjLHRuS48EEsM8+C5gjY23diZZj7F9MP0eo3JnMuV3SyLhKELgPHUaW1RBKXXtfA5tuwqYshuMYkl/mTI/sx5dkd/UiEJxA4V5w+ySGaNZVdfeHaizFTqdGEvONFcnw7GmO8y9oai7pbUPnKrsiLxNumXSvxKSXlY0wbCCfH8XKESmKAybDWbJPgTYyVRgul1f0xfoo4kpy0KFgAAQOfphszOp2Z0BSt/5VrFN2x4qiTVUAz61eGkRwpxwlxb+gaFGtkSU6fDA8WsLpNM1pIzuh7JHXirTjMdYrr6Jpjn0L1gSHoB14orQpWsyabOeGpa+S2hP5/Z2NL8R0kmNojcoqwi945q64uybJcuqSkxn2+3DOOhYHFFimTmuXxg9KQxeQqEWtodxqcLzpRsIjjo4zZ2AAAANXRlDxqpg3IPVq7WPKti4xmaC7PWiBz1i7XVOkj/linJCbtxO1TK1W69m0H6t3xjaSUq3IRzzFVb0nR1o7SzyHlZHR/2+ca4q3GGYa/m7BlexvPJs+pLHRIZGTK8nhPC4M8gAZzdkj7FO/JpQGijU1sTAADA43RBZsfnZ8Oabo+tM2Ir2GxcamMvG9sPZUV8IRHWpOV5H1vQVbX1+KAqKa0hlVe80onsdBa5XlamoZvTumxuBN+8bWAqysKWHnV9S53YB7cR6tRnewAA4HG6omcbcpcbh3lANcJovFFrymZLpwNtbSFe2igOqAvnClLaRVLnqvTs6zsV34mTDkQFs2MHTxmLuxPBvcIl1ySlg8iVsspsFH3N1vtrcJxNZoEPTjb+Qpp9HeCECPt0e9lpOovlttYsAACg/+nGvnF1+3Fh3R8eXuW7n+LzisWVVDqpI5oboQnL/d4C8Sd1DzPH3D2uxq/u4paiurhe8I+p+5OVqGQkVSkkjG3VytZuI4Xs54OXZS5YakU22RvNfeMmLNx6d7RV5DZlRVgWl9g3bm1hbiGbVWUuN6tXF7hZ2o3g8WDfOAAAOOUA+s8mUTFRrh/HG8mbQ4tNWfUlkNkAgEMP/GcDj7C2XdL8I60Y/AEA4JAAmQ0OGpkZ9q15DueNAwBADT20jQMAAADAAtjGAQAAAG8DmQ0AAAB4A8hsAAAAwBtAZgMAAADeADIbAAAA8Aa9lNkRdqQl+54nvpDr8yOmx7n3iwUn3y7F54XvDf6TedNPV0u4EklrHKLaBACAHtEPejYJCQtPFUxcdewD36l5j4ol67ICAADgBXops5n3Le4x8/pOxc6pV58gPFY5OJpbON5gLlXYcWCtOv00cCWS1jhEtQkAAD3ioJ2pEkldnNaulcJjQW0rm9VisYDpEqPeZYVW6zhEeK3QapxecG+YjQ7rJu1zYie9qE2L2BQnHKb/DOk5g52GXeN4u8pNiPSfIT1qMChy4fPD8L3BIE09tJHemRBvrPqTHfzVmpMnragqPYH08CG9m2yERDplWbHnpTeXmjPA672MAAAAcBMPnaniC58op+cKlUCM5Gh6vRIMcQv31HxirJTlfpujK1JzzKeY+prdYjJP/IWLkMwMXTD32CRNBc29a/jGEkxEcQ/fujdMEk4xv4yZ+YpmC8NCY6YEkFTmf4jq3iwiydPaBRGSLmimJ1DhbZoSWUsgJt5IsfnGTnfKjK9jU1aS4CSbtVBYdssXjjVKC/NBvivKNV0YisHSDgAAXeMgrmcXLwsNtbhqKpSR1KlgcaWTvp5IBnMZlr+6Kf03j58c1QqLMg2ZS8bswYZ8akafGTDn077hZj6g9Tcyb99OvGLw6UJ7SnZztrIi5gylZWjEXg7HQ4FiVgr7fPJy0Zk3bgAAAC7QD3vQWoFU55yBuqG6cu2KFIZMNPLJQXDQNxBOyGdztYblevgmbUHzhw8YxQ19OrQ0E23gCHV8xK8FYzKXOcV1NwAAgI5z2GR2PnmWm3U5+qK1PaYBnKMYk+uIz/PFZvFger0ig/sQY8WBA0/nAADQLbwis/Pbu5o0TZM6W63eXd+pWFho2ZbpYGg/nyYvbRQHzGXpKorlysDoyTprNtuqTYynpjuhZ3M9fp/rx9ZlZYc0krPpiMzP2pXNvWDM0YfmAAAAXMYzenbmfLYY4EbZ2cFVfQ+aIJ9aLGi6EdsUJ5mZlWJwUoQup5quFluQmeFbz0QUhGlLX0surmvcxzML5q/kC97idbODm6aezY43IWIBts2NLnq7acumrCxQnpworxT0/OSTZ9nWM/57BvagAQBA1/Cm/+yp+dypsvExFQAAANBPwH82AAAA4G0gswEAAABv4E3bOAAAANC/wDYOAAAAeBvIbAAAAMAbQGYDAAAA3gAyGwAAAPAGkNkAAACAN3BXZsszv1TfGwAAAABwBXdltnRc7Z8Ux3kCAAAAwDU6YBtnbiQceIMGAAAAQCtgPRsAAADwBpDZAAAAgDfohMzOb+/6Ru+Fi0YAAADATTqiZ2fOR1eHE+16rQYAAACABZ2Q2ZHUxVxoIxqNnkmuySAAAAAA7JMOrWdXykV5BQAAAABXwB40AAAAwBtAZgMAAADeoAMye/zk6EBpGyvZAAAAgKu4K7P5eeOzYW39UkaGAAAAAMAdbjl27Ji8rCMQCGxtbckbAAAAAHSFI0eO3Lx5U94oYD0bAAAA8AaNZDaUbAAAAODgAD0bAAAA8AaQ2QAAAIA3gMwGAAAAvEETmR1JLueIiyl46QIAAAB6SxOZnU+diUaj2d3wdBJSGwAAAOgljmzjmY2ib/i4vAEAAABAL8B6NgAAAOANILMBAAAAb+BMZhfLlUAoLm8AAAAA0AOcyey15Jm58kQul1uA4AYAAAB6gzOZPTWfO6ctRqPR8/DXBQAAAPQGx+vZu9t5eQUAAACAHoA9aAAAAIA3gMwGAAAAvIEjmR0PBSs71+UNAAAAAHpBE5ktzhuPBYqrKSxnAwAAAL3klmPHjslLAAAAABwAjhw5cvPmTXmjgPVsAAAAwBtAZgMAAADeADIbAAAA8AaQ2QAAAIA3gMwGAAAAvAFkNgAAAOANILMBAAAAbwCZDQAAAHgDyGwAAADAG0BmAwAAAN4AMhsAAADwBpDZAAAAgDeAzAYAAAC8AWQ2AAAA4A0gswEAAABvAJkNAAAAeAFN+/8Bm0+9dYzY/FUAAAAASUVORK5CYII=)
You can see in the body of the received message the temperature and humidity values that were sent.
I still need to sort out generating the Shared Access Signature and also programmatically access the data I send to the IoT hub. I hope to have blog posts for these soon.