If you have scheduler jobs running in Azure you may have received an email recently stating that the scheduler is being retired and that you need to move your schedules off by 31st December 2019 at the latest and you also will not be able to view your schedules via the portal after 31st October.
This is all documented in the following post: https://azure.microsoft.com/en-us/updates/extending-retirement-date-of-scheduler/
There is an alternative to the Scheduler and that is Logic Apps and there is a link on the page to show you how to migrate.
I’m currently using the scheduler to run my webjobs on various schedules from daily and weekly to monthly. Webjobs are triggered by using an HTTP Post request and I showed how to set this up using the scheduler in a previous post :
Creating a Scheduled Web Job in Azure
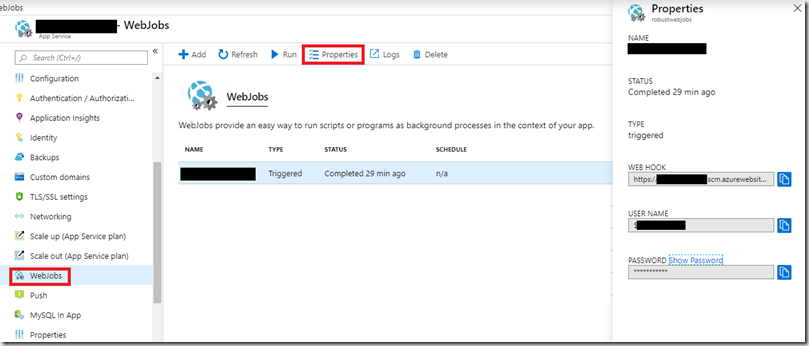
I will build on that post and show how you can achieve the same thing using Logic Apps. You will need the following information in order to configure the Logic App: Webhook URL, Username, Password
You can find these in the app service that is running your webjob. Click “Webjobs”, select the job you are interested in the click “Properties”. This will display the properties panel where you can retrieve all these values.
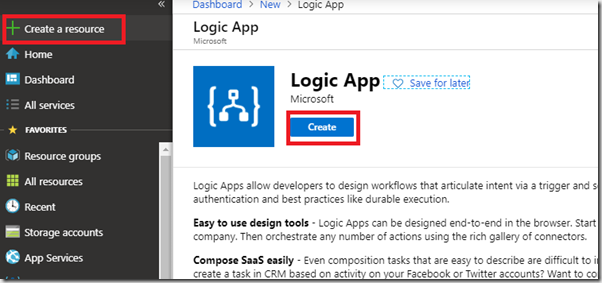
Now you need to create a Logic App. In the Azure Portal dashboard screen click “Create a Resource” and enter Logic App in the search box, then click “Create”
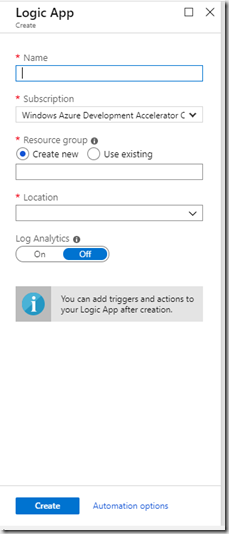
Complete the form and hit Create
Once the resource has created you can then start to build your schedule. Opening the Logic App for the first time should take you to the Logic App Designer. Logic Apps require a trigger to start them running and there are lots of different triggers but the one we are interesting in, is the Recurrence trigger
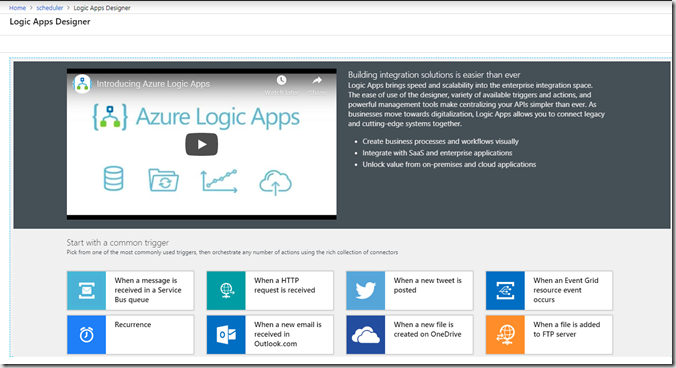
Click “Recurrence” and this will be added to the Logic App designer surface for you to configure
I want to set my schedule to run at 3am every day so I select frequency to be Day and interval to be 1, then click “Add New Parameter”
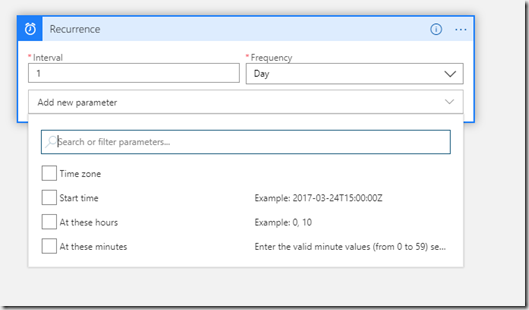
Select “At these hours” & “At these minutes”. Two edit boxes appear and you can add 3 in the hours box and 0 in the minutes box. You have now set up the schedule. We now need to configure the Logic App to trigger the web service. As as discussed above we can use a web hook.
All we have in the Logic App is a trigger that starts the Logic App at 3am UTC, we now need to add an Action step that starts the web job running.
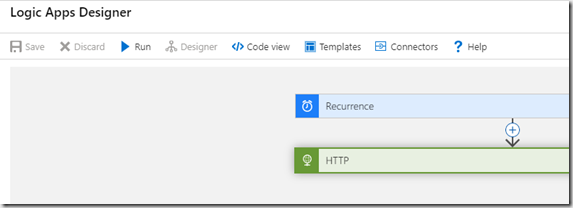
Below the Recurrence box there is a box called “+ New Step”, click this and then search for “HTTP”
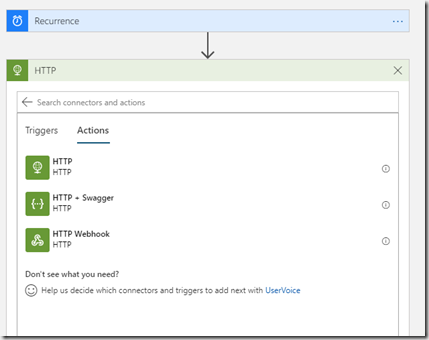
Select the top HTTP option
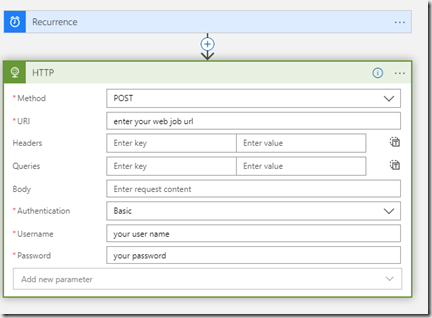
Select POST as the method and Basic as Authentication, then enter your url, username and password
The web job is now configured and the Logic App can be saved by clicking the Save button. If you want to rename each of the steps so you can easily see what you have configured then click “…” and select “Rename”
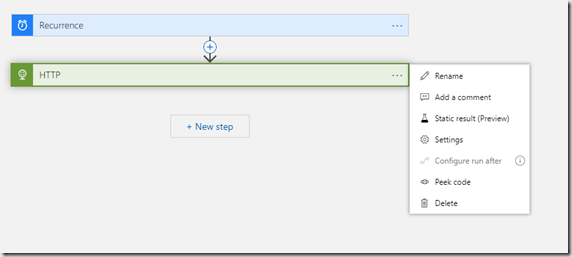
You can test the Logic App is configured correctly by triggering it to run. This will ignore the schedule and run the HTTP action immediately
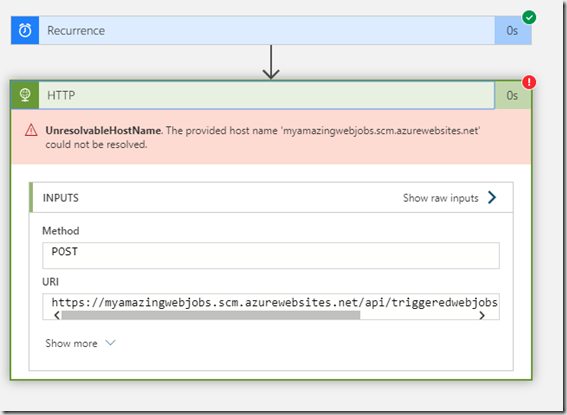
If the request was successful then you should see ticks appear on the two actions or if there are errors you will see a red cross and be able to see the error message
If the web job successfully ran then open the web job portal via the app services section to see if your web job has started.
If you want to trigger a number of different web jobs on the same schedule then you can add more HTTP actions below the one you have just set up. If you want to delay running a job for a short while you can add a Delay task.
If you want to run on a weekly or monthly schedule then you will need to create a new Logic App with a Recurrence configured to the schedule you want and then add the HTTP actions as required.
The scheduler trigger on the Logic App will be enabled as soon as you click Save. To stop it triggering you can Disable the Logic App on the Overview screen once you exit the Designer

Hopefully this has given you an insight in to how to get started with Logic Apps. Take a look at the different triggers and actions as see that you can do a lot more than just scheduling web jobs