Cloud hosted services and collaboration mean exposing services to a worldwide audience, but it also exposes you to malicious attacks and identity is one axis where attacks take place. Usernames and passwords are constantly being obtained either through hacking, social engineering or buying. Once obtained they can be used to gain access to a variety of system and single sign-on makes the scope of attacks larger. It has long been recognised that having multiple levels during authentication makes it harder for an attacker to gain access. Microsoft have been involved with identity for a long time now with their services such as Hotmail, XBox Live and Azure and they have used this experience to build and enhance their security models to incorporate Multifactor Authentication (MFA) into their systems. MFA allows you to use an additional piece of information that is usually generated at the point of entry and is not something that is remembered. This information is usually generated and presented on something that you have in your possession such as a Mobile Phone, RSA key or FIDO token. This adds an additional layer of protection as it means the attacker also requires the same device in order to gain access. When building your applications it is sensible to incorporate MFA into your design and Microsoft Azure has the Conditional Access service to help you build this extra layer of security into your applications.
Conditional Access allows you to create a set of rules (policies) about the access a user is attempting to determine whether the user is allowed access, whether they are required to user MFA or whether they are blocked from access. Conditional Access policies use a set of signals that could be things like being a member of a specific group; accessing a specific application; IP address/location information; the device they are using or if Identity protection is enabled there are a set of AI models applied that give the user or login a risk value.Rules are applied to these signals and a decision is made.
In order to use Conditional Access your Azure AD tenant will require a P1 license or Microsoft 365 Business Premium for each user.
To setup Conditional Access Policies, navigate to the Azure Portal and search for Conditional Access
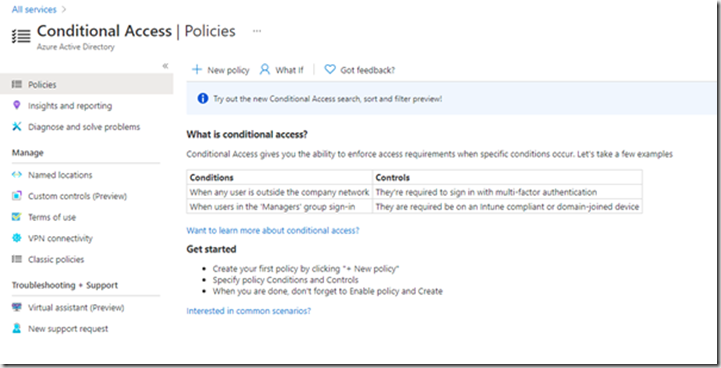
Click “New Policy”
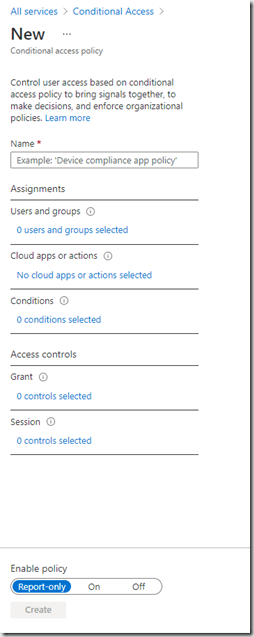
You can configure the group membership requirements, which apps the rules apply to and the conditions that apply. When a user signs in each policy is evaluated to see which ones apply to the users. Each of the conditions are evaluated and any policies that match all the conditions will be applied to the user. This is an important point because if you make the policies too restrictive then a user may not match any conditions and they will be given access without applying any access controls. This is especially important if you are expecting access to be blocked if the conditions are not met, which is not the case. You will need to create a specific policy for that which blocks the access.
When creating a policy, enter a name for the policy and then click users and groups to determine who the rules apply to.
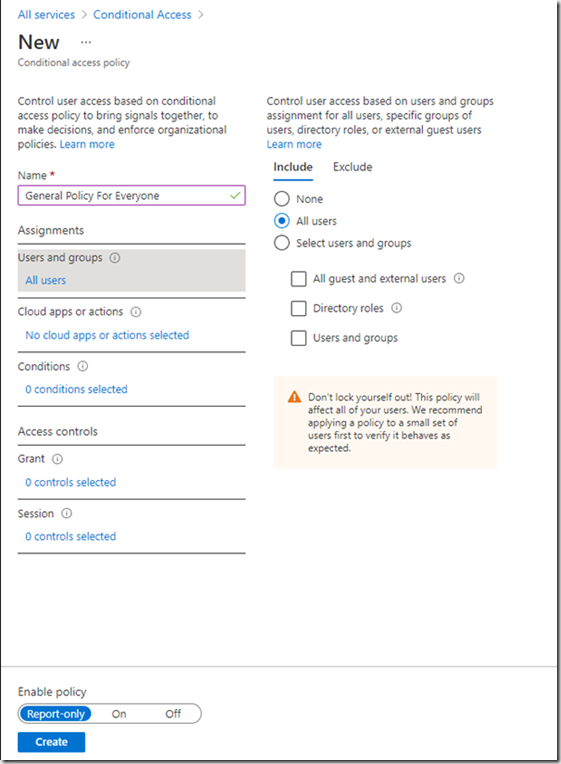
Here you can include or exclude sets of users. Whether its all users, your guess/external/B2B users, specific roles or specific users or groups. For example you may apply this rule to All users and exclude users who are members of a specific group. If you apply the rule to all users then you will get a warning that might cause you to lock you out of access. In this scenario you could exclude users who are part of the admin group so at least a small number of people will gain access.
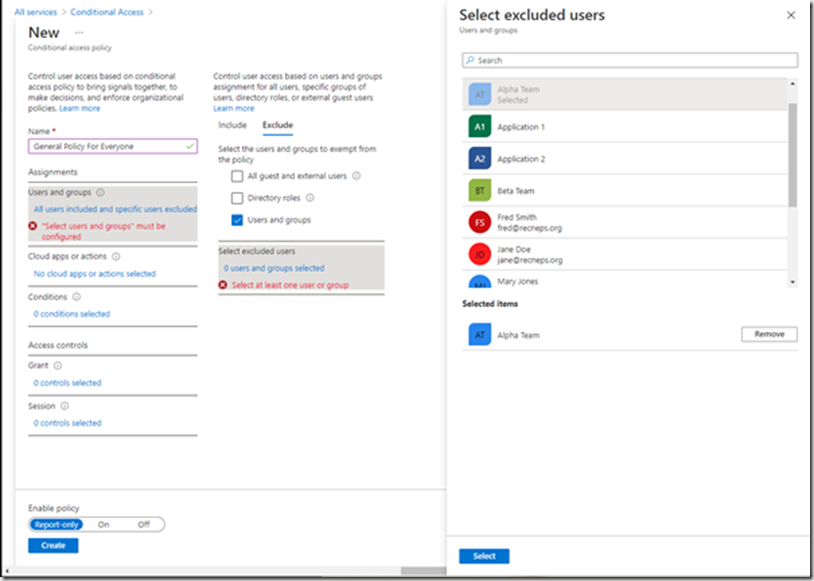
Selecting a user or group brings up the user/group picker. Select a group.
In addition or instead of, you can pick an application or group of applications that will cause the policy to be applied if the user tried to access them. Whether you use this or groups will be down to you. It depends how you give access to the applications. If the number of groups to access the applications is complicated then you might want to apply the application here, if for example you use group membership to control access to the application then you can just use the same group in the policy instead of the application.
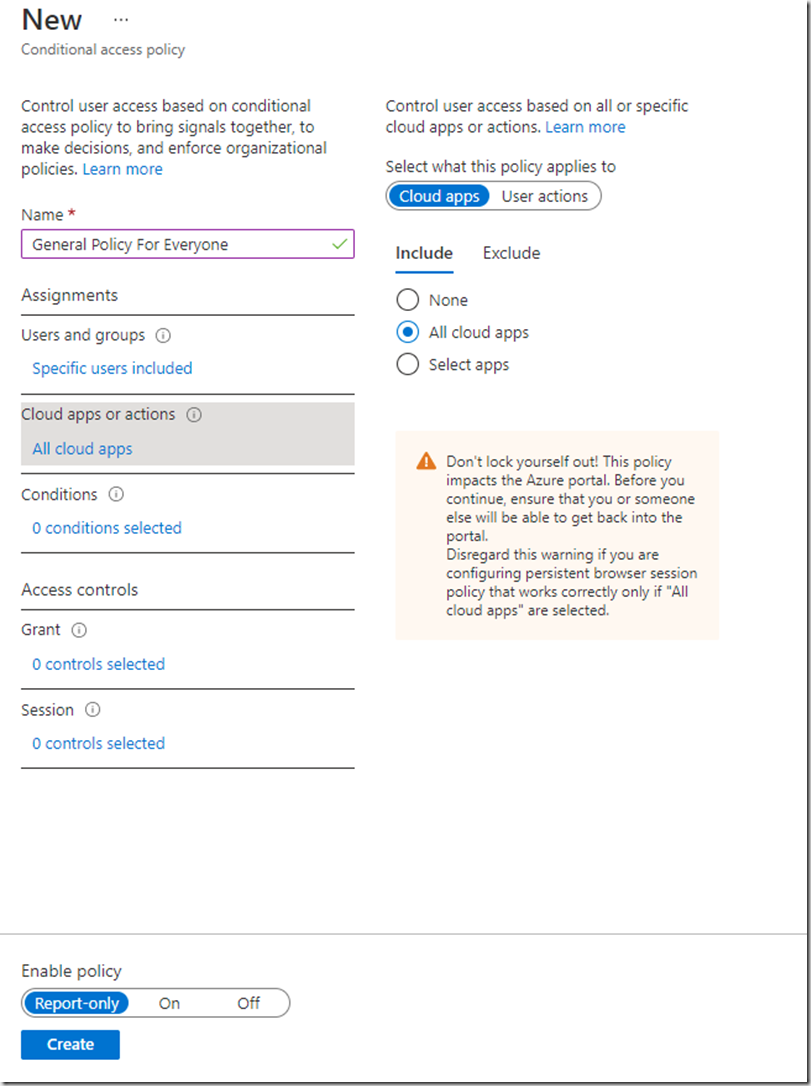
Picking the all applications has the same warning as all groups. For this policy we’ll just stick with group membership so will select None
The next part to pick is the condition for the policy.
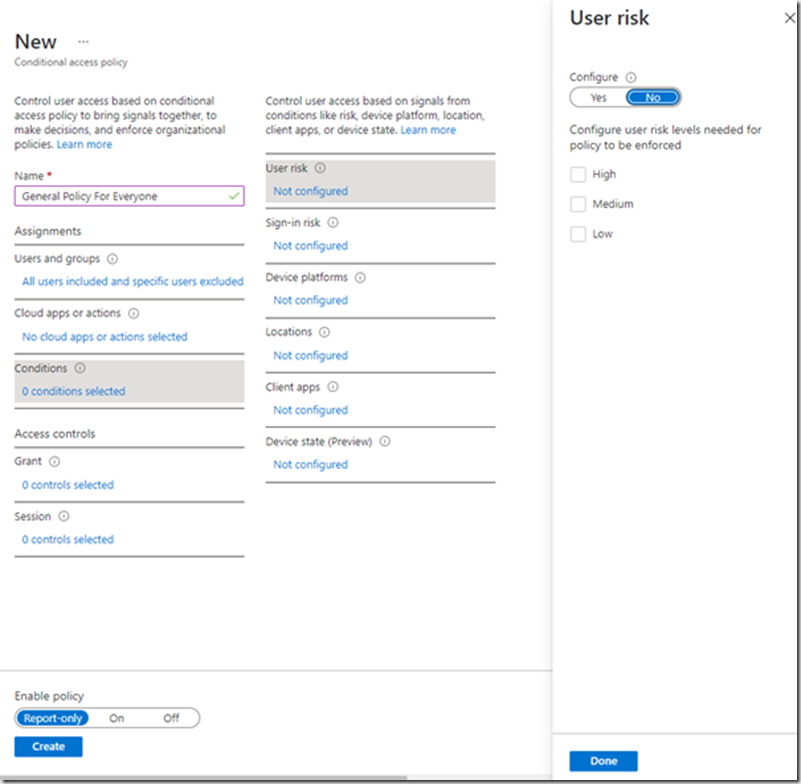
Be aware here that both User risk and Sign-in risk can be applied here, but will only give you a valid value if Identity Protection is also enabled in your tenant.These conditions will return a percentage value based upon whether Identity Protection believes the user account has been compromised or the sign in attempt is not authorised. Information about the information monitored to generate the risk can be found here
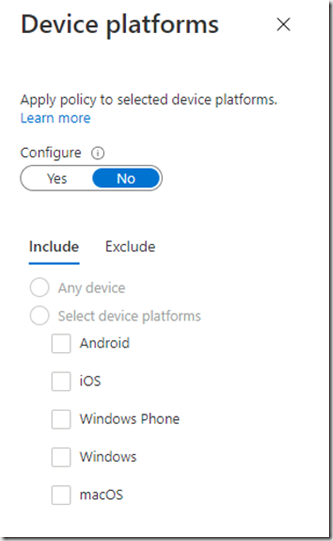
Device platforms looks at the type of device that is trying to connect. This works well for machines that are internal to your organisation and are managed by Microsoft Intune device compliance policies. User agent strings will be used for External users , but these can be changed so are not a reliable condition for B2B users.
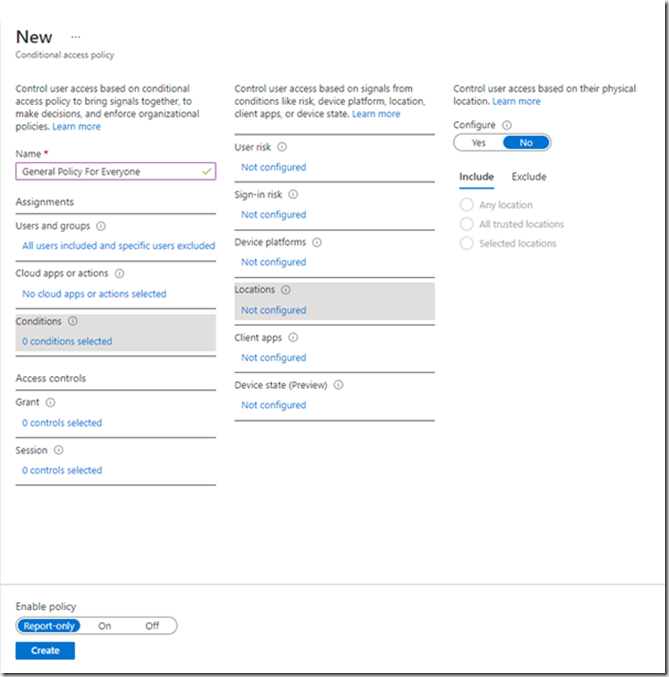
Locations allows you to configure trusted locations where access is allowed from and access is blocked if the access if from elsewhere. I’ll talk about this in a future post.
Client Apps allows you to configure which apps are allowed access and which are blocked.
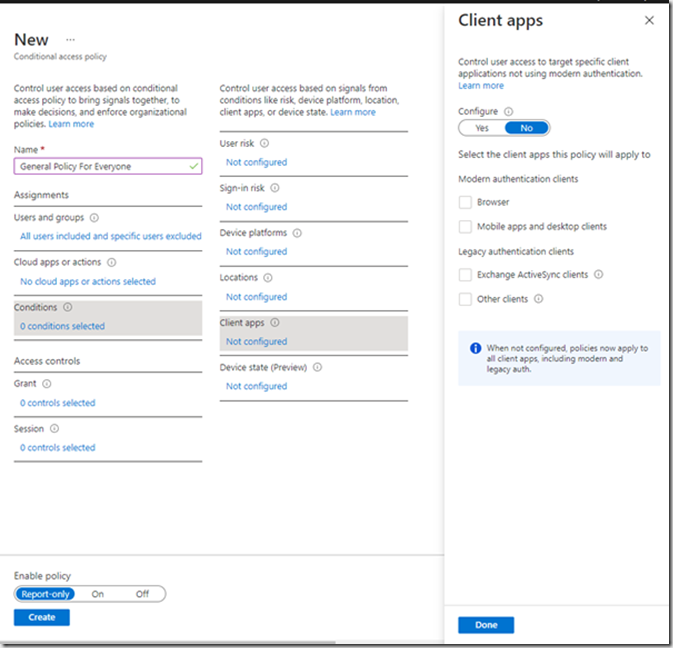
Finally Device state
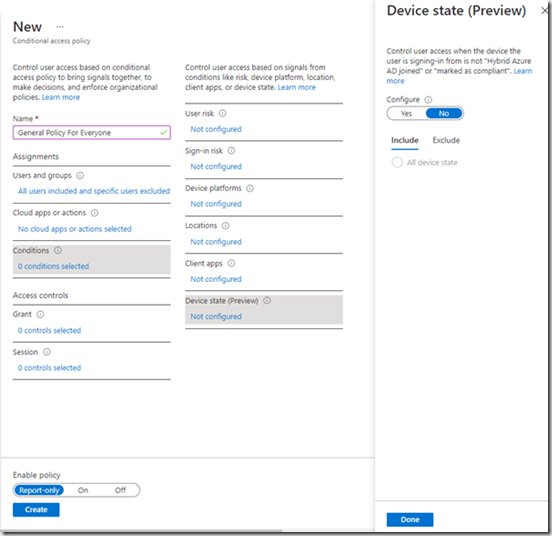
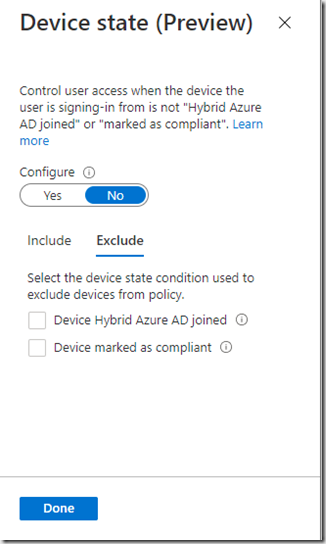
This allows you to exclude compliant devices from the policy.
Now you have configured all your conditions you now decide what action should be taken if those conditions are met. Here you can grant or block access
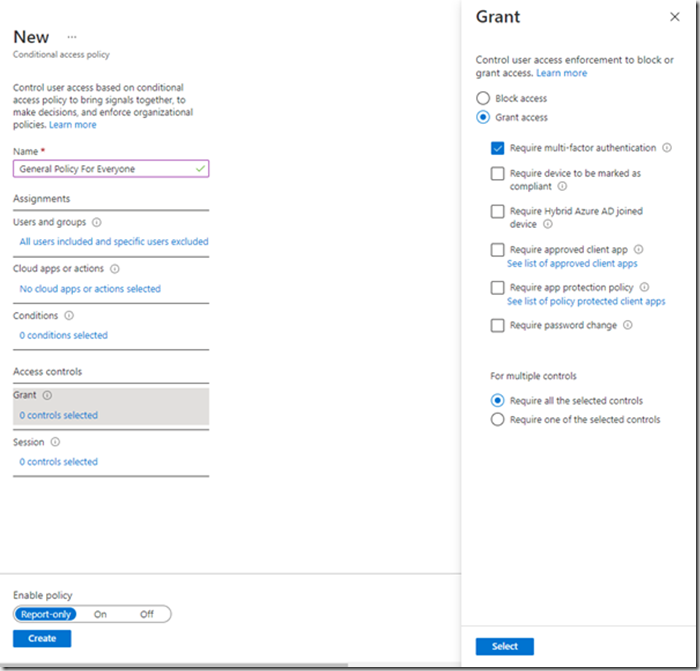
There are more conditions that need to be met to allow access. MFA is one of these. Selecting MFA will force the user have to use a secondary authentication device before access can be gained. Unlike the policy conditions, failure to meet the conditions at this stage will block access. If a user manages to get through the conditions but doesn’t have a Hybrid joined device or fails the MFA challenge then they will still not gain access.
The final option is for Session which is used to determine whether the user needs to be challenged again for MFA. This can be set in the Sign-in frequency option:
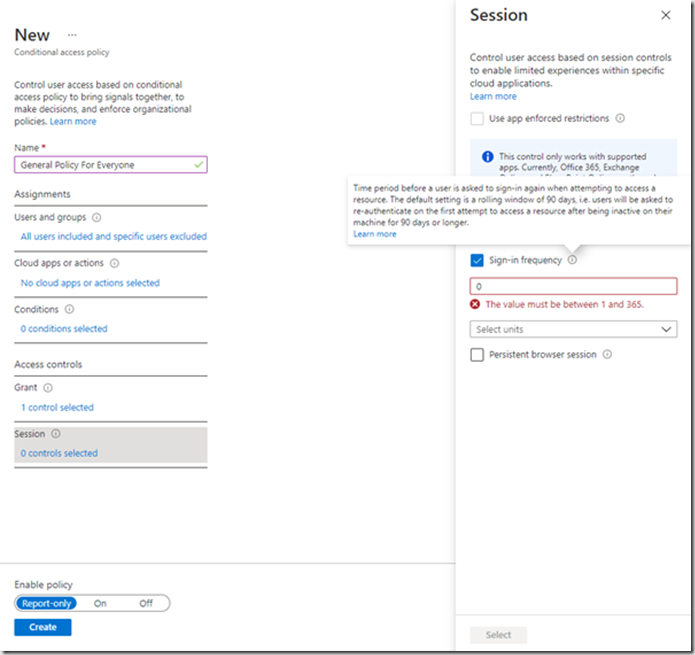
Now we have a choice about how to apply the policy. Whether to enable it or set it to report only. If you have a complex set of criteria that you want to enable and not sure whether there will be issues you can set the policy to Report Only and this will appear in the sign in logs showing what the rule outcome will be. You can run it on the user population and review the logs to see if the policy breaks anything. This will also be the subject of a future post. For now we will set the policy to On and click Create. This will now be applied to all users and those that match the policy will be presented with the MFA challenge.
The policy we’ve just created will present all users who are NOT in the Alpha Team group with the MFA challenge and members of Alpha team will be allowed to sign in without MFA.
Its a good idea to plan your conditional access policies so that there are not too many complex policies that could end up with scenarios where users are given access without out the additional security of MFA. There are also limitations on the number of policies that can be applied to a user after which they policies are ignore. I believe the limit at the moment is 100 but I can’t find this in writing anywhere.
Conditional access allows you to build extra layers of security into your app and data access processes and tailor the access model to suit your needs. The next posts will cover reviewing and diagnosing policies and also restricting access based upon IP addresses.