Previously I’ve talked about how you can control access to your web applications in Azure AD (Part 1 & Part 2) and also how to use Role Based Access Control (RBAC) to manage access to resources in Azure. This post will build on these previous posts and show you how you can create your own custom roles for use in your own web applications and how you can use these roles to control access to parts of your application.I’ll use the same example used in Part 1.
Firstly you need to created the roles for your application to use, assign the roles to users and finally change your code to make it role aware.
To add roles to your application. Navigate to the Azure portal and click on Azure Active Directory and App Registrations. Select the Web App you created previously.
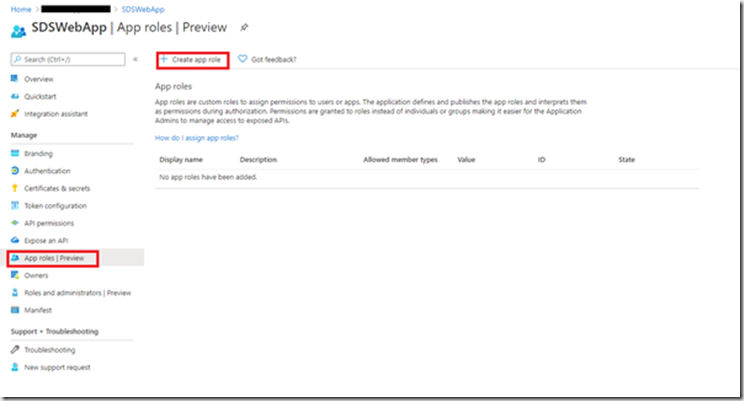
Click on “App roles | Preview” then “Create App Role”
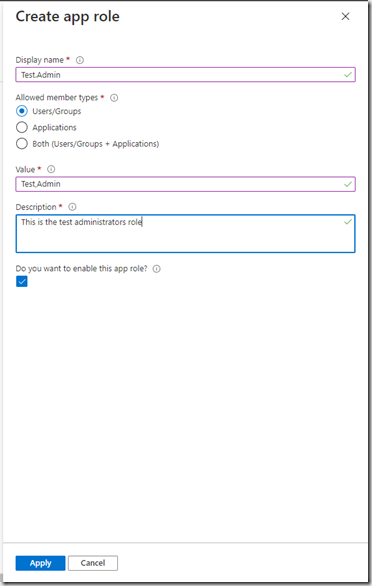
Enter the role information and click Apply and repeat for all the roles you require.
You should now see your roles in the grid:

I’ve added a standard user role and a test administrator role.
To assign these roles to users, Navigate to the Enterprise Applications blade and click your application. Then select “Users and groups”
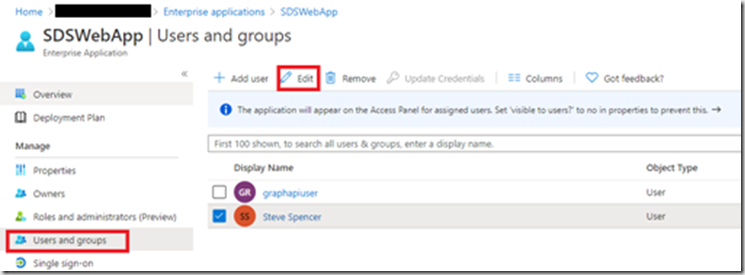
To Add roles to an existing assigned user, tick the user and then click “Edit”
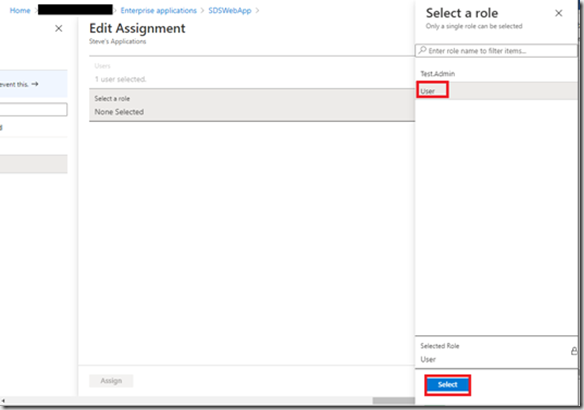
Select the role and click “Select”

You should now see the role is assigned to the user. Similarly to add a role to a new user click “Add user”

This time you need to select the new user and then the role:
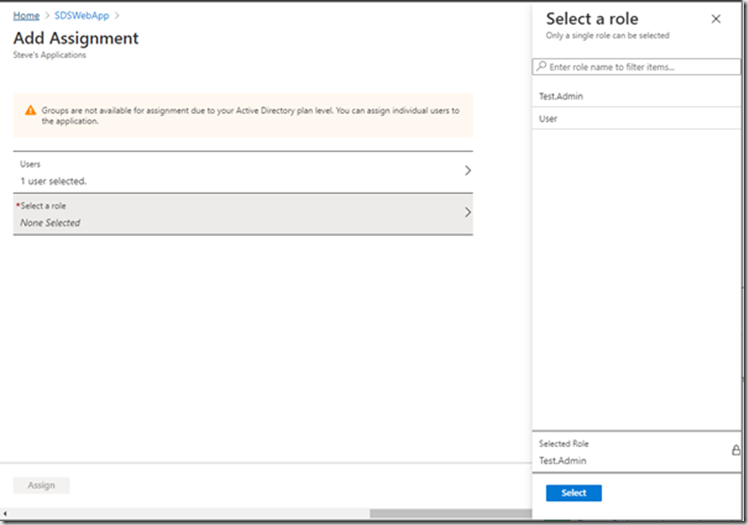
You can add multiple roles to a user by repeating the Add user process.
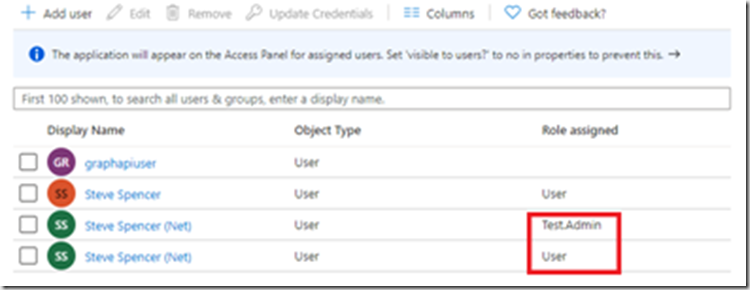
Here I’ve added both new roles to one user.
You are now ready to user these roles in your application.
The sample code already shows how to view the claims for a user.

When I sign in to the application with the user that has two roles I see the following entries in the claims table:

Adding the roles to the application and the assigning the roles to a user is enough to make them appear as roles in your application when the user signs in. There is a limit to the number of roles that an application can have. These are stored in the manifest of the App Registration. There is a limit of 1200 items in the App Registration Manifest and this includes all the configuration items not just roles.
There are a number of ways in which you can use Roles in code. Firstly in your views you can add conditional code to limit what a standard user can see
@if (Request.IsAuthenticated && User.IsInRole("Test.Admin"))
{
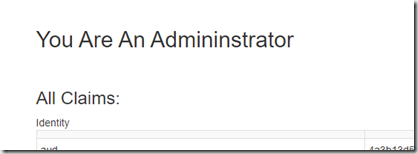
<h2>You Are An Admininstrator</h2>
<br />
}
When you sign in with the Test,Admin role you will get this additional text which is not visible for the User role
You can also control access at the controller and controller action levels by adding the Authorize attribute on the controller or controller action:
[Authorize(Roles = "Test.Admin ")]
public class ClaimsController : Controller
{
or for multiple roles
[Authorize(Roles = "Test.Admin,User")]
public class ClaimsController : Controller
{
at the action level:
[Authorize(Roles = "Test.Admin")]
public async Task<ActionResult> Index()
{
}
or both
[Authorize(Roles = "Test.Admin,User")]
public class ClaimsController : Controller
{
[Authorize(Roles = "Test.Admin")]
public async Task<ActionResult> Index()
{
}
[Authorize(Roles = "User")]
public async Task<ActionResult> Index2()
{
}
}
In this example the user needs either the User or Test.Admin role to access the controller but only the Test.Admin role can access the Index action and the User role can access the Index2 action. This allows you to put controls in at multiple levels and provide a more custom experience for your users.
App Roles makes it easy to add custom roles to your application. If you have a higher Azure AD subscription you can assign these roles to groups and assign the groups to the applications. This means that you can add users to groups to assign the roles rather than adding them to each individual user. I can have a Standard user group that has the User role assigned and all users in that group will have the User role passed through to the application.
You now have Role Based Access control in your Azure AD application and can start to build your application features out based on the roles you define.